Invoice templates
Introduction
Invoice templates are templates that are used to generate invoices in a particular format. Invoice templates are invoked just before generating an invoice. BMS comes with a host of preloaded invoice templates which you can use to generate a wide variety of invoices in various formats. Also, you can create your own custom invoice templates.
To learn at what point an invoice template is used, see BMS Finance | Configuring and creating an invoice. See section Creating an Invoice, step 15 onwards.
Types of Templates
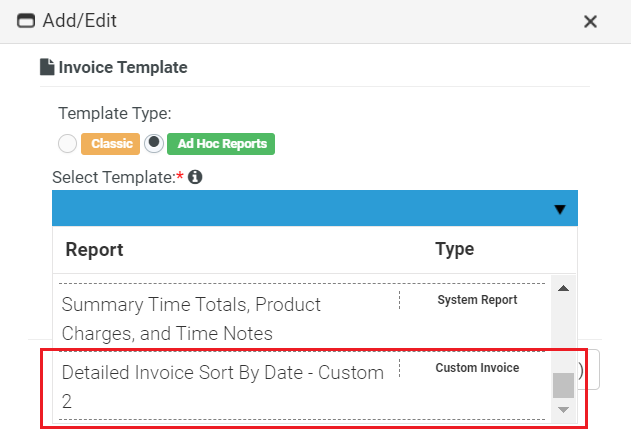
When you come to the above point of selecting a template, you will have two choices with the template type. You can choose a template from Classic or Ad Hoc Reports. Classic gives you an entire list of BMS' preloaded templates. You can pick one and then click Generate to generate the invoice. Alternatively, you can choose Ad-hoc Reports and choose a template from a list of custom templates that you have created earlier. The custom templates that you create are stored under Ad-hoc Reports option.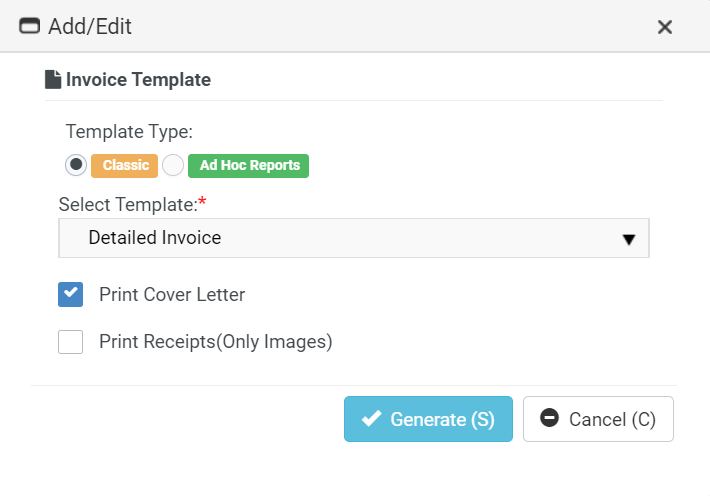
You can see the list of preloaded invoice templates at BMS > Reports > Ad-Hoc Reports > Reports > System Reports > Invoices.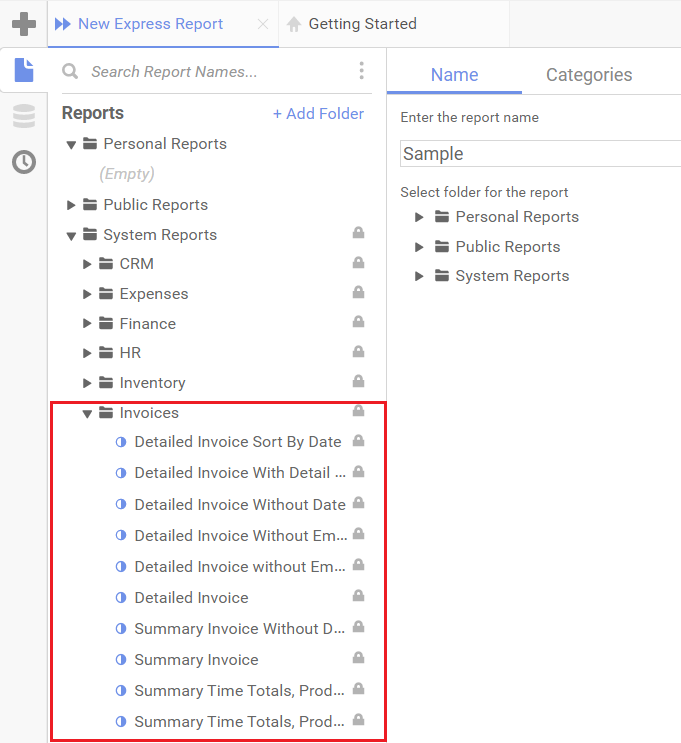
Creating a Custom Invoice Template
BMS' Ad-Hoc Reports are powered by Exago engine, a business intelligence solution.
- Go to Reports > Ad-Hoc Reports > Reports > System Reports > Invoices. You will see a list of preloaded invoice templates.
- Click the template that you want to customize. You will see an icon with three tiny horizontal lines.
- Click this icon and a small dropdown menu opens.
- Click Duplicate. You will see the Duplicate Report window.
- Enter a name of your choice for the template.
- Select Public Reports folder (at the topmost on the left). (This is the place where you should save your custom invoice templates.)
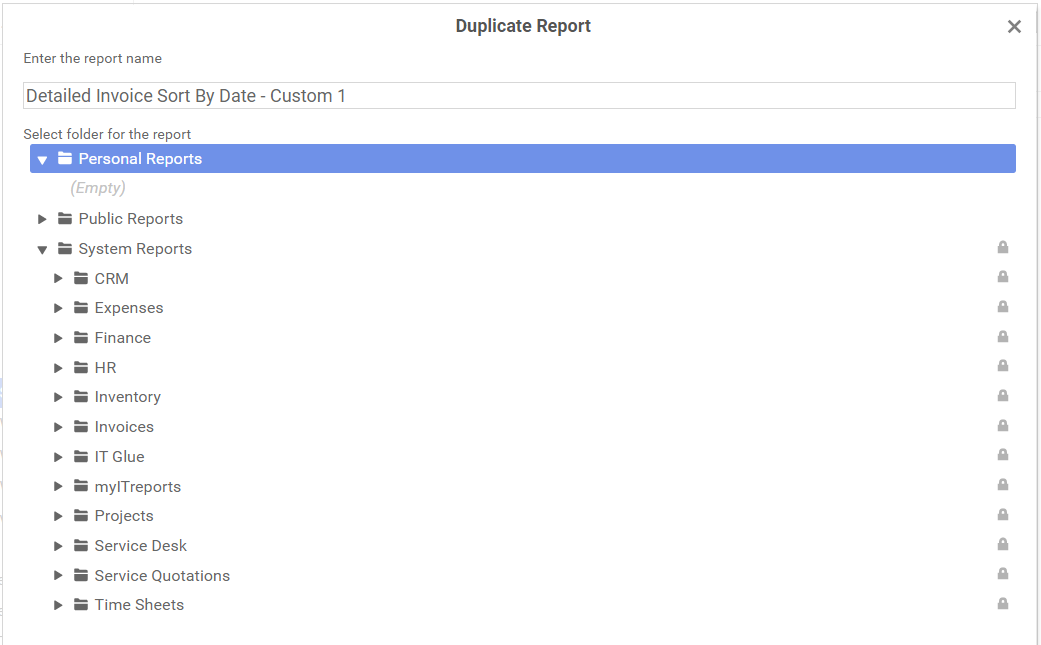
- Click OK. Now, the template is saved. At this point, only half the job is done.
- Go to the template that you saved under Public Reports folder.
- Double-click the template to open it.
- Double-click any field to edit it. Once you have edited the relevant fields, you have the option to run the report and see if everything is fine.
NOTE If you do not edit a field properly, the report might throw some errors.
- Click Run Report. The Report Filters window appears.
- Select all the relevant fields from the left to the right. Make sure you select under both Invoice Design Detail and Invoice Design Header. These are the two dropdowns that you will find on top on the left. You can use the up arrow or down arrow to move the fields up or down. You can also delete a field by pressing the x icon.
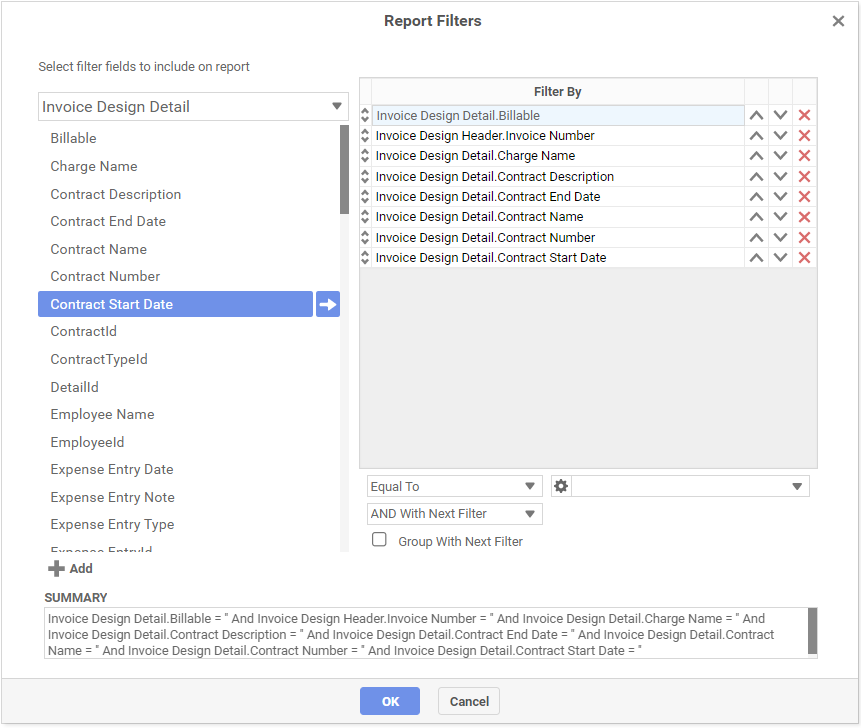
- Click OK. The report will be generated. You can then export the report to Excel, PDF, RTF, and CSV formats. To see detailed information on various kinds of reports, see Exago Help and functions.
Including Custom Templates Under Ad-Hoc Reports
There is a process to include these custom templates under the Ad-hoc Reports option while you are about to choose a template.
- Go to Admin > My Company > Company Settings > Invoice tab > Location of Custom Ad-Hoc Invoice Templates.
- Select Public Reports. (Remember, this is where you saved your custom template previously.)
- Click Save. Now, you will be able to see your custom template in the Invoice Template dialog box under Ad Hoc Reports under Custom Invoice type.
NOTE If you want Kaseya to create reports for you according to your business requirements, you should get in touch with your account manager who will then get in touch with our Professional Services team. Please note that this is a paid service.
Related Topic
BMS Reports | Where can I find Ad-Hoc Report help documents?


