Configuring and creating an invoice
Introduction
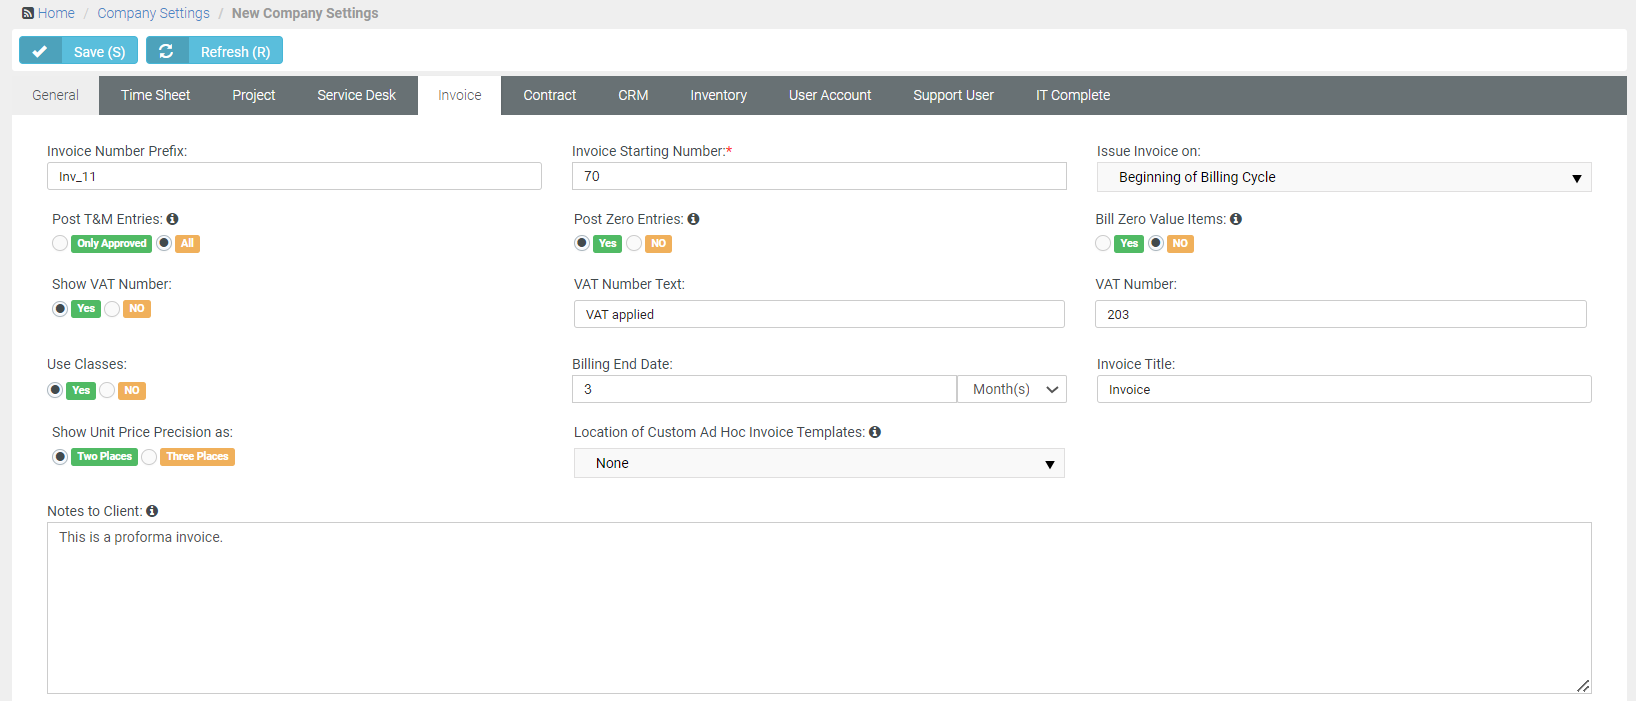
Configuring an Invoice
Admin > My Company > Company Settings > Invoice tab.
- Use Classes: If you select Yes, In the QuickBooks Desktop version, you can create classes that you assign to transactions. These classes enable you to track account balances by department, business office or location, separate properties, or by any other meaningful breakdown of your business. Use classes are maintained using the Admin > Finance > Class List page.
- Click Save. The invoice configuration is saved.
Creating an Invoice
The process of creating an invoice begins from a ticket. Tickets are created to render different types of services, and these tickets are assigned to different team members of the MSP to render the services to the MSP's clients.
- Go to Tickets page and open a particular ticket for which service is to be rendered.
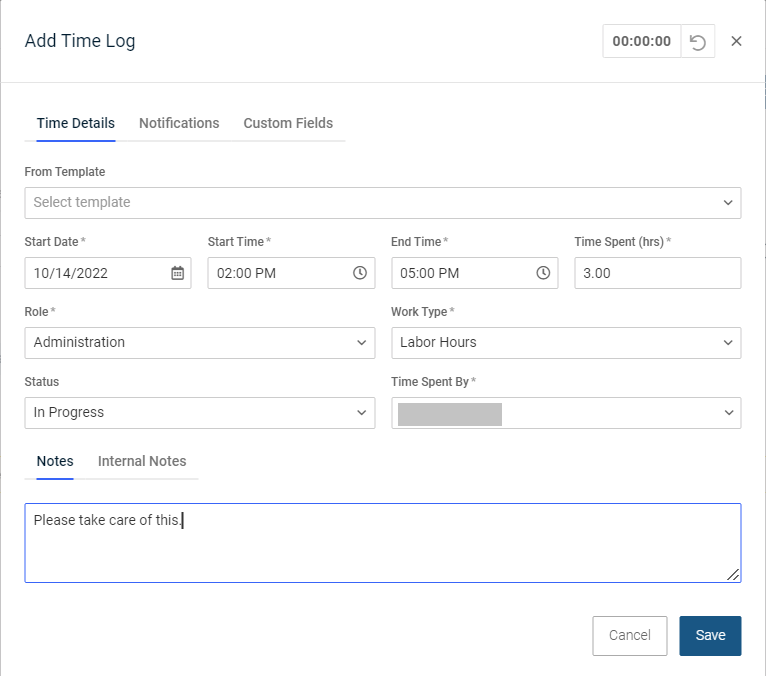
- Add time to the ticket by clicking the Add Time icon.
- In the Add Time window, in the Time Details tab, do the following:
- Start Date: Select a start date.
- Start Time: Select a start time.
- End Time: Select an end time.
- Time Spent (hrs): The time spent will automatically be filled then.
- Role: Select the appropriate role from the dropdown. To create roles, navigate to Admin > Finance > Role page. You can create many other roles other than Administrator.
- Work Type: Select Labor Hours as work type. To create work types, navigate to Admin > Finance > Work Type page. You can create many other work types other than Labor Hours.
- Status: The status should be New if it is a brand new ticket. You can choose other appropriate statuses as the case may be.
- Time Spent By: This is usually the assignee's name. This appears automatically.
- Notes: You can add any relevant notes. These notes will be seen by the client.
- Internal Notes: Internal notes can be seen only by MSP team members. They cannot be seen by the client. Add any relevant internal notes that you might find useful for others.
- In the Notifications tab, do the following:
- Contact and Resource: Enter the first name or last name of the contact person or the resource and the name appears.
- Other Emails: Enter the email IDs of persons to whom you want to send the notification.
- If you have any custom fields set up for tickets, they will appear under the Custom Fields tab. Enter relevant info in the custom fields.
- Click Save. Once you log the time, it will be saved under Activities tab in the Ticket page.
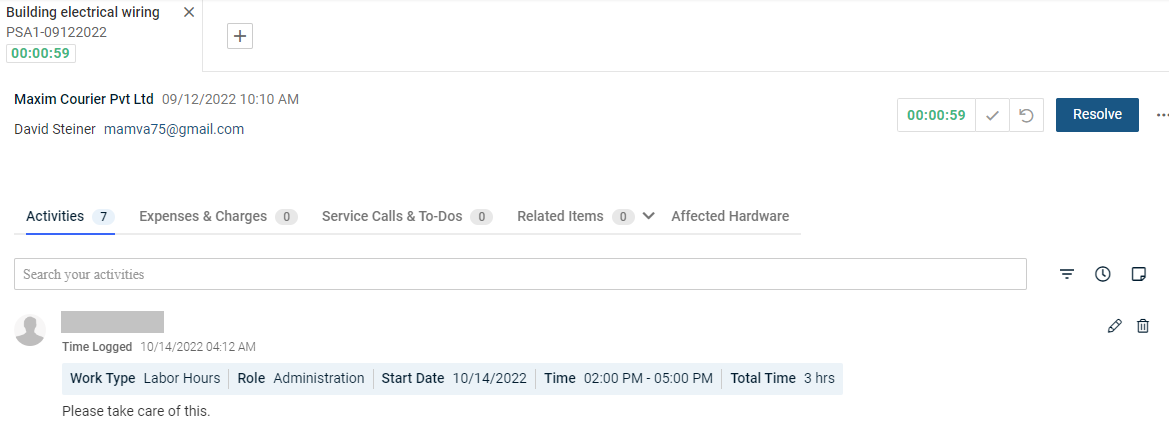
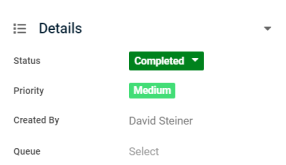
Once the time is added after the service is rendered, you can change the status of the ticket to Completed.
Whenever the billing is supposed to happen (at the preconfigured time), the finance team of the MSP would go to Finance > Billing Review > Labor Hours page (because we specifically added labor hours in the Add Time window while logging time on the ticket). So, go to Labor Hours page and search for the account under which the ticket was created. In this case, the account is Maxim Courier Pvt. Ltd. Go to the Account field and select the particular account from the dropdown.
- Select the start date and the end date.
- Select as many search criteria as you want from the respective dropdowns. The ticket appears below in the grid.
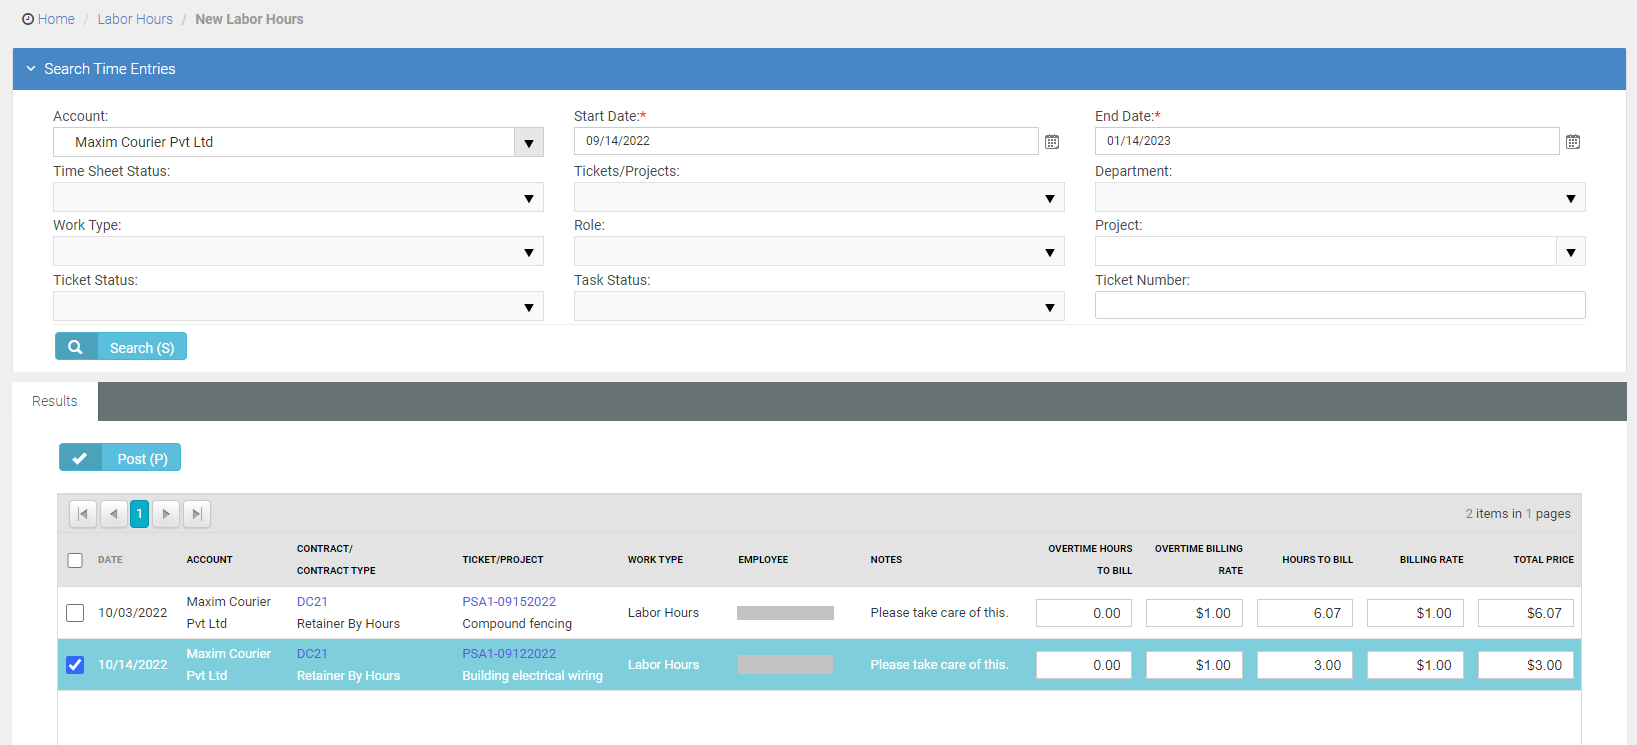
- Enter Overtime Hours to Bill and Overtime Billing Rate if they are applicable to the case. The Hours to Bill is picked up from the time logged earlier (from the Add Time window). The Billing Rate can be set in Admin > Finance > Roles. You can set a billing rate for each role here. When that role becomes applicable during the billing review, the billing rate applicable to that role is applied. However, you can enter a new billing rate on this page. At this point, you can review the billing information that you see in the grid with respect to the ticket.
- Click Post. Now, you cannot edit the billing information anymore.
- Go to Finance > Billing.
- Account: Select the appropriate account from the dropdown.
- Select the dates and other search criteria if needed. Make sure you select the correct from date and to date at this point because these dates are going to reflect in the invoice.
- Bill Zero Value Items: This is applicable when you do not want to bill someone or a team with the money value of the service rendered. For example, let us say that you have rendered the same service to an internal team member (someone from your own company and not a client). You want to keep track of the time spent on the service but do not want to bill an amount for the service rendered. You then select Yes from the Bill Zero Value Items dropdown. This is an important point.
- Click Search. You will see the description of the ticket under Labor Hours.
- Select the labor hours to be billed.
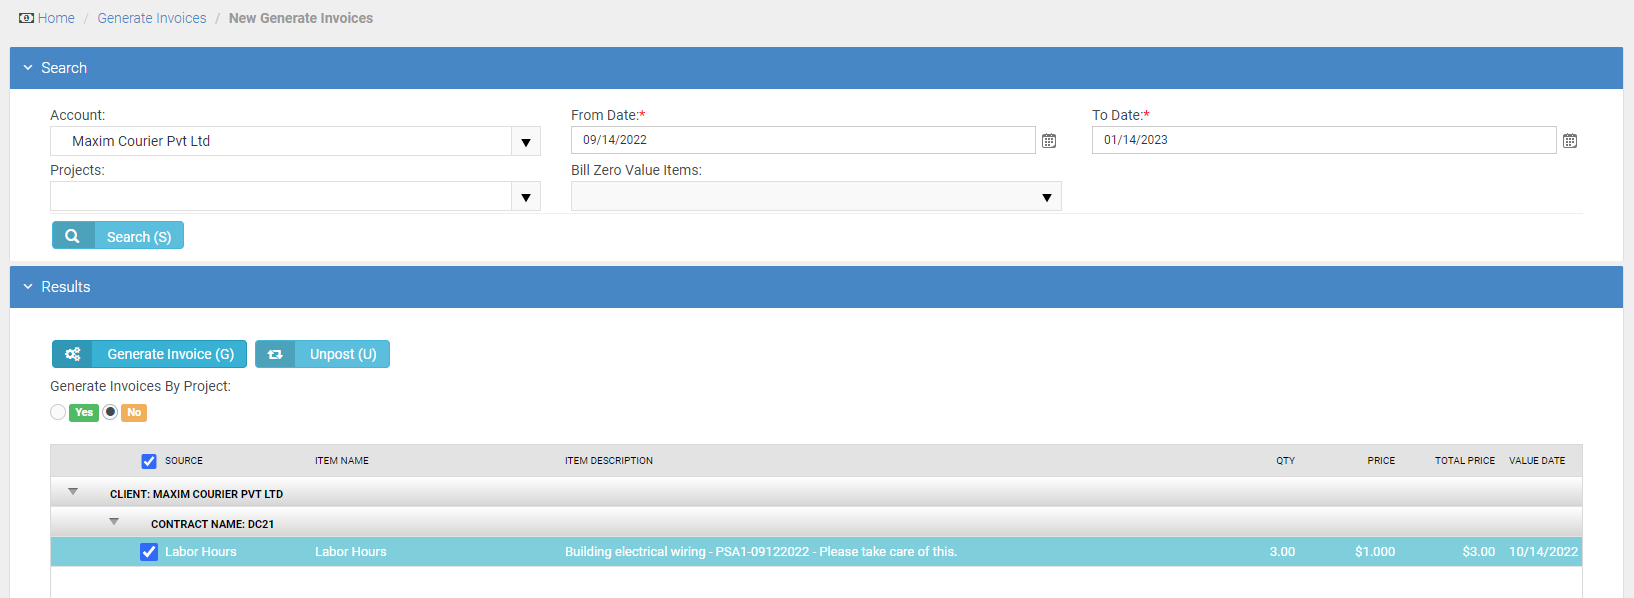
- Click Generate Invoice. BMS will flash a confirmation message.
- Click Yes. BMS will flash a message saying that an invoice with a certain invoice number has been generated.
- To see the particular invoice, go to Finance > Invoices page.

- Open the particular invoice.
- Click Generate on the top. The Invoice Template window will appear.
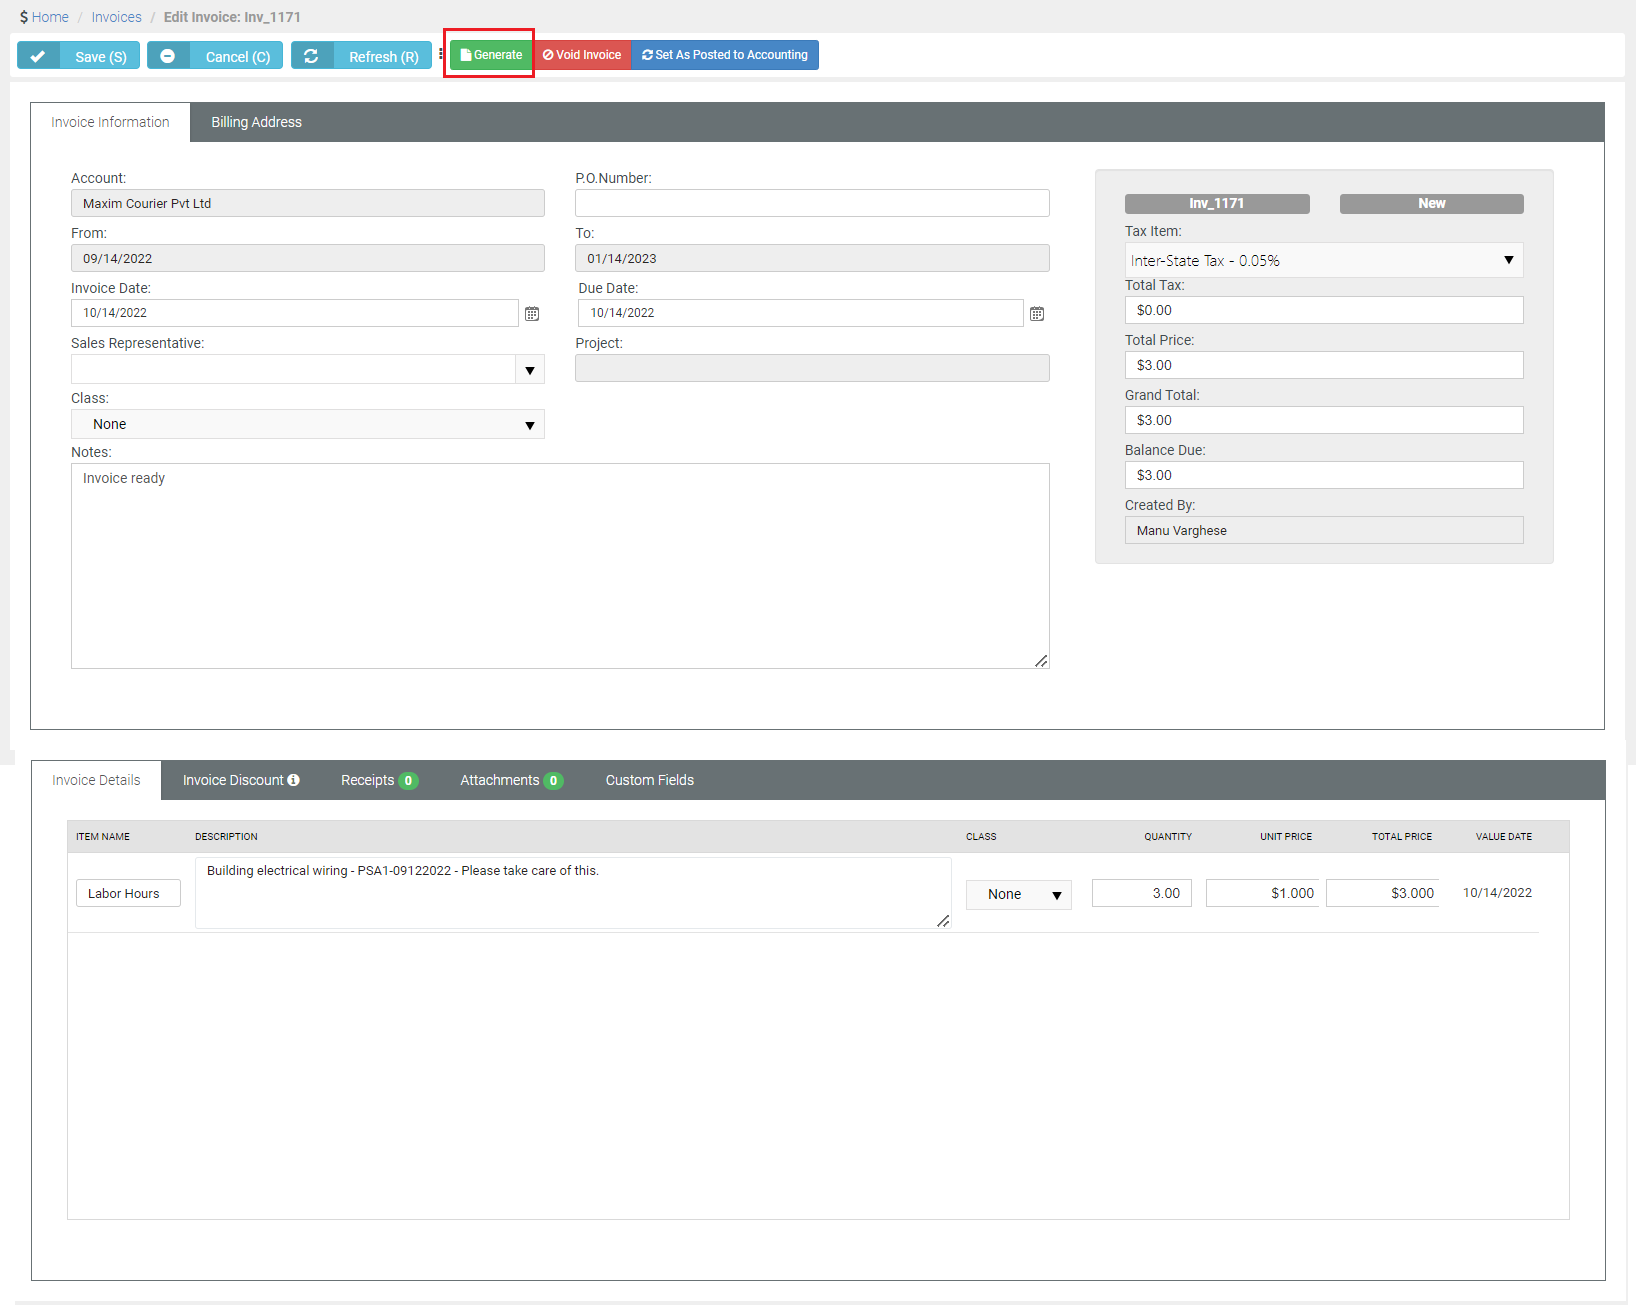
- Template Type: Select the appropriate template type.
- Select Template: Select the appropriate template.
- Select Print Cover Letter and Print Receipts (Only Images) options as the case may be.
- Click Generate.
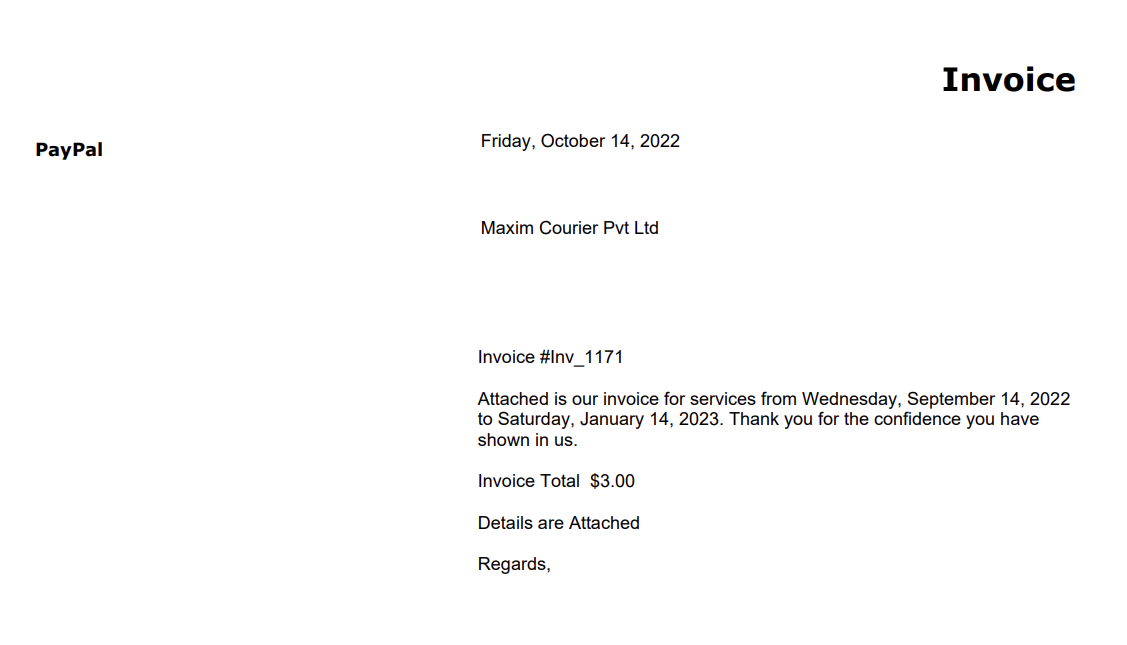
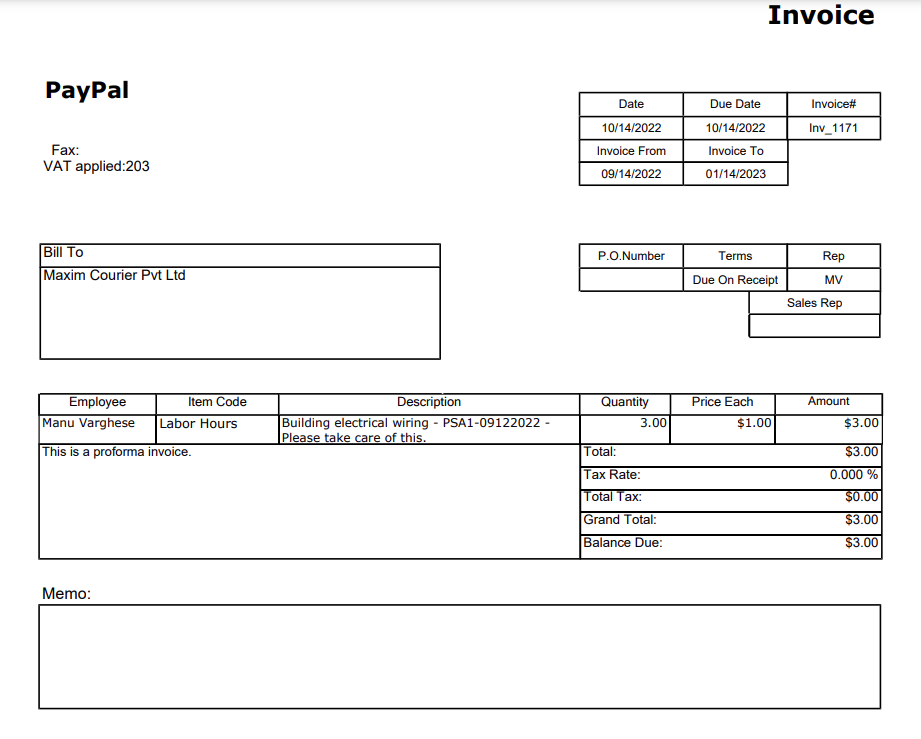
- Once you have generated an invoice, click Preview (on the top right among the many options) to see how the client would see the invoice. You will see a PDF document consisting of an invoice and a cover letter if you have opted for it.
Once an invoice is generated, you cannot edit the from date and to date. The only solution is to void the invoice and create a new one. At this point, you have five different options in front of you - Regenerate, Preview, Send to Customer, Void Invoice, and Set as Posted to Accounting.
-
- Regenerate: This will regenerate the invoice.
- Preview: This will show you the preview of the invoice in PDF format.
- Send to Customer: This will allow you to send the invoice to multiple contacts of the account by email.
- Void Invoice: This will void the invoice and the invoice will cease to exist.
- Set as Posted to Accounting: This will post the invoice to the accounting software that you have integrated BMS with.
- As the next step, click Send to Customer. You will see the Send Invoice to Selected Contacts window.
- Email template to use: Select the appropriate email template from the dropdown.
- Send Email: Select either Separate Recipients or Combined Recipients as the case may be.
- In the Contacts tab, you will see the list of contacts from the same account.
- Select as many contacts as you want.
- Other Email: Enter the email IDs of other contacts to whom you want to send the invoice.
- In the Attachments with Emails, you will see the attachments and their details.
- Click Send. An email with the invoice as attachment will be sent to the contacts.


