Billing for closed tickets
Introduction
This guide shows you how to bill only for time logged against closed tickets. Manual and automated billing are covered.
Manual billing
- Navigate to Finance > Billing Review > Labour Hours.
- Filter based on Account, Tickets, Date, and Ticket Status.
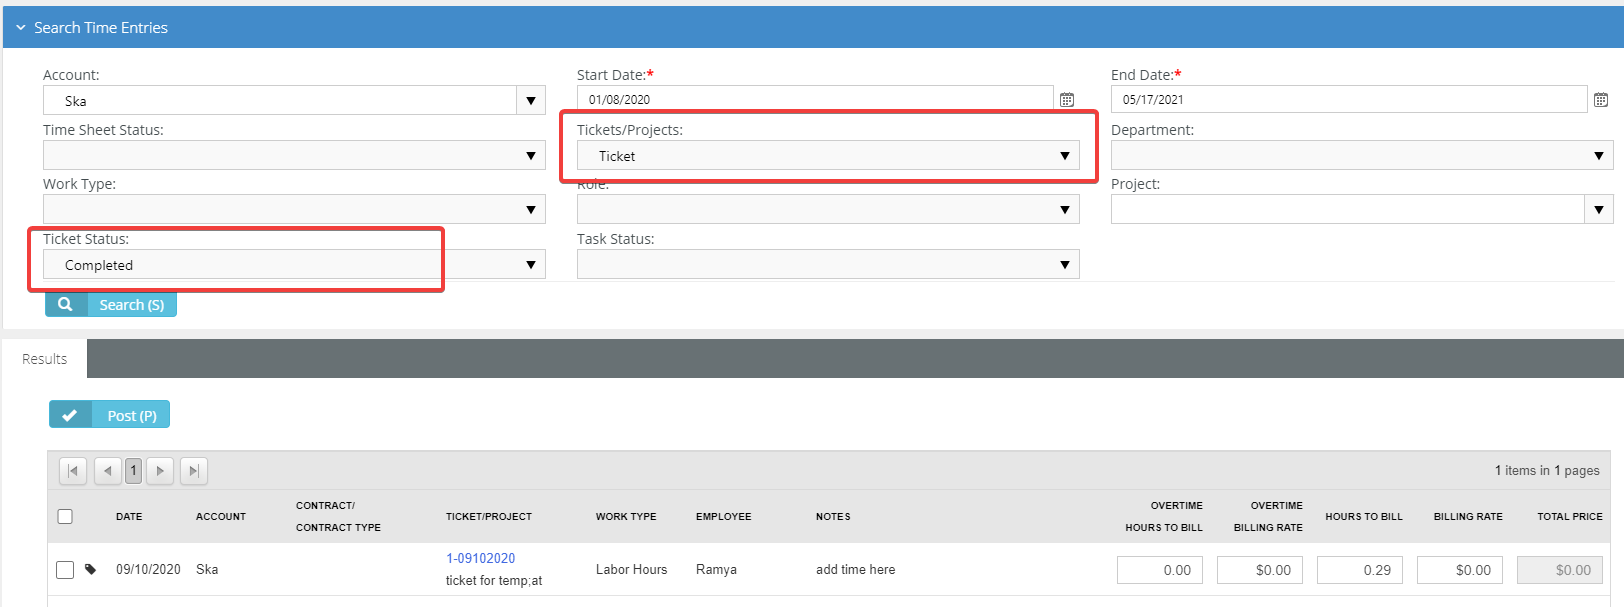
- Select the desired billable items and post them, by clicking Post.
- Navigate to Billing.
- Selected your posted items and click Generate Invoice.
- Navigate to Invoices.
- Check that the invoice contains the desired billable items.
- Repeat these steps for Expenses and Charges.
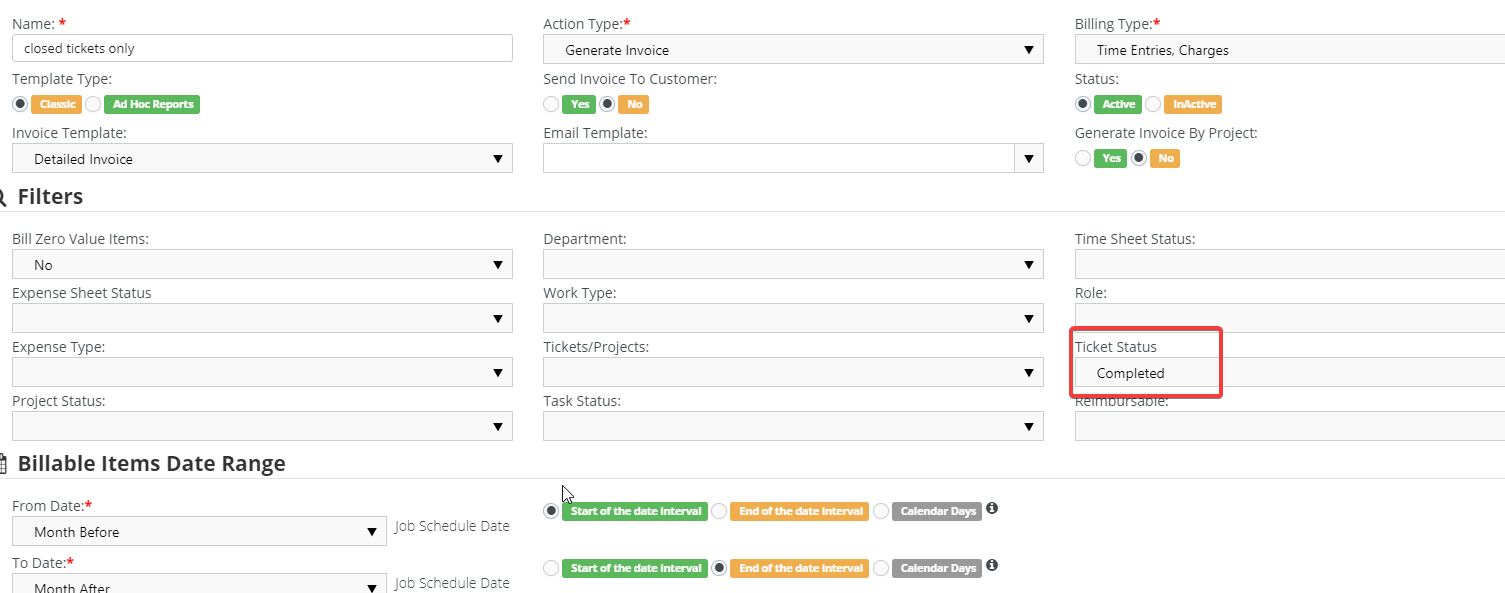
Automated billing
Use Billing Automation to bill all your closed ticket billable entries without manual intervention.
- Navigate to Finance > Billing Automation.
- Click New.
- Enter a Name.
- Choose an Action Type. Billing consists of:
- Post - Corresponds to Billing Review > Post action.
- Post & Bill - Corresponds to Post, followed by Billing > Generate Invoice action.
- Generate Invoice - Post & Bill followed by attaching the Invoice PDF to the invoice.
- Select a Billing Type, which is the type of billable items to automate.
- For Ticket Status, select Completed.
- Set the Billable Items Date Range. See this guide for how.
- Set up a job schedule so the billing recurs at the specified interval.