Ticket Configuration
Introduction
The Ticket Configuration page determines the default behavior for each of the fields that appear in the Ticket page and for certain activities that are related to the ticket. The defaults that you set for the fields and activities will determine the overall behavior of the ticket. You can customize the defaults with the available number of options according to your choice. Remember, the defaults that you set for the fields and activities will affect your technician's ability to work with the ticket.
Steps
Follow the steps below to set your defaults in the page.
-
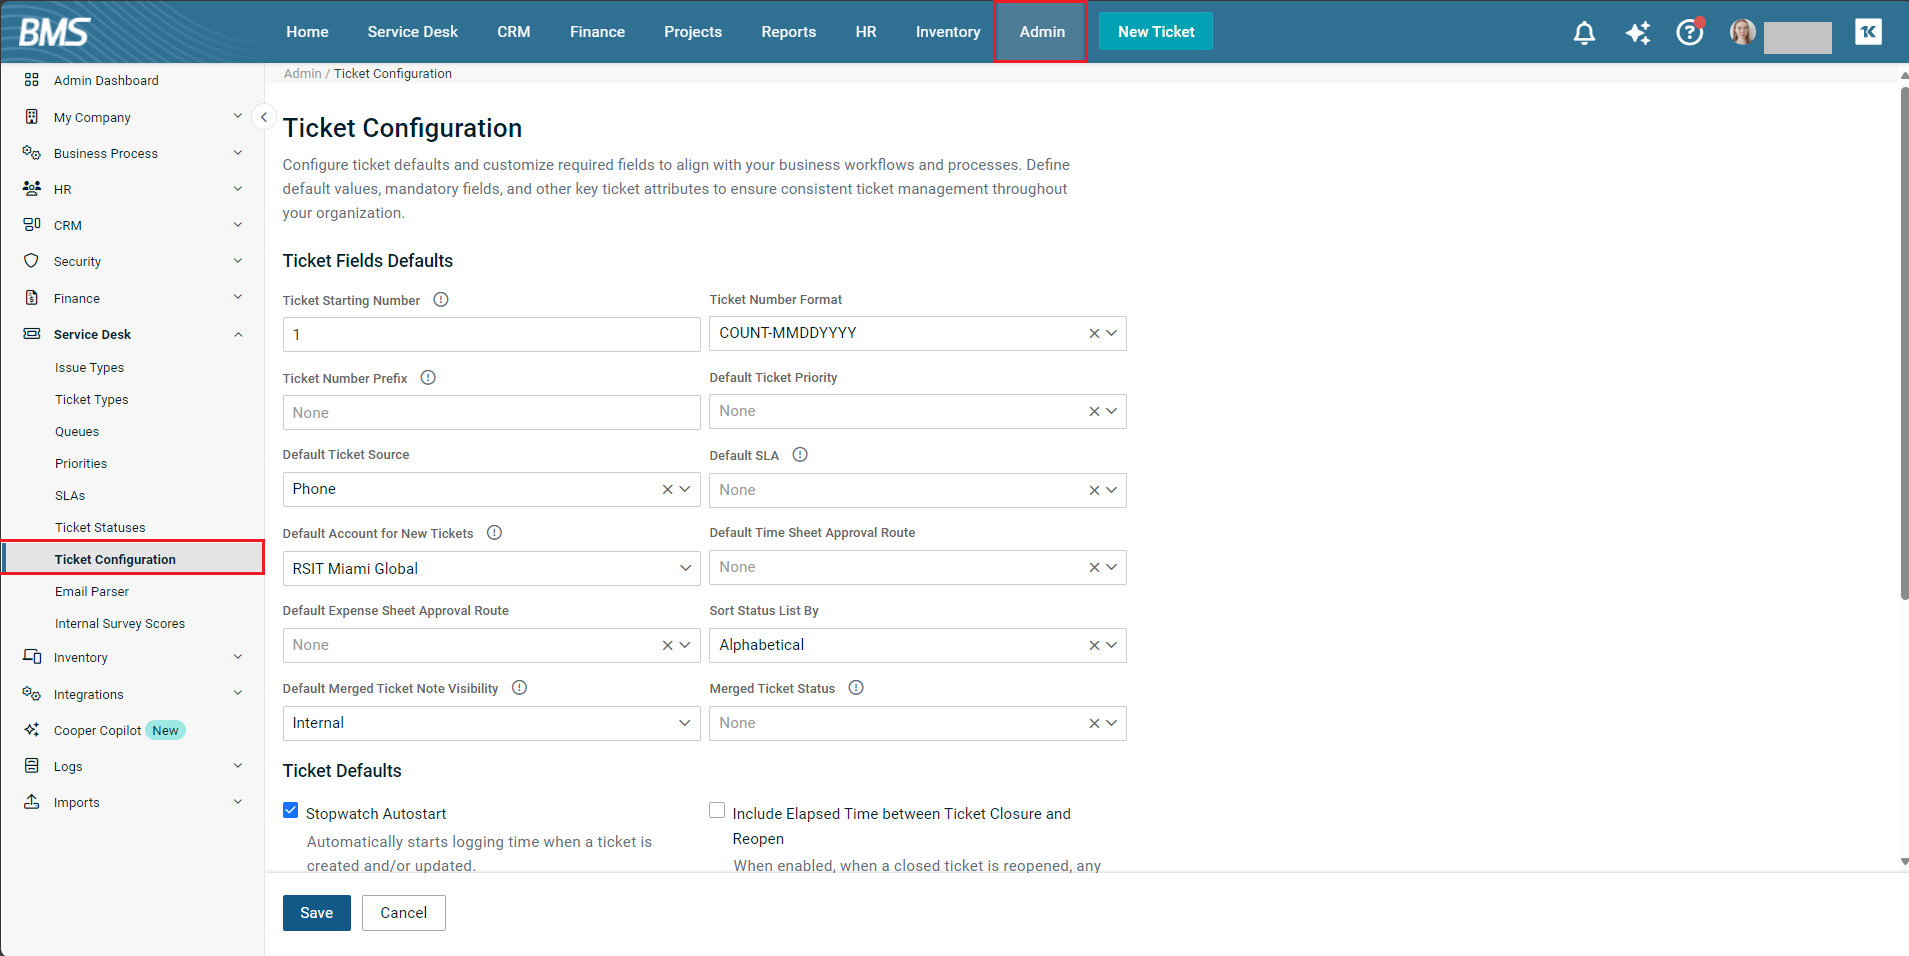
Navigate to Admin > Service Desk > Ticket Configuration. The Ticket Configuration page opens.
- In the Ticket Field Defaults section, do the following:

Ticket Starting Number: Enter a serial number to begin numbering the tickets. You can start from any number.
Ticket Number Format: Select the appropriate format from the dropdown. This specifies the date and count format of the ticket identifier. Changing the format affects new tickets only.
Ticket Number Prefix: Enter a prefix for the ticket number. It defaults to blank if nothing is entered.
Default Ticket Priority: Select the appropriate ticket priority from the dropdown. Priorities can be created using Admin > Service Desk > Priorities page provided you have admin access. For more information, see Priorities.
Default Ticket Source: Select the appropriate ticket source from the dropdown. A ticket source refers to the method of communication used by the customer to initiate the creation of a ticket.
Default SLA: Select the appropriate service-level agreement (SLA) from the dropdown. This applies to customers that do not have a contract. SLAs can be maintained using Admin > Service Desk > SLA page.
Default Account for New Tickets: Select the appropriate default account for new tickets from the dropdown.
Default Time Sheet Approval Route: Select the appropriate default time sheet approval route from the dropdown. This will route all time sheets with entries from tickets to a specific person or manager. Approval routes can be created using Admin > Business Process > Approval Routes page.
Default Expense Sheet Approval Route: Select the appropriate default expense sheet approval route from the dropdown.
Sort Status List By: Select the appropriate option from the dropdown to sort the status list. This sorts ticket pages by ticket status (alphabetically) or by ticket status order.
Merged Ticket Note Visibility: Same as above. The only difference is that this applies to a merged ticket.
Merged Ticket Status: Select the appropriate ticket status from the dropdown for merged tickets. When a ticket is merged, this field will determine which status to be merged to.
-
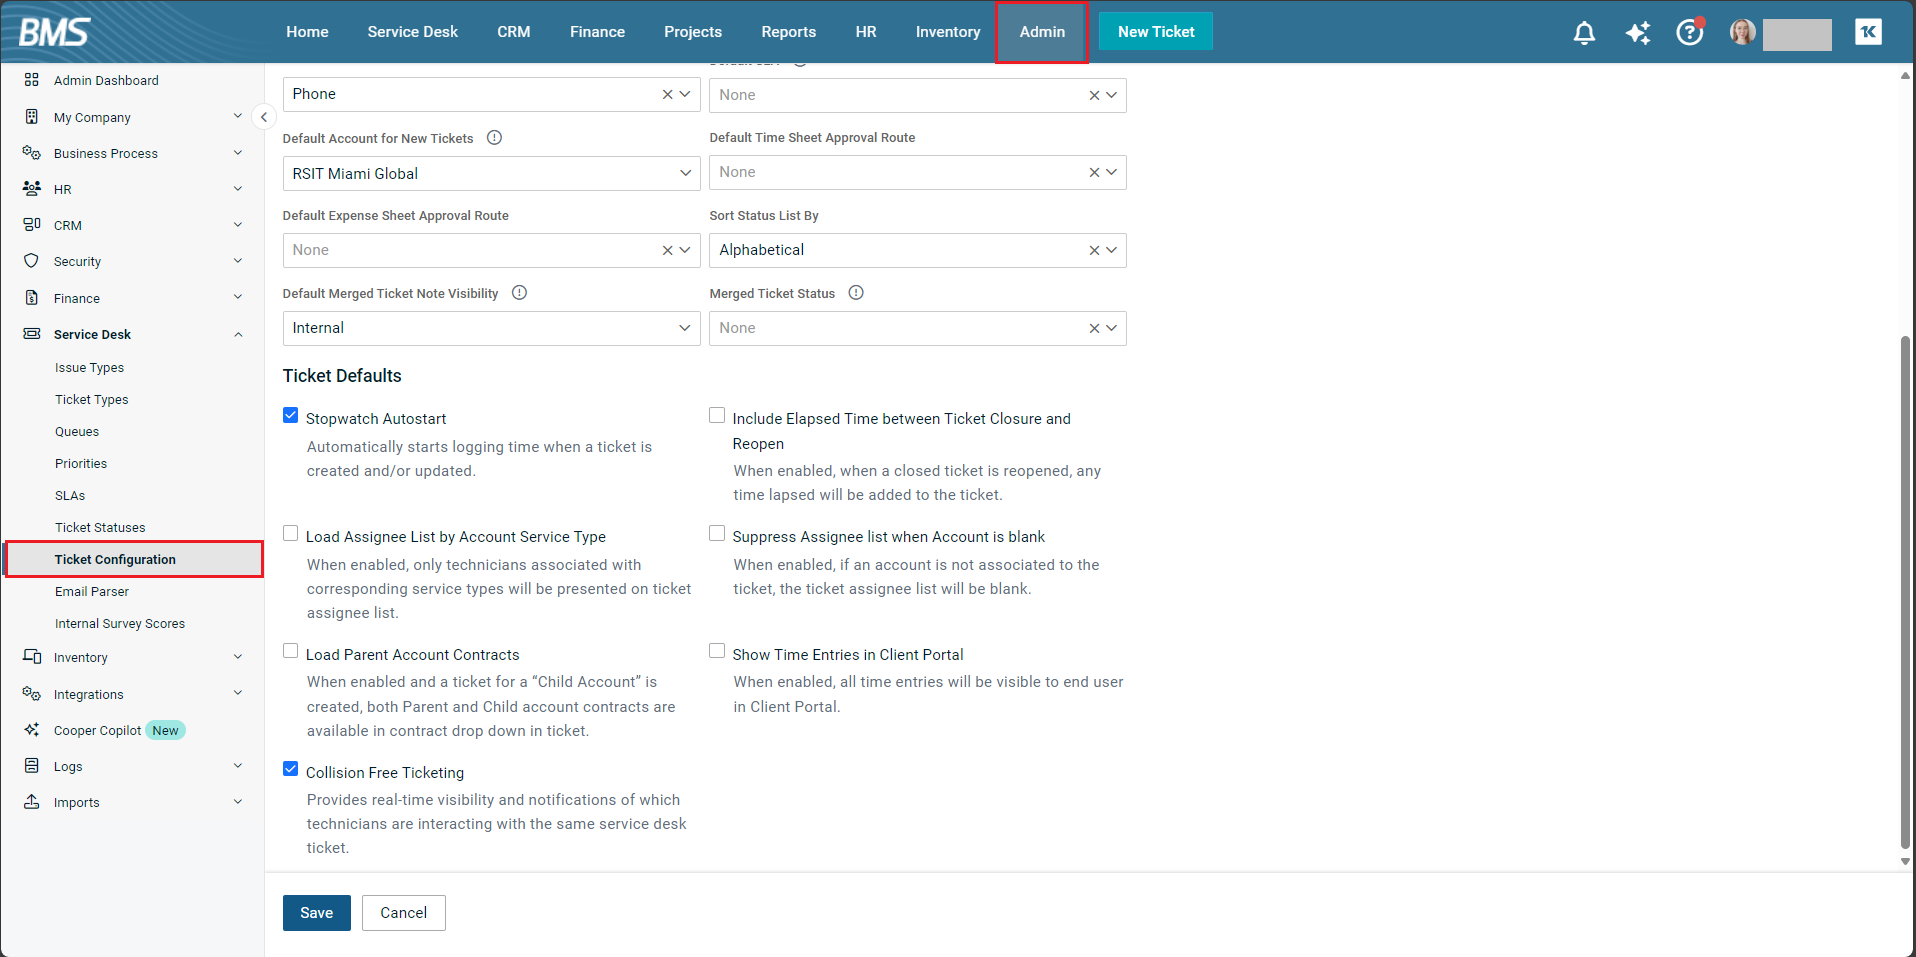
In the Ticket Defaults section, do the following:

-
There are seven checkboxes in this section. These options are based on activities that happen on a ticket. Select as many options as you like, depending on your requirements.
-
-
In the Ticket Required Fields section, there are two fields—Issue Type and Sub-Issue Type—which you can make mandatory. If you want to make them mandatory, select the checkboxes next to Issue Type and then Sub-Issue Type. Optionally, you can select only Issue Type as well without selecting Sub-Issue Type. However, you cannot select Sub-Issue Type only without selecting Issue Type.
-
Click Save. The defaults are now saved.


