Locations
Introduction
Path: Admin > My Company > Locations
The Manage Locations page stores certain details particular to a location. These fields are used throughout the system to track information about your various offices. The Main branch is the default location. If you have other custom locations, they can be created here.
Adding a location
- Click New. Remember, all the details that you are going to enter in different tabs are going to be specific to this location.
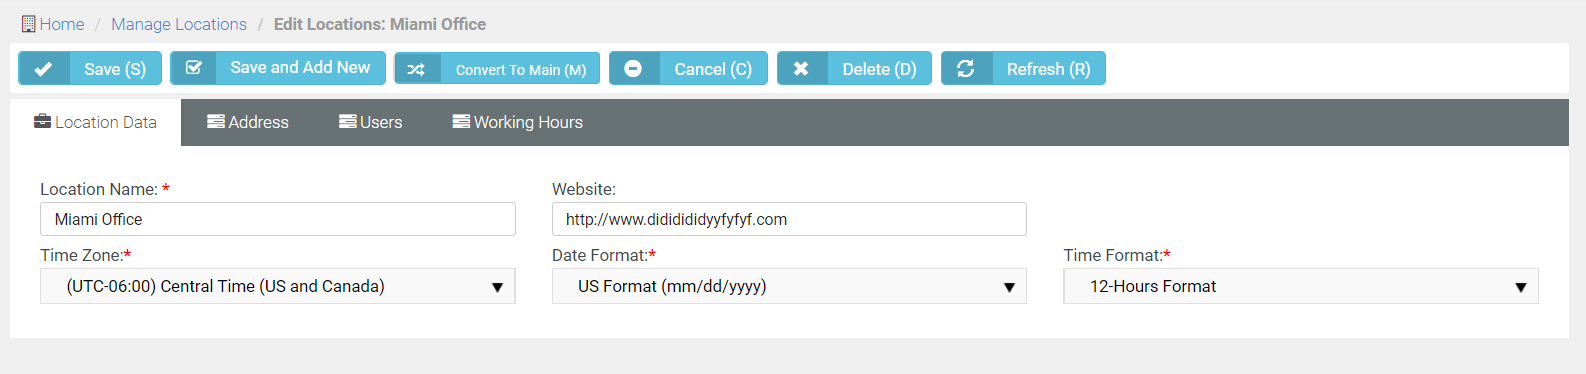
- In the Location Data tab, fill in the following details:
- Location Name: Enter a name for your office located at this location.
- Website: Enter your company's official website address.
- Main - Yes/No: This is the option that determines if this office is the main office or not. If you are entering details of a new office for the first time, the default selection is Yes. Otherwise, it defaults to No. Select Yes or No as the case may be.
- Time Zone: Select the appropriate time zone from the dropdown.
- Date Format: Select the appropriate date format from the dropdown.
- Time Format: Select the appropriate time format from the dropdown.
NOTE Time Zone, Date Format and Time Format will affect each user and their tickets (including adding time entries to them) mapped to this location.
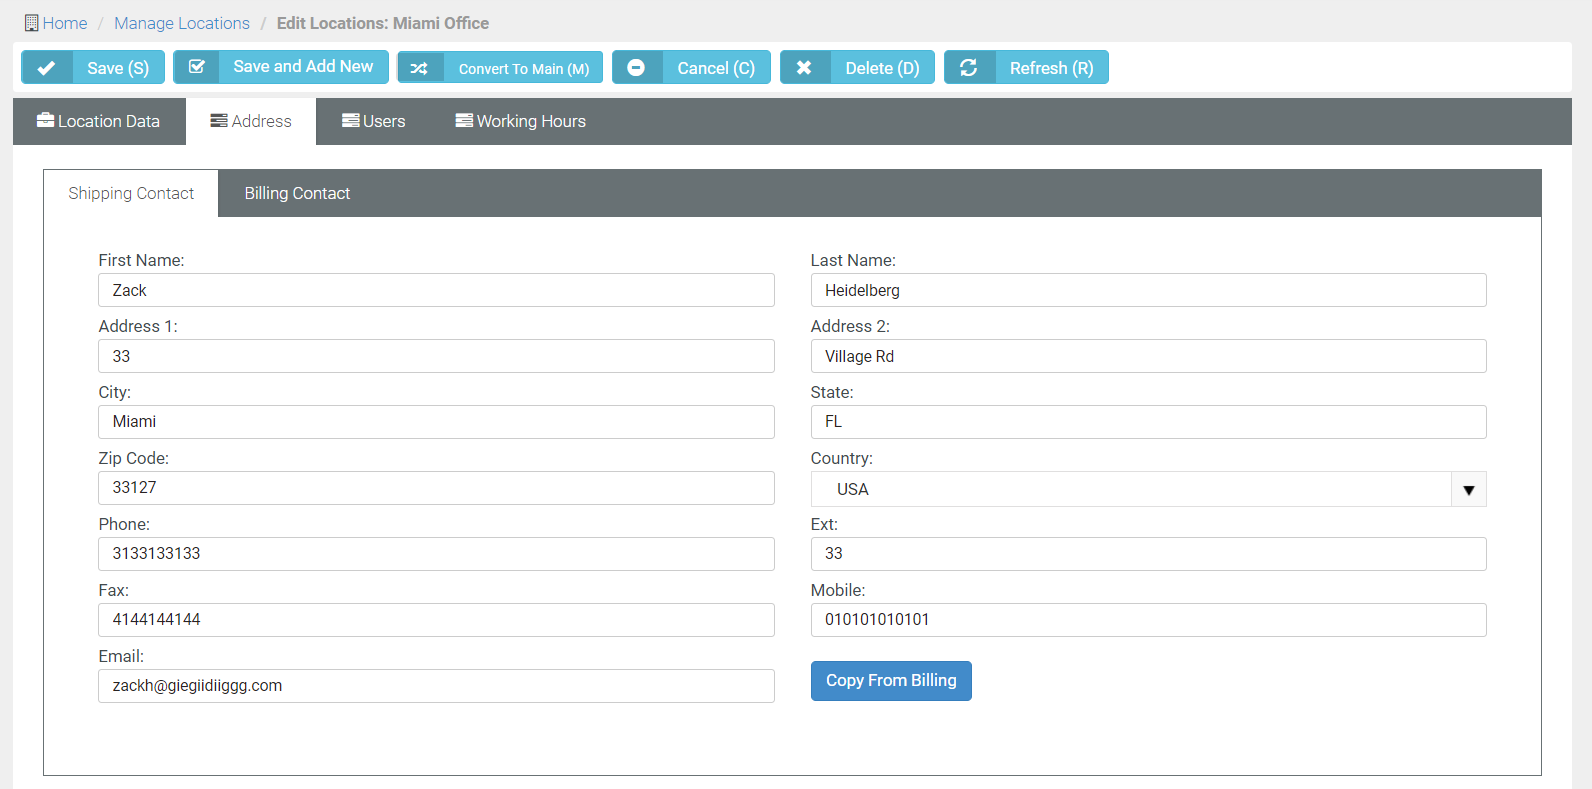
- In the Address tab, you have two subtabs - Shipping Contact and Billing Contact. If both are the same, you can copy one from the other. For example, if you have entered the shipping address first and want the billing address to be the same, you can go to the Billing Contact tab and click Copy From Shipping. Similarly, if you have entered the billing address first and want the shipping address to be the same, you can go to Shipping Contact tab and click Copy from Billing. The fields are the same in both the tabs. You can refer the below fields for both.
- First Name: Enter the first name of the person who is in charge of shipping/billing as the case may be.
- Last Name: Enter the last name of the person who is in charge of shipping/billing.
- Address 1: Enter the building number.
- Address 2: Enter the name of the road/street/court.
- City: Enter the name of the city.
- State: Enter the name of the state.
- Zip Code: Enter the appropriate zip code.
- Country: Select the appropriate country from the dropdown.
- Phone: Enter the official phone number of the above person.
- Ext: Enter the official phone number extension of the above person.
- Fax: Enter the official fax number of the above person.
- Mobile: Enter the mobile number of the above person.
- Email: Enter the official email of the above person.
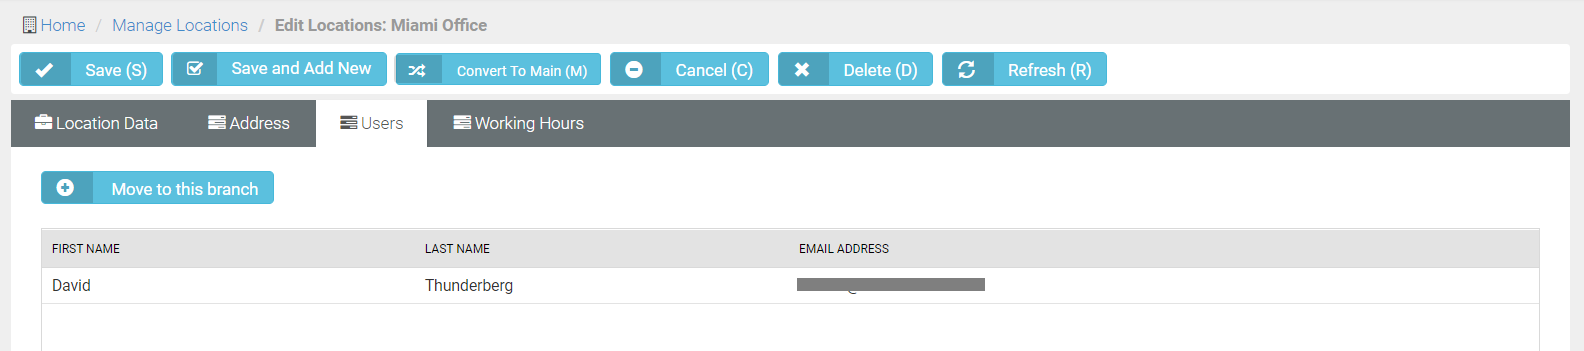
- Users tab: Click Move to this Branch to select and add employees to this location. Ideally, this will be blank if employees are not created at this point of time. To add employees and their details, go to Admin > HR > Employees page. The Users tab tracks which employees are mapped to which location.
-
In the Working Hours tab, you can specify your company's working hours for the location. For example, working hours are used in Admin > Business Processes > Workflow page. For instance, assume that you have a workflow that says if the ticket is idle for 10 hours, notify someone. If the ticket is idle outside the working hours, that time is not counted as idle time. Working Hours field is also used in Admin > Service Desk > SLA to choose working hours of a certain location from the dropdown. The field is also used in Timeframe field of SLA Objectives tab once an SLA is saved.
- Use the check box on the extreme left and select the week days that apply to this location.
- Select the start time and end time from the respective time picker dropdown by clicking the
 icon.
icon. - If you have multiple locations, set the working hours for each location.
- Click Save or click Save and Add New in case you want to add another location and its details.

Editing a location
- Click the Open/Edit icon on the extreme left of the particular location. The page opens in edit mode.
- Make changes wherever necessary.
- Click Save or click Save and Add New in case you want to add another location and its details.
Creating a custom view
- You can create additional customized views of the grid and save them with names. The view options are available on the far right corner just above the grid.

- On the Manage Locations page, click the book icon (last icon) next to the Views field. Choose as many columns as you want from the available list.
- Click Save.
- Enter a name and click Save As from the Settings icon (last second from the right) next to the Views field.You can also edit, delete, and share a view.
- To share a view, click Share from the Settings icon. The Add/Edit window opens.
- In the Queues tab, select a queue from the dropdown and click Add. (You can edit a queue by clicking the Delete button.)
- In the Employees tab, search for an employee name in the Employee textbox and click Add once you find it.
- Click Save.
- Similarly, you can edit the name of the view by clicking Edit from the Settings icon.
- You can also delete a view by clicking the Delete button from the Settings icon.


