SSO with JumpCloud
Introduction
Our PSA supports integrating the application with JumpCloud SSO Solution. JumpCloud is a full stack cloud directory platform with support for SAML 2.0 standard. This guide helps you integrate PSA with JumpCloud. After the successful setup when users log into JumpCloud and navigate to their applications dashboard, they can click on the PSA app and launch their tenant site with the user already logged in.
Prerequisites
- Admin account in PSA and JumpCloud
- User and user groups setup in JumpCloud
Setup
Setup of PSA SSO with JumpCloud involves the following stages.
Adding BMS application in JumpCloud
- Log into your JumpCloud admin portal.

- Under User Authentication, click SSO.
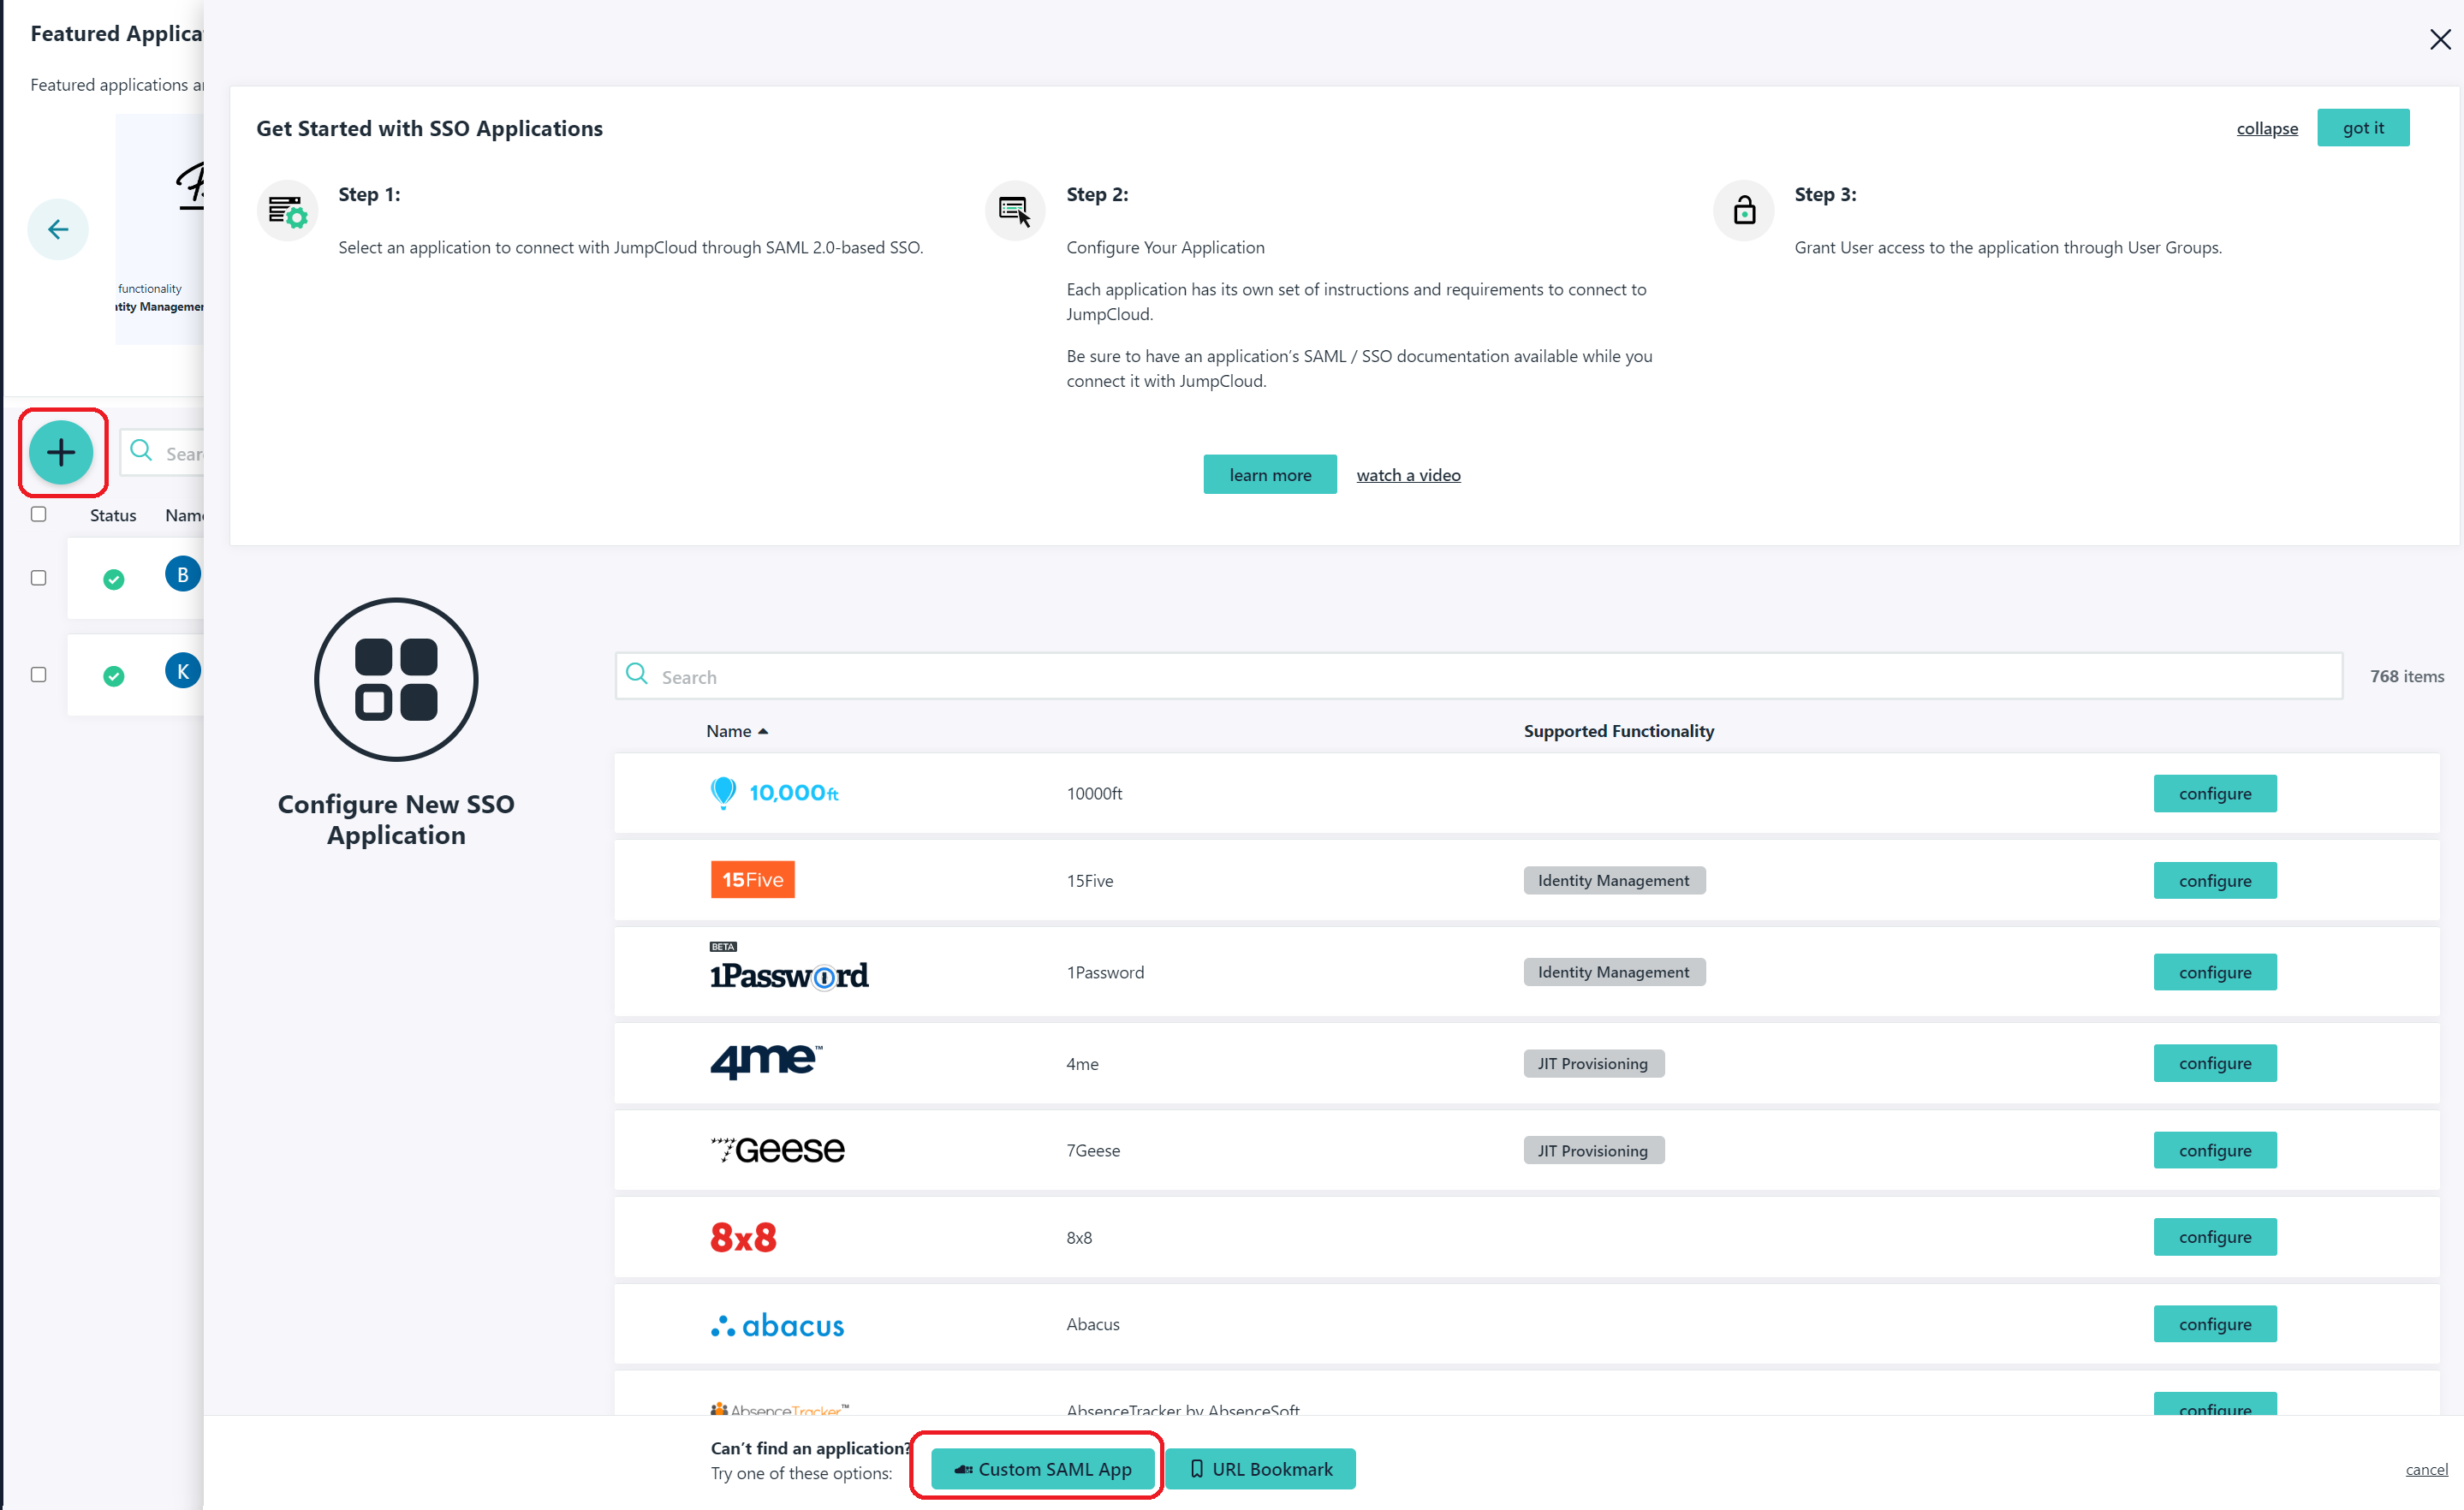
- Click on the + button to create a new app.
- Select Custom SAML App.
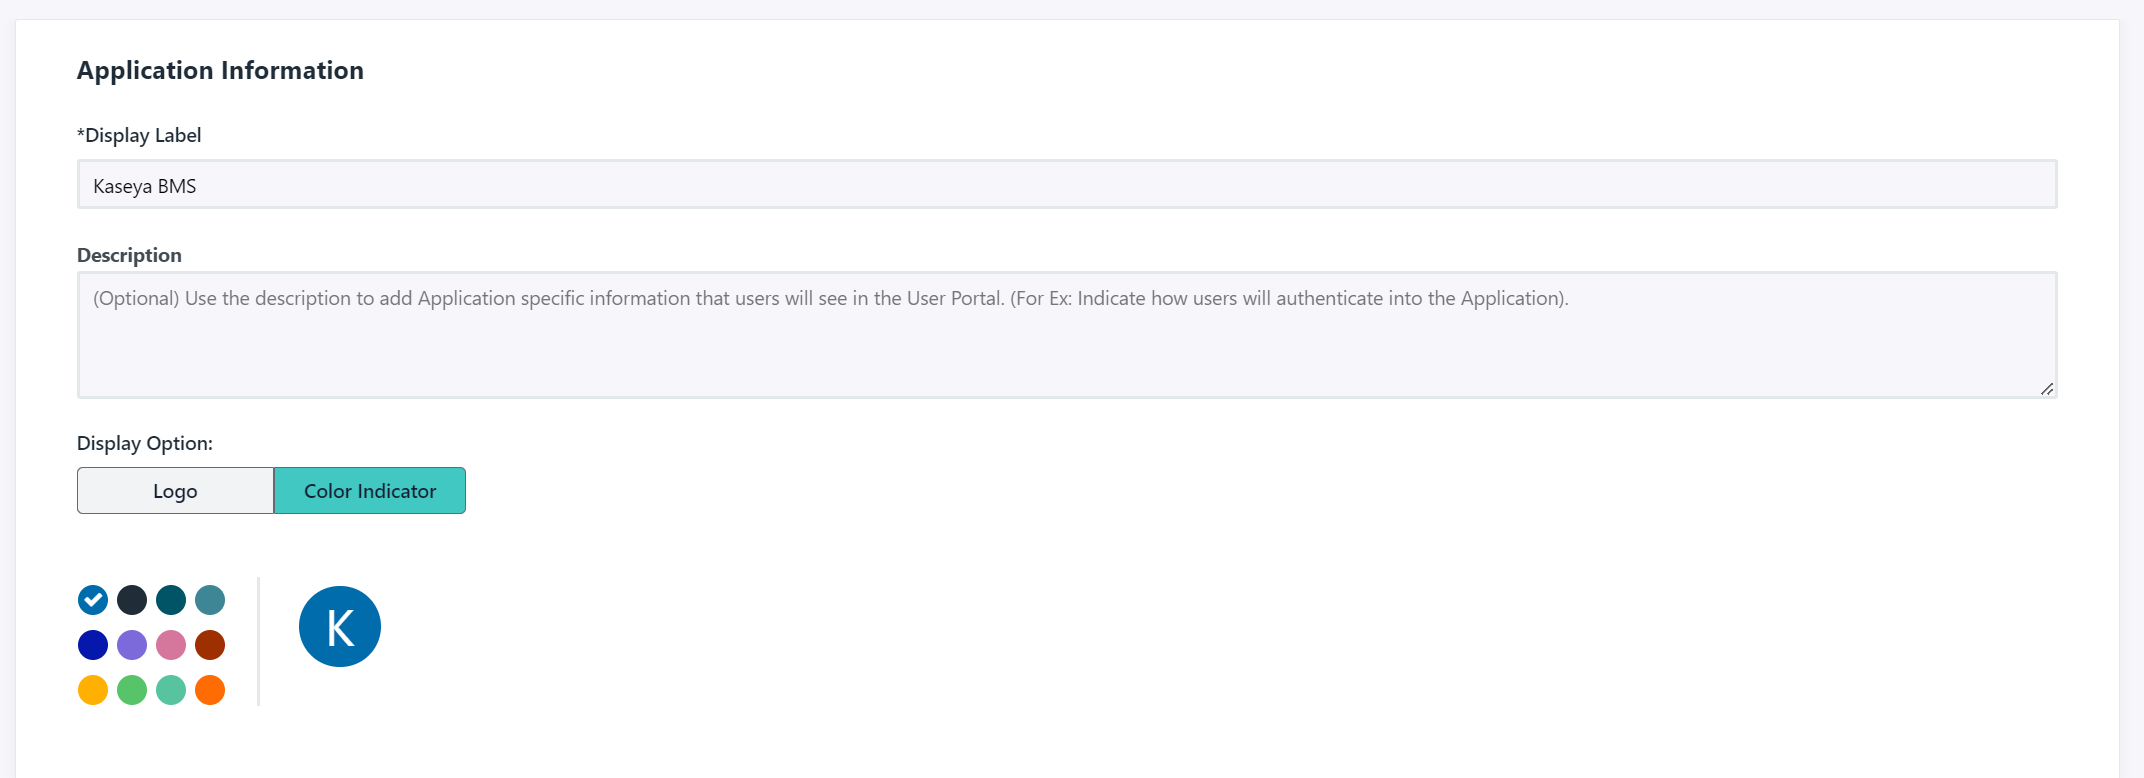
- In General Info tab > Application Information window, do the following
- Display Label: This is the app name. Enter Kaseya BMS.
- Description: Provide a description for the application (optional).
- Display Option:Logo: Provide a logo for the application (optional).
- Color Indicator: Choose a color indicator you like.
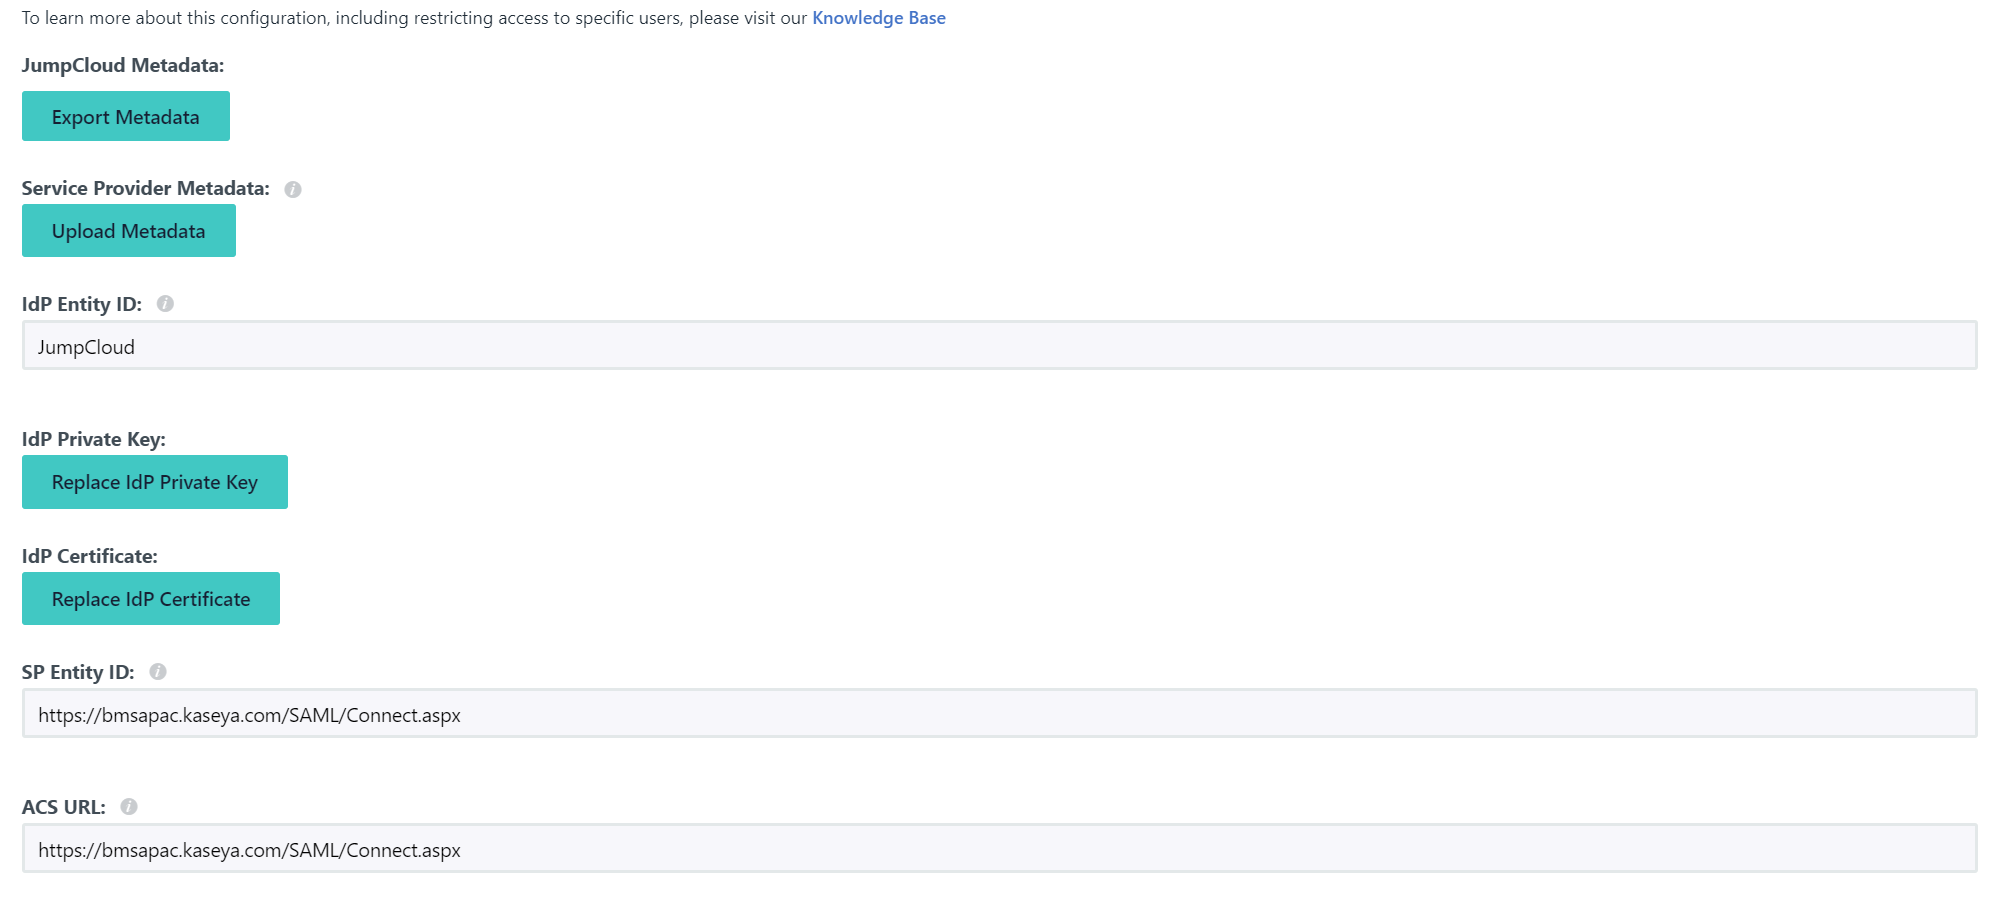
- In SSO tab > Single Sign-on Configuration window, do the following:
- IdP Entity ID: Enter JumpCloud.
- SP Entity ID: This is the PSA URL. The format is <server name>/SAML/Connect.aspx.
- ACS URL: This is the same information as above. (For example: https://bmsapac.kaseya.com/SAML/Connect.aspx)
- Go to PSA. Navigate to Admin > My Company > Auth and Provision.
- Under the Single Sign-on URL, copy the URL from the field.
- Set it in JumpCloud.
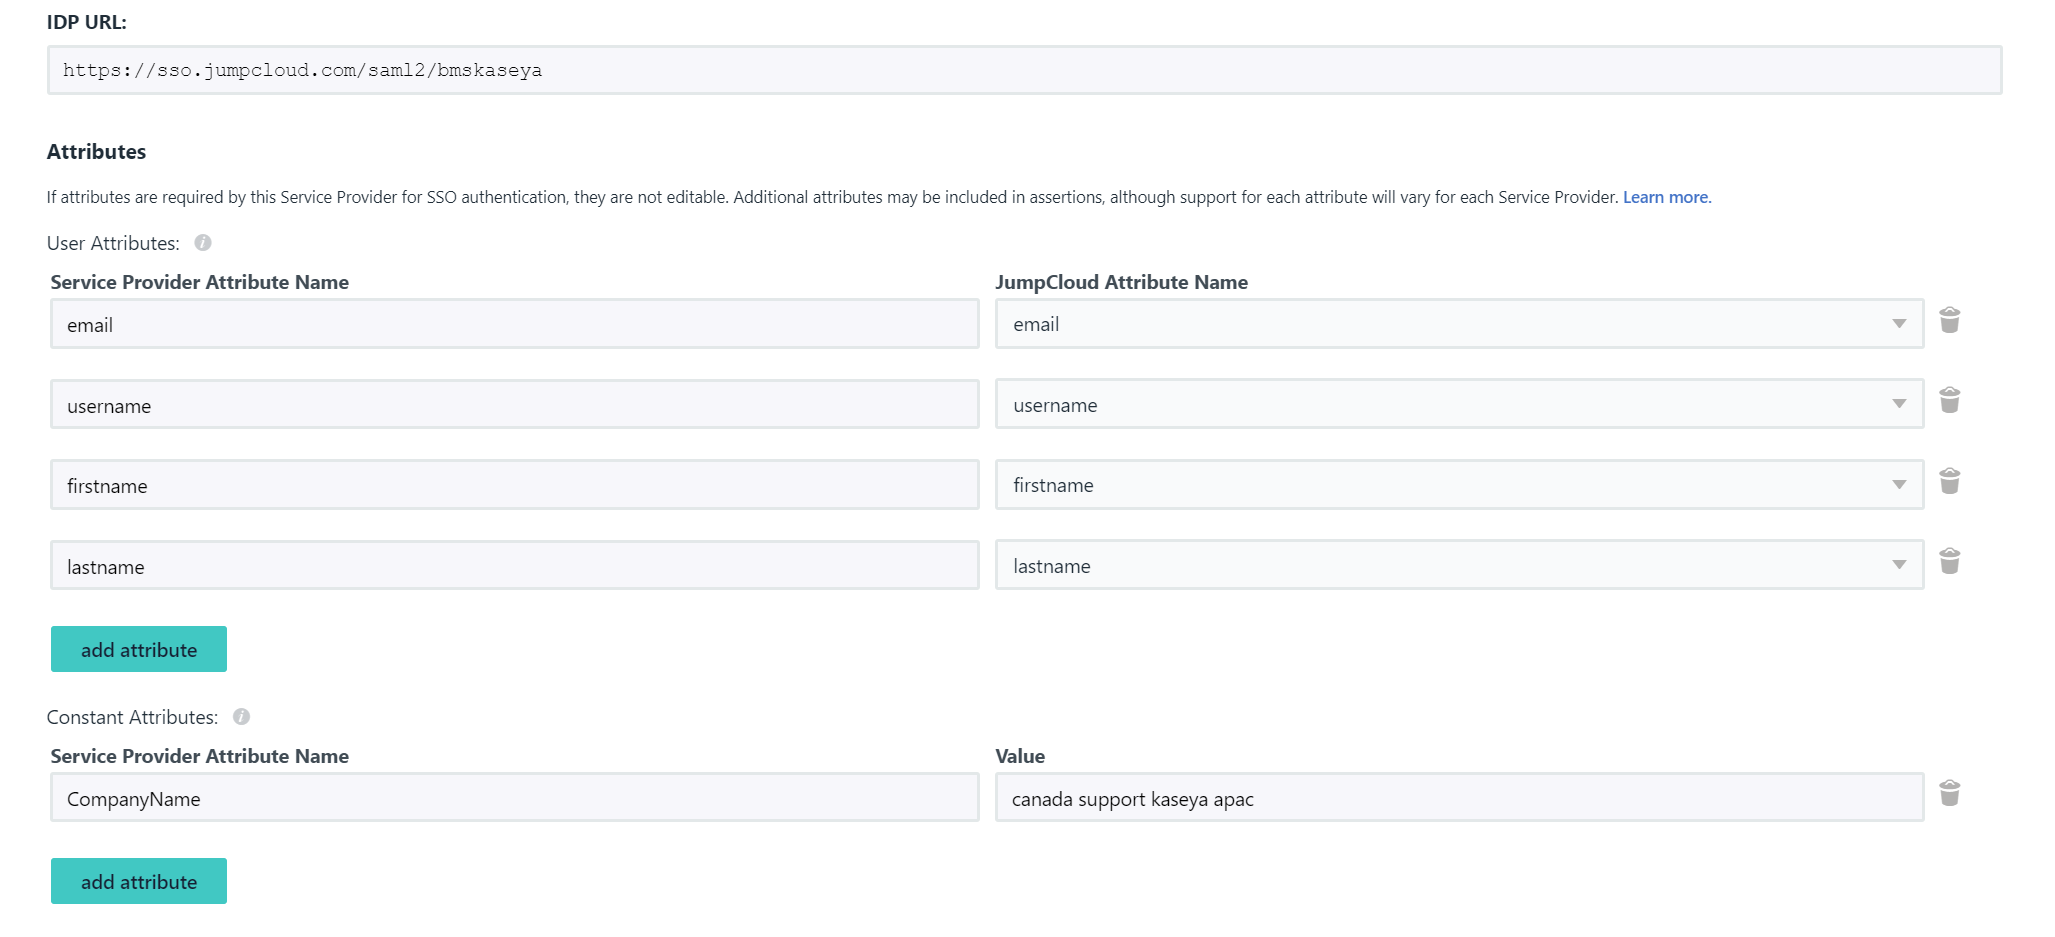
- IDP URL: This will be your login page for this application. You can customize the end of this URL.
The next information to be edited is the attributes. Keep all others as default.
Adding attributes
- Attribute 1
- Name: email
- Value: email
- Attribute 2:
- Name: username
- Value: username
- Attribute 3
- Name: firstname
- Value: firstname
- Attribute 4:
- Name: lastname
- Value: lastname
- Constant Attribute
- Name: CompanyName
- Value: <tenant name>. Add your tenant name here.
- Enter BMS Company Name. You can find the company name by navigating to Login > Your profile name > My Settings. You will find the company name just below your profile picture.
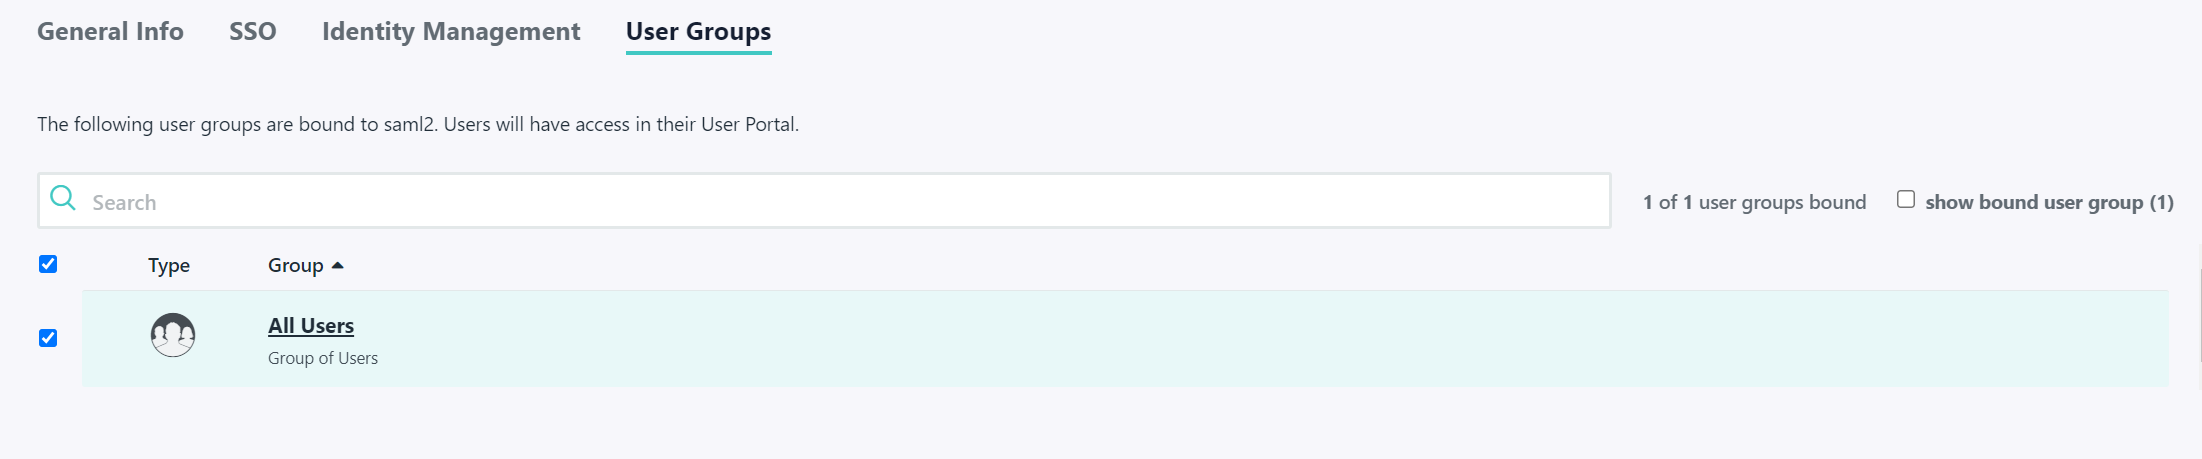
User groups
The final step of the configuration is User Groups.
- Choose the User Groups you want to give access to this application. Give access to all relevant users under the group or groups.
Make sure all users you wish to give access to this application are active and under the user groups selected here.
Downloading the certificate
After finishing the setup, you will see an option to download the certificate.
If you missed it at that moment you can still download the certificate. Click your newly created app in JumpCloud > SSO page. Open the application, and you will find the screen shown below on the left side.
- Click on IDP Certificate Valid
- Click on Download Certificate
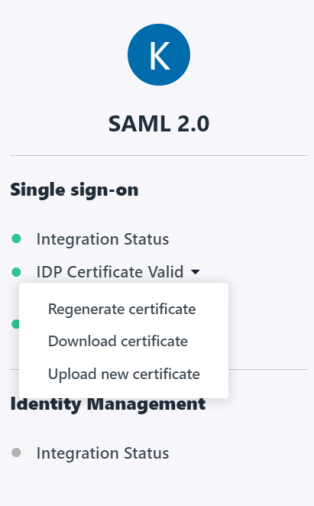
- Ensure the file is saved as .cer and not in any other format.
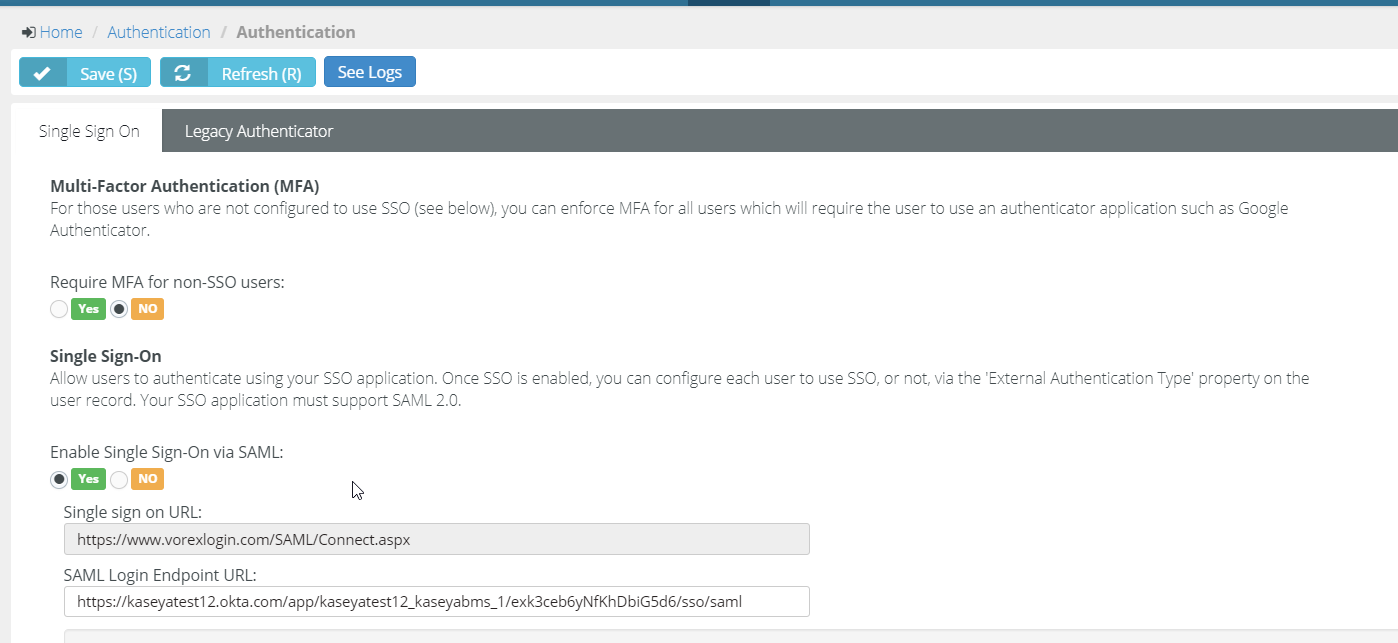
Setting up SSO in BMS
- In PSA, navigate to Admin > My Company > Auth and Provision.
- On the Single Sign-on tab, click Upload Certificate.
- Select the JumpCloud certificate you previously downloaded.
- Set Enable Single Sign On via SAML to Yes.
- Copy the application IDP URL you defined earlier and paste it in the SAML Login Endpoint URL field in the above path of the PSA. This enables user authentication with JumpCloud from the PSA login page.
- Click Save.
Enabling SSO for employees
- Navigate to HR > Employees.
- Select the particular employee who was previously selected as the user in LastPass. Click the Edit/Open icon of the employee's record. The employee's page opens.
- On the employee's page, under External Authentication Type in the left bottom corner, select SAML SSO and click Save.
- Repeat step 2 and 3 for each of the user for whom you had given access as part of the user group.


