Single sign-on with Passly
Decommission notice
There are two ways to authenticate with AuthAnvil (renamed Passly):
-
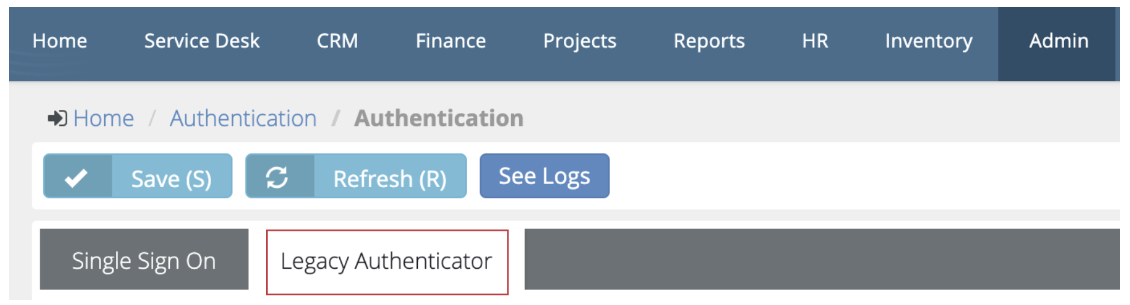
AuthAnvil Authenticator (called Legacy Authenticator in BMS)
-
Single Sign-on with Passly
AuthAnvil Authenticator was deprecated in November 2019 with the release of version 4.0.27. As of July 4, 2020, the current version is 4.0.34. AuthAnvil Authenticator is now scheduled for removal. All organizations must migrate to Passly Single Sign-on (SSO) by August 31, 2020. After this date, users will not be able to log in if your organization is using AuthAnvil Authenticator. For setup instructions, see below.
Single sign-on with Passly
This topic covers how to configure BMS to authenticate users with Passly using SAML based Single Sign-On (SSO).
Create Passly group
You need to have a Passly user group to associate with the BMS SSO configuration.
-
In Passly, navigate to Directory Manager > Groups.
-
Click the '+' button to create a new group.
-
Give a name to your group.
-
Click the Add Group button.
-
Add users to the group.
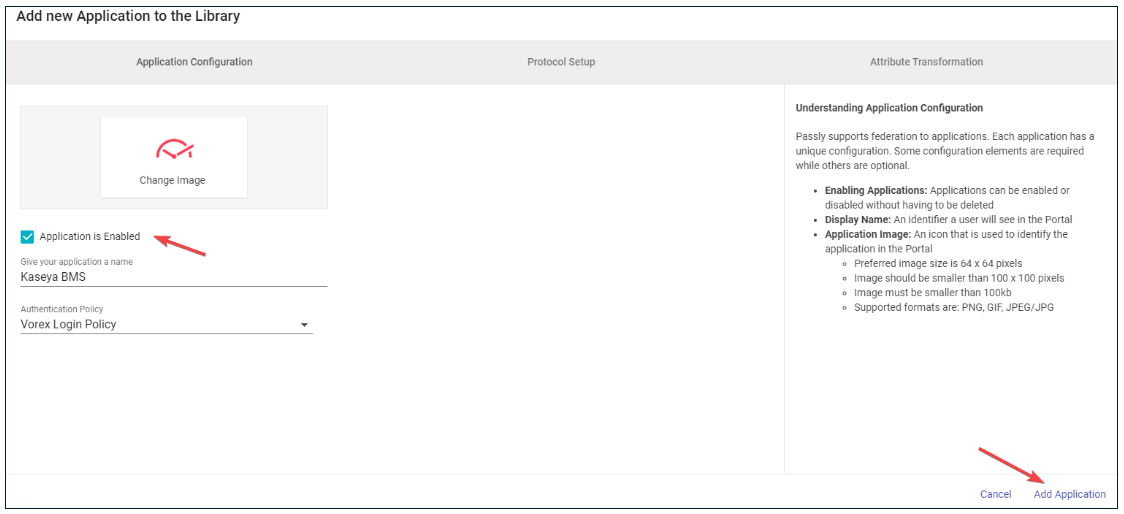
Add BMS to Passly
-
Navigate to SSO Manager.
-
Click the '+' button followed by the book button.
-
Search for 'Kaseya BMS' in the application catalog and select it.
-
Check Application is Enabled.
-
Click Add Application.
Permissions
-
Navigate to the Permissions tab.
-
Click Add Group.
-
Select the group you created previously.
-
Click Add Groups.
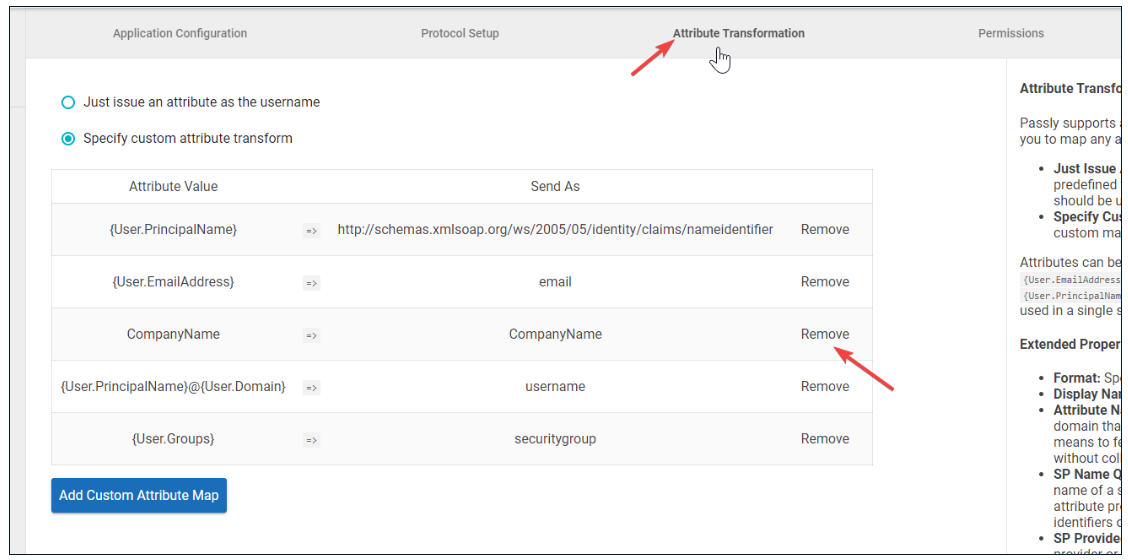
Attribute Transformation
-
Navigate to the Attribute Transformation tab.
-
Remove the CompanyName attribute.
-
Save your changes.
-
Click Add Custom Attribute Map.
-
Add back the CompanyName attribute, referencing your tenant name.
-
Click Add Mapping.
-
Save your changes.

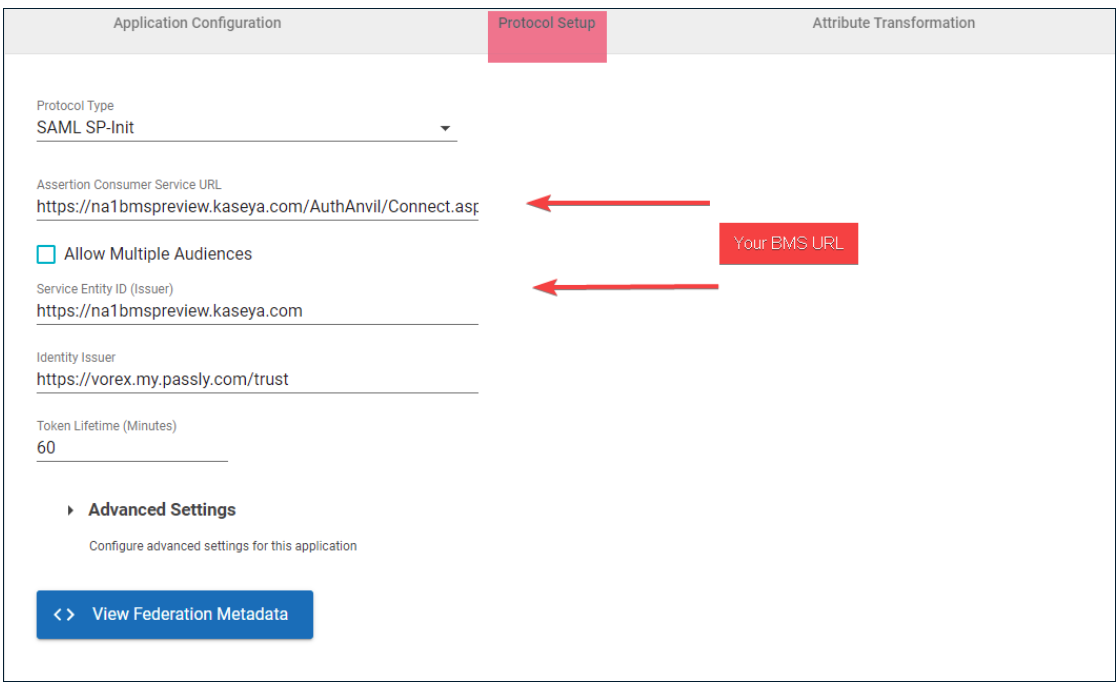
Protocol Setup
-
Navigate to the Protocol Setup tab.
-
For Assertion Consumer URL, change the base URL to the base URL of your BMS server. In the example below, the base URL is na1bmspreview.kaseya.com.
-
For Service Entity ID, change the base URL to the base URL of your BMS server. In the example below, the base URL is na1bmspreview.kaseya.com.
-
Save your changes.
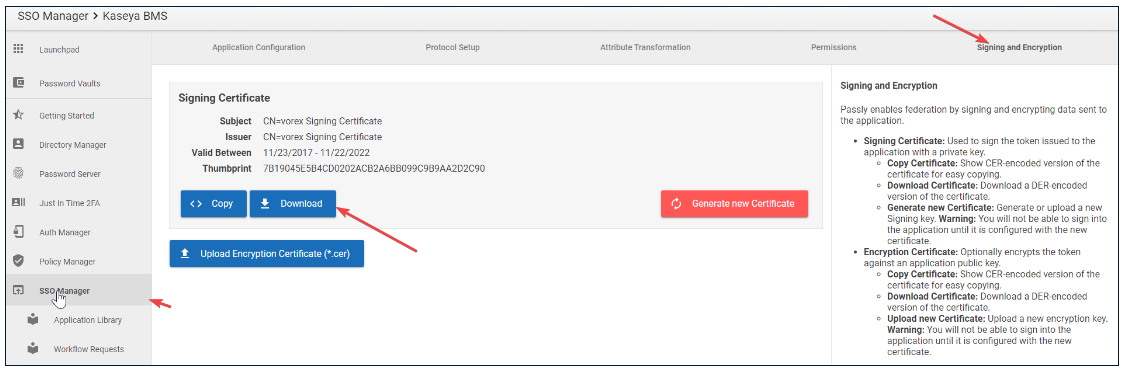
Download certificate
-
Navigate to the Signing and Encryption tab.
-
Click Download.
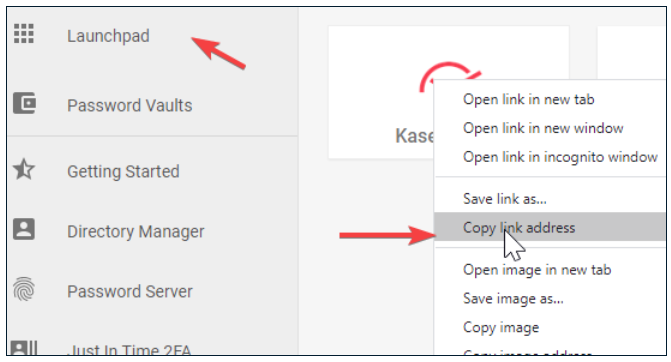
Passly application assignment
-
Navigate to Launchpad in the left menu.
-
Right-click the BMS application, and copy the link to a text pad.
-
Click the BMS application.
-
Verify that you are redirected and logged into BMS.
Setup BMS SSO
-
In BMS, navigate to Admin > My Company > Auth and Provision.
-
On the Single Sign On tab, click Upload Certificate.
-
Select the Passly certificate you previously downloaded.
-
Set Enable Single Sign On via SAML to Yes.
-
Paste the Passly login URL you copied above into the SAML Login Endpoint URL field. This enables user authentication with Passly from the BMS login page.
-
Click Save.

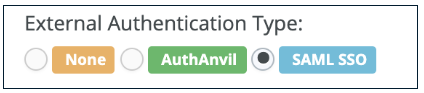
Enable SSO for employees
-
Navigate to HR > Employees.
-
Select an employee.
-
Under External Authentication Type, select SAML SSO.