BMS-webhooks integration
Introduction
A webhook is an HTTP-based callback method that allows event-driven communication between two APIs, delivering the ultimate communication to the targeted website in a prescribed format. BMS has harnessed this technology to create an integration between BMS and webhook to deliver communication of ticket-related events to customer's targeted website. The integration is applicable to both Legacy View and the New View. The existing integrations will be visible in the webhooks listing page in the grid.
Steps
-
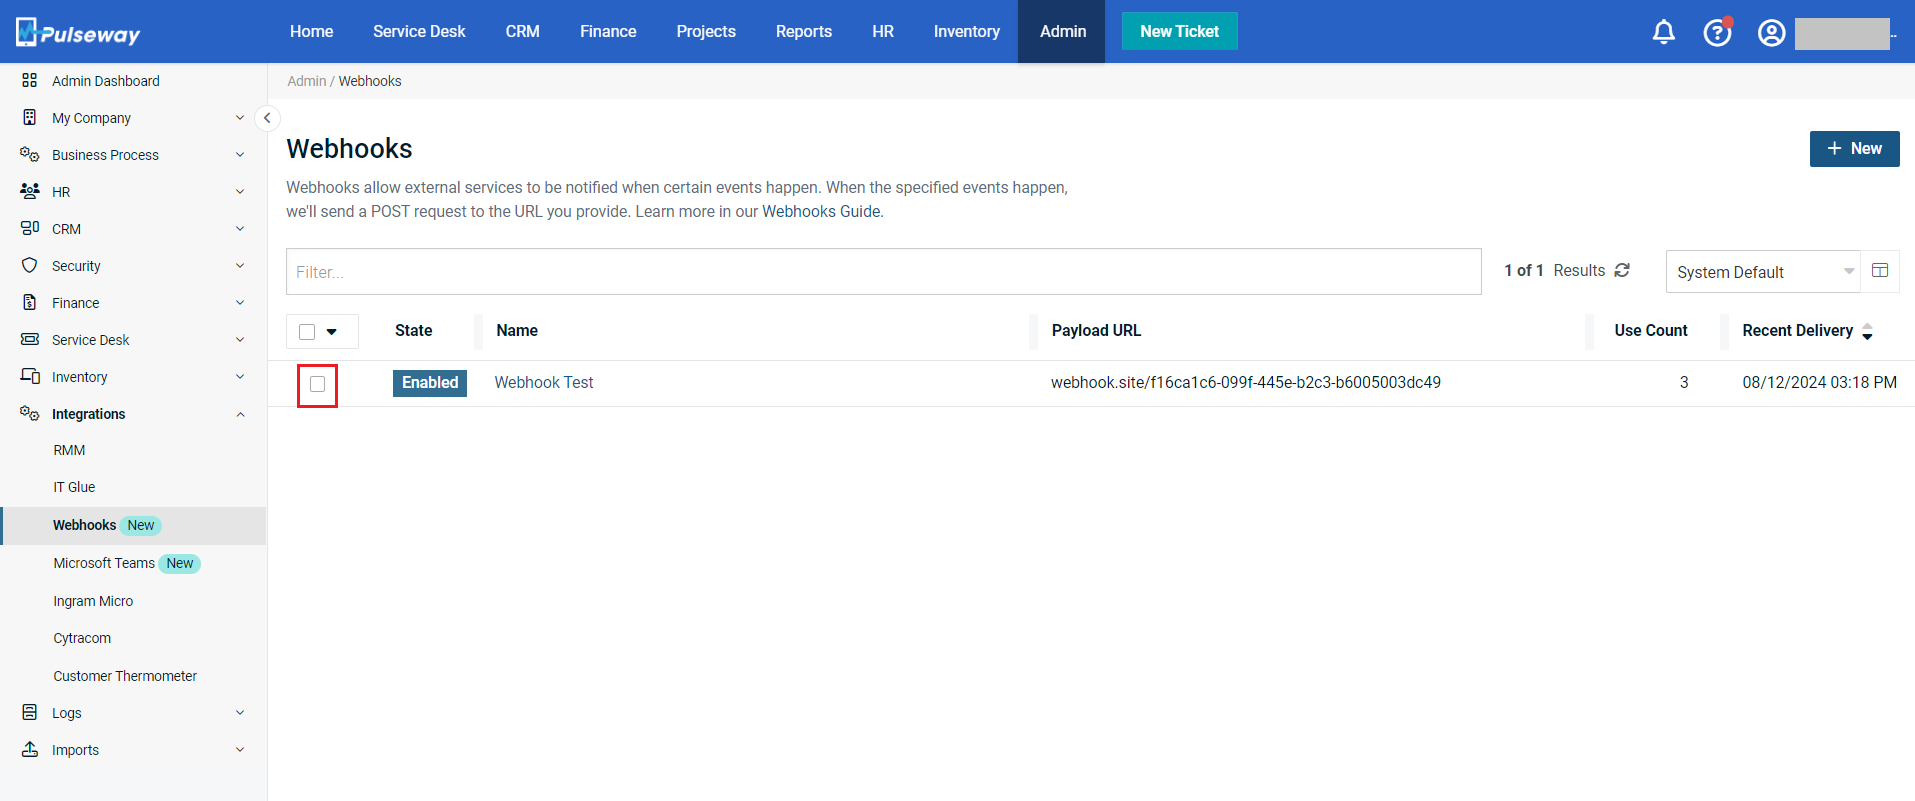
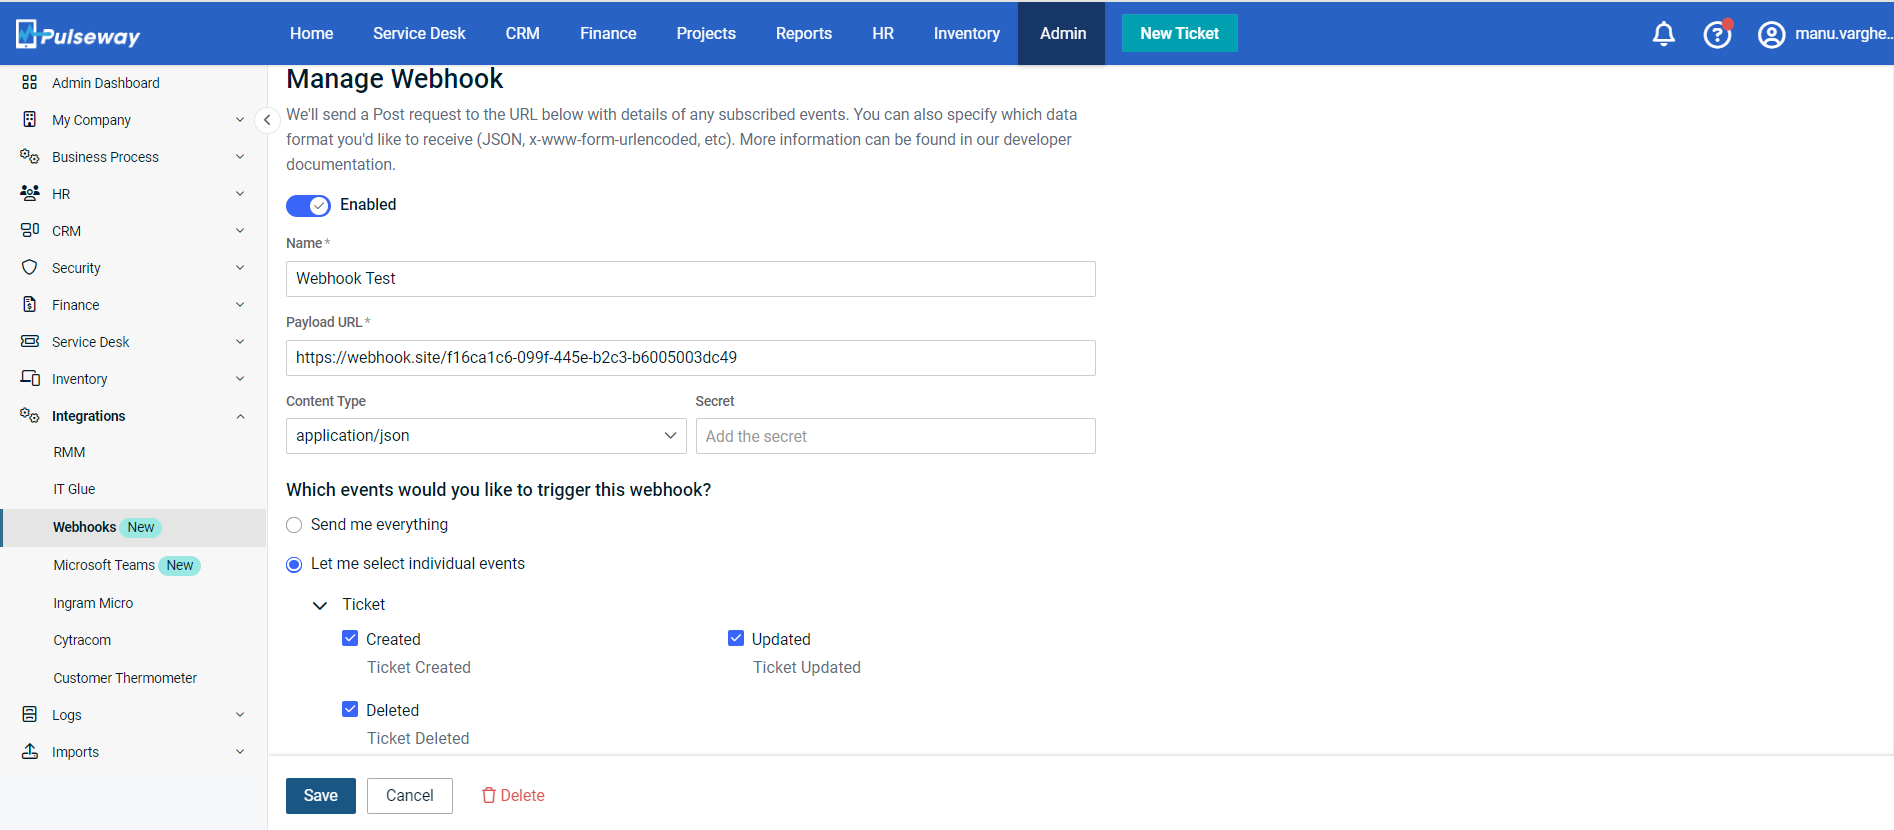
Go to Admin > Integrations > Webhooks. The Webhooks page opens.
-
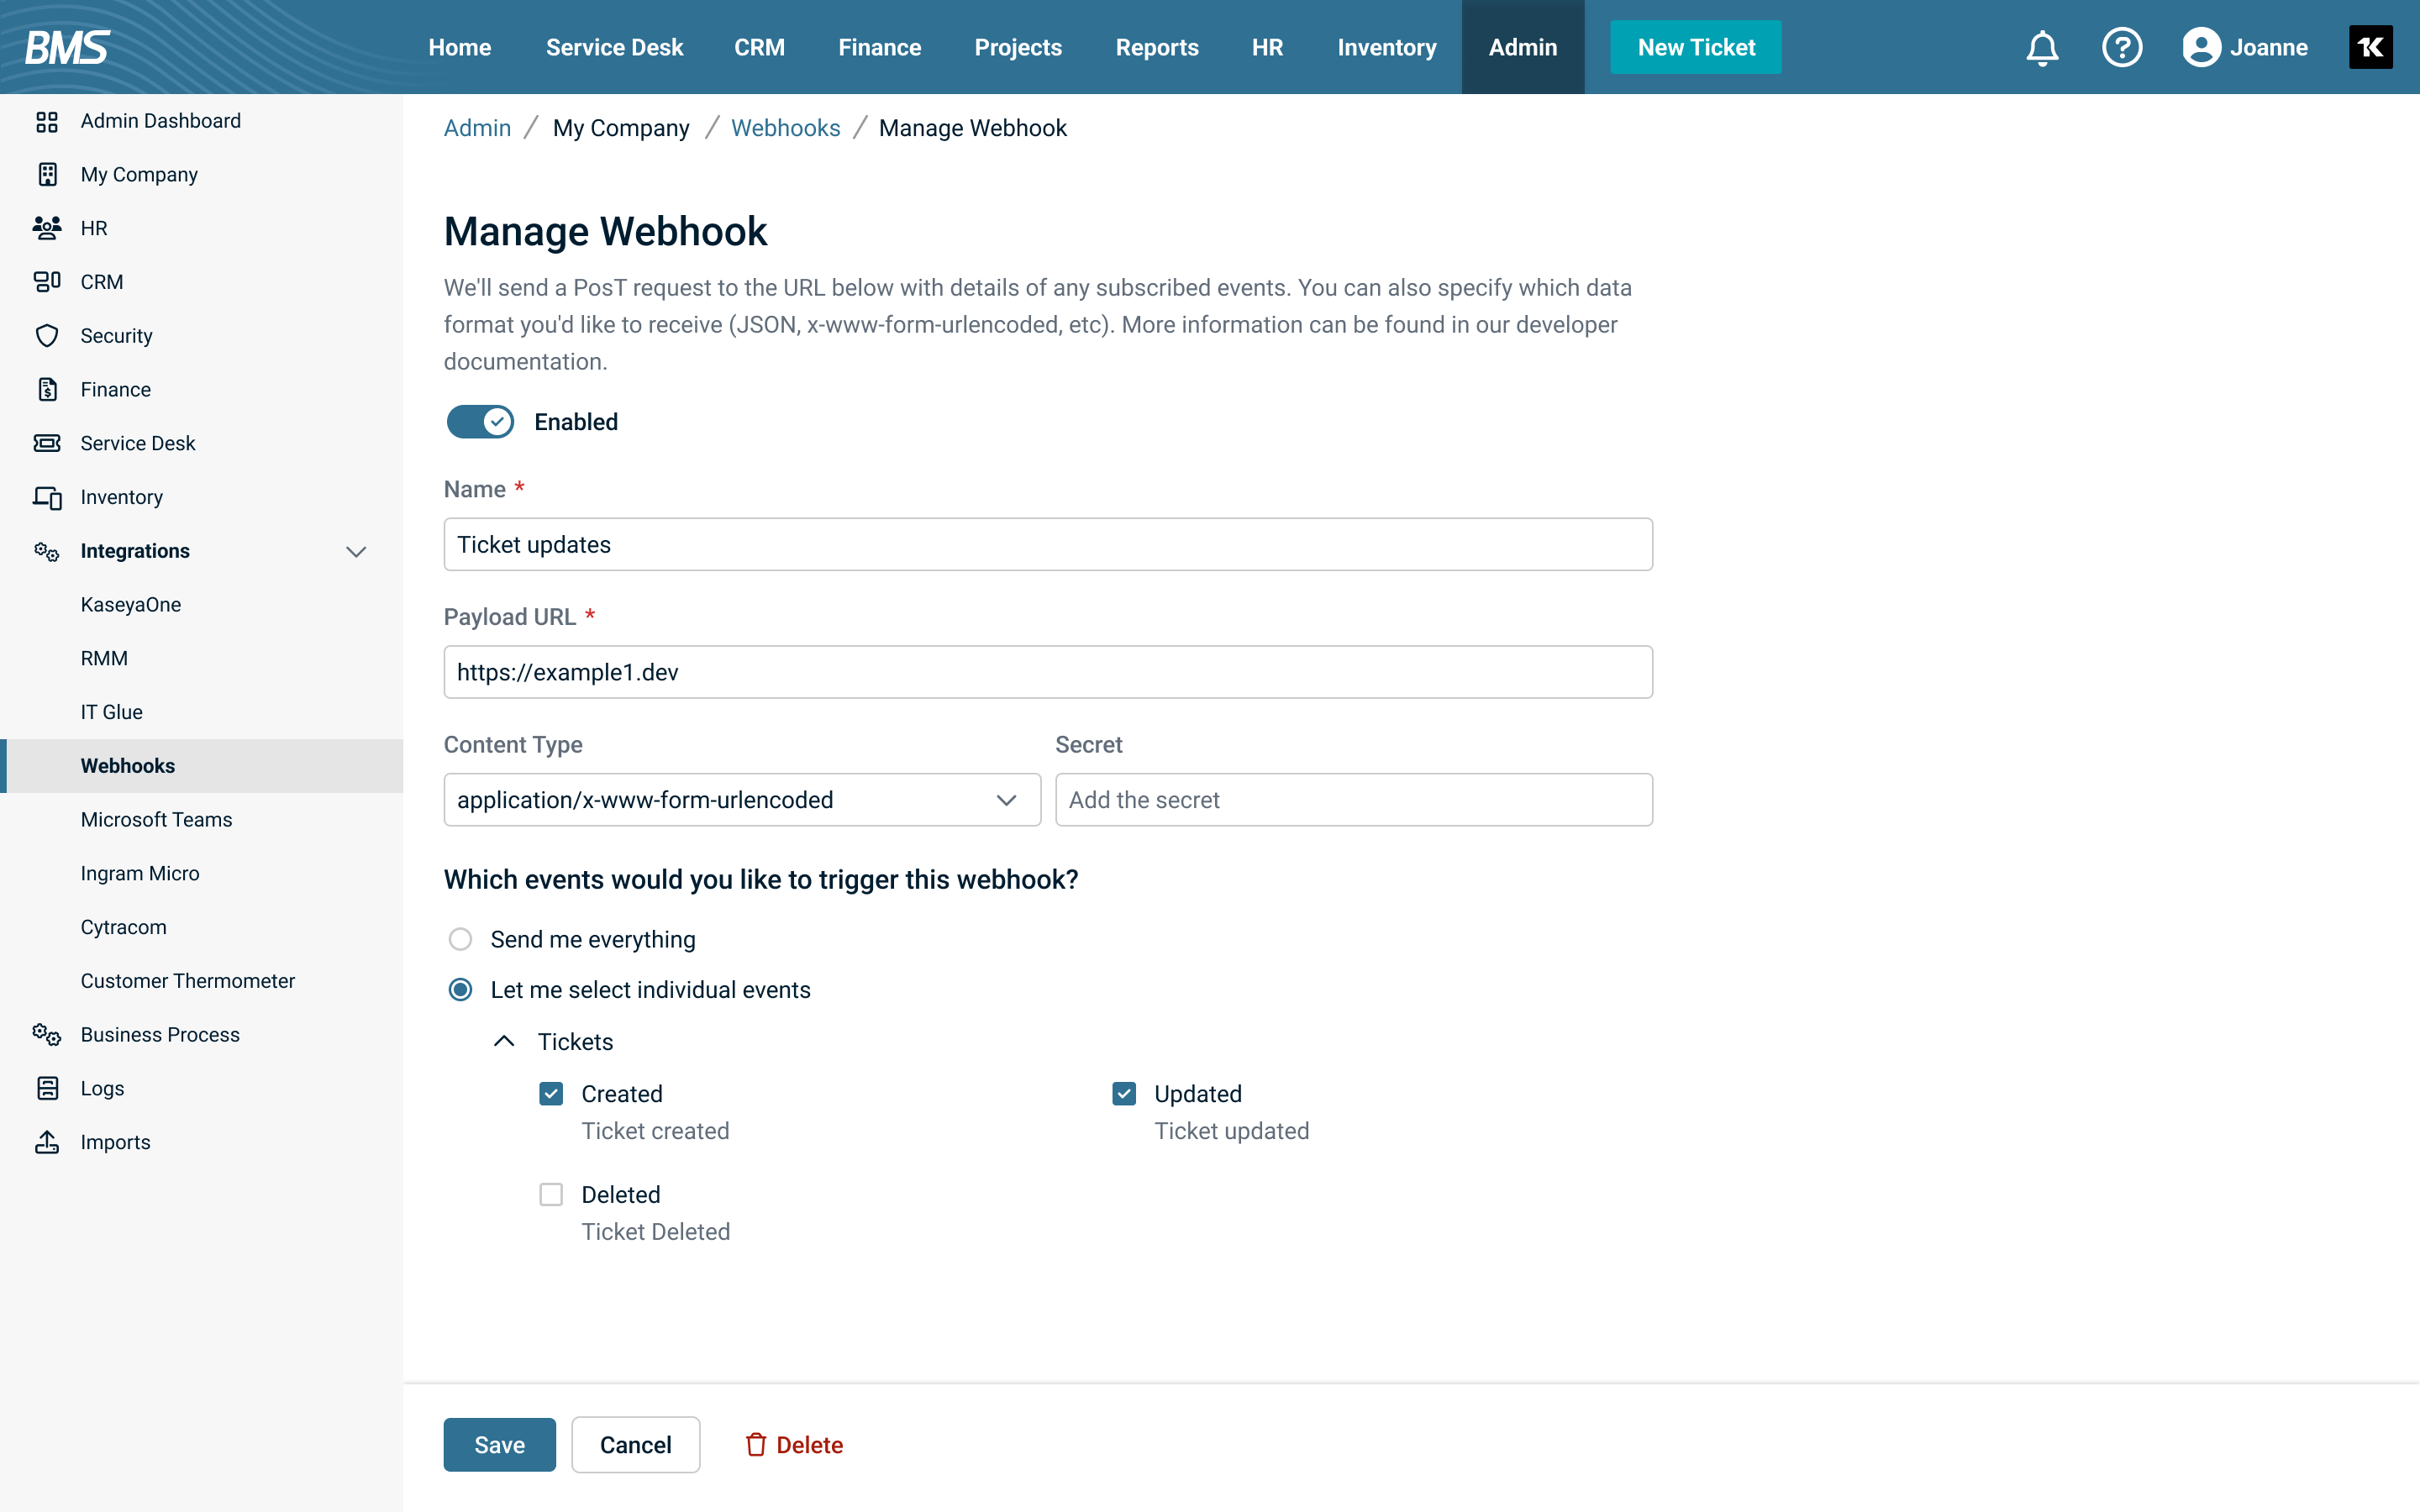
Click New. The Add a Webhook page opens.
-
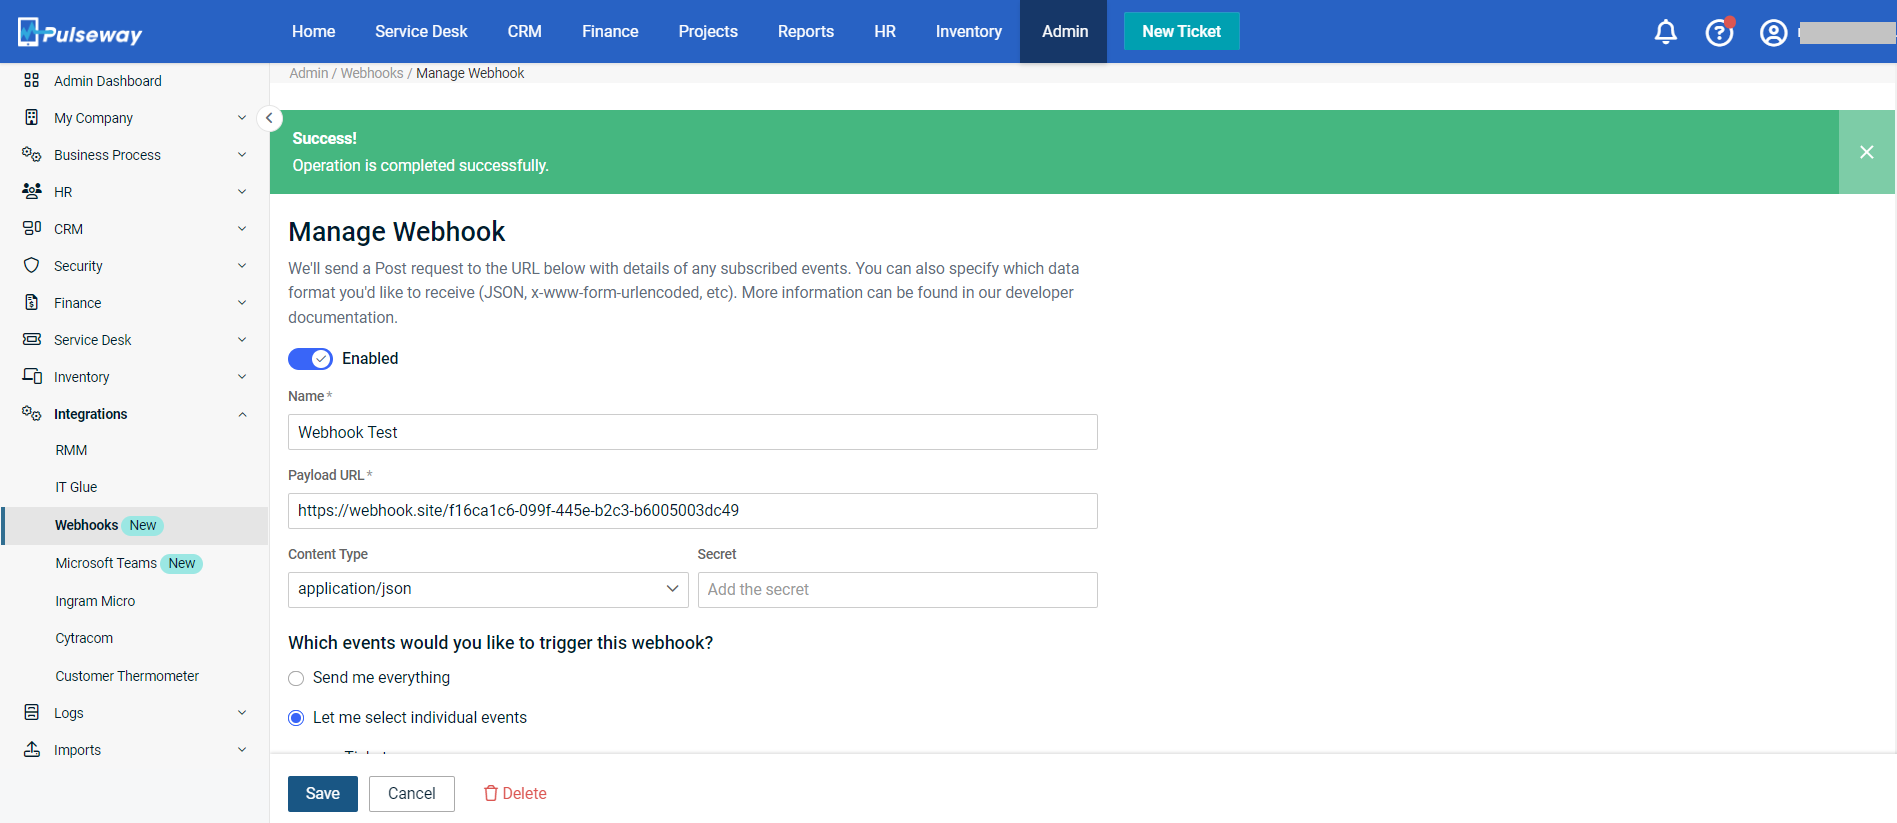
Enable/Disable button: By default, the Enable/Disable toggle button is enabled. This button should be enabled to proceed with the integration.
-
Name: Enter an appropriate name for the webhook.
-
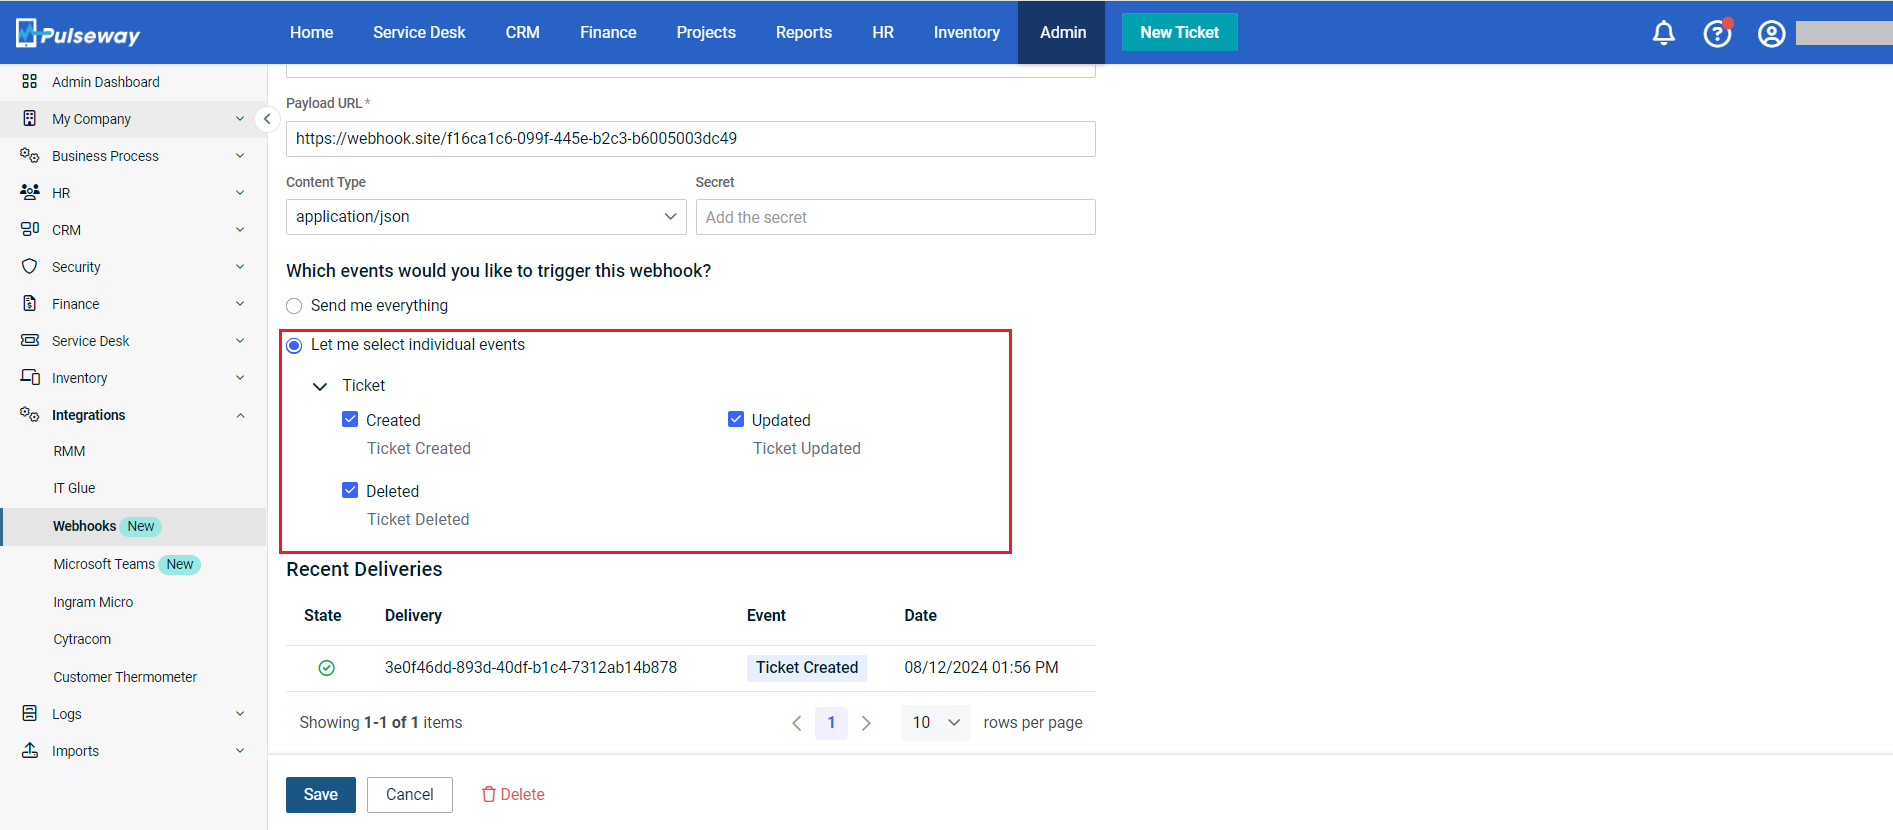
Payload URL: Enter a valid target URL here. This will be the URL where you will get notifications about ticket-related events in a prescribed format.
-
Content Type: Select the appropriate content type from the dropdown.
-
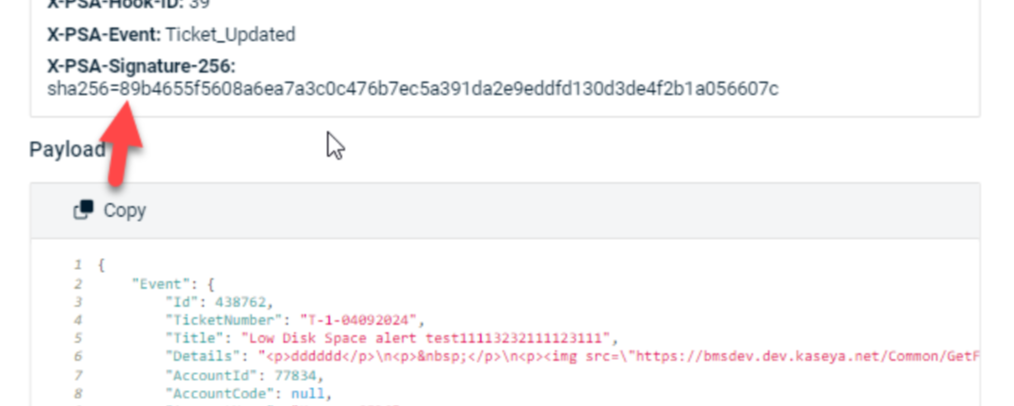
Secret: This is an optional field. Enter any alphanumeric text and/or with special characters. If you choose to enter a secret in this field, you will see a Signature field along with a signature next to it in the header area in the details window as well as in the targeted website. (See fourth image after step 9.) However, make sure you remember this text as this will be used in the authentication process of the above target URL when you access it for the event notifications. This serves like a password. It acts as an extra layer of security.
-
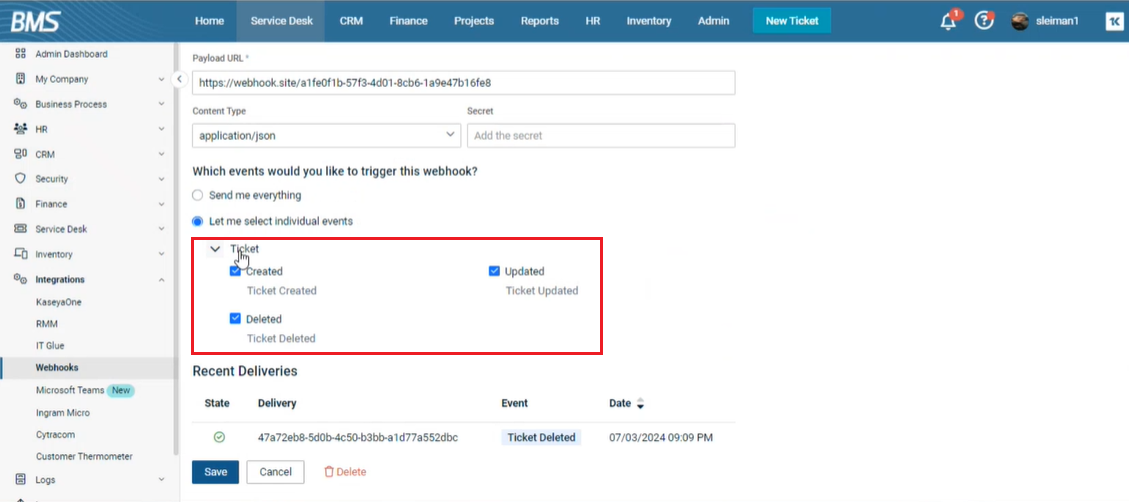
Which events would you like to trigger this webhook? You can select Send me everything or Let me select individual events. If you select Send me everything, notifications about all ticket-related events will be delivered to your URL. If you select Let me select individual events, notifications about only the selected ticket-related events will be delivered to your URL. Right now, only Created, Updated, and Deleted are the only options under the Let me select individual events option. Select the appropriate option.
-
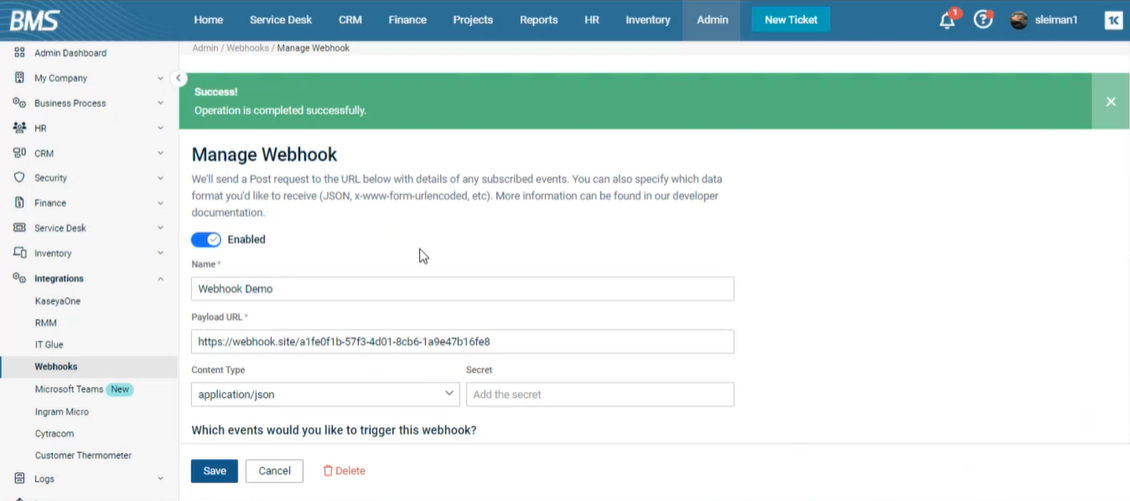
Click Save. You will see a green success message on the top of the page. The integration is now configured.
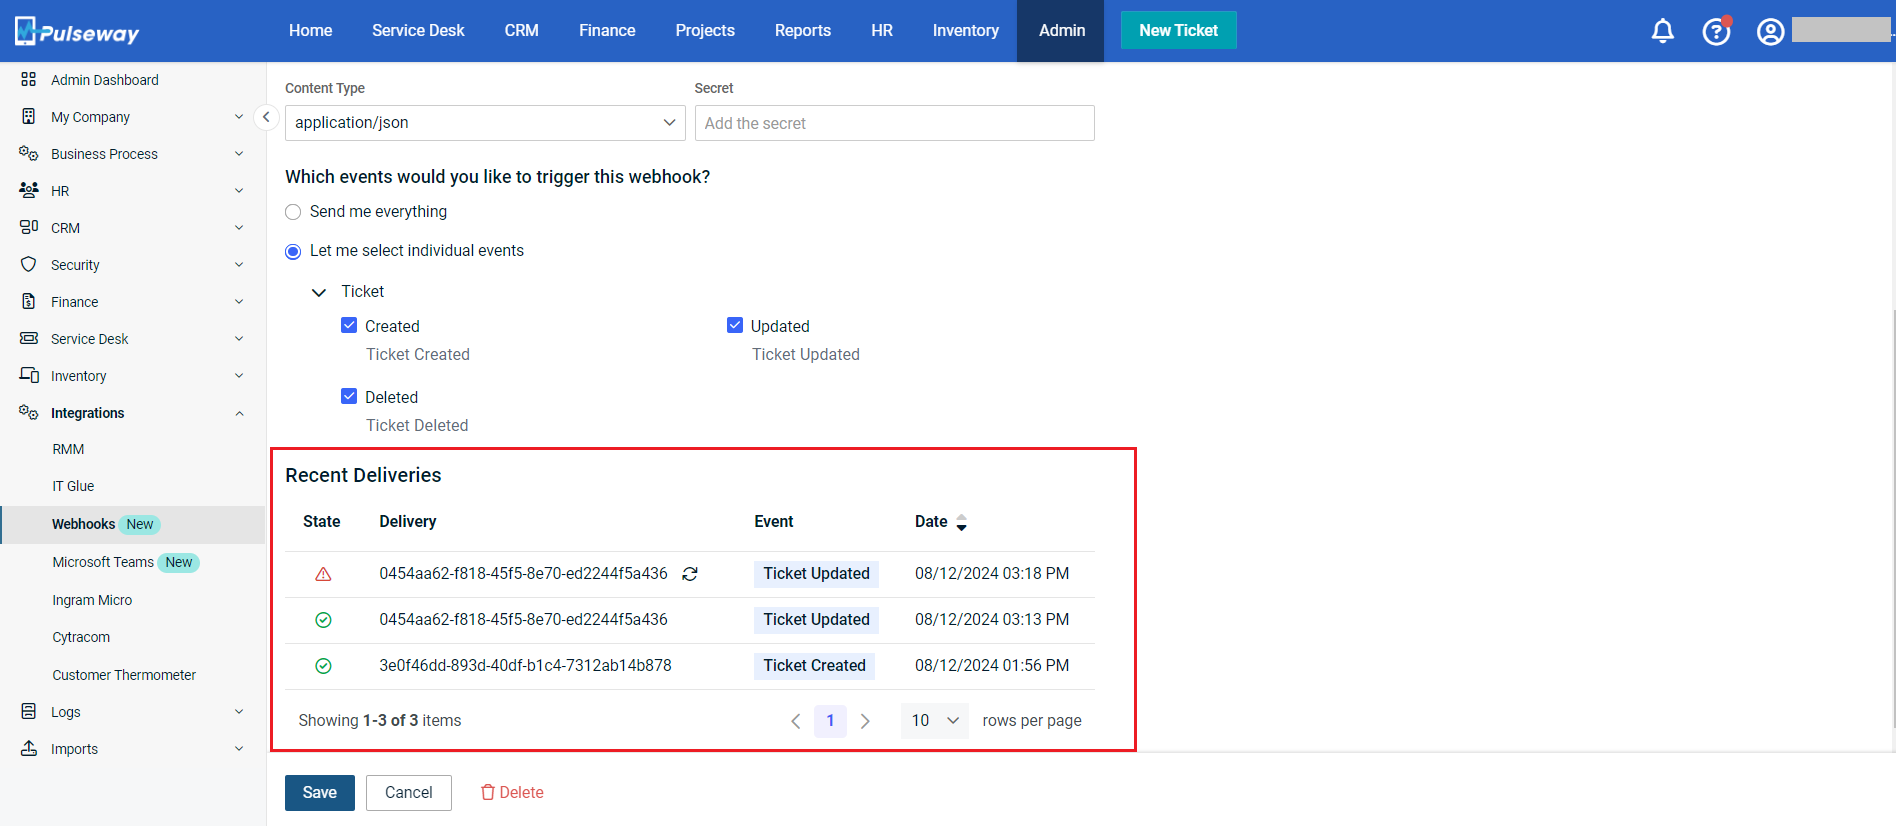
Once events are delivered to the target URL, those events will appear under the Recent Deliveries section. To see the summarized details of the event notification, click the individual row of the event notification that you want to see.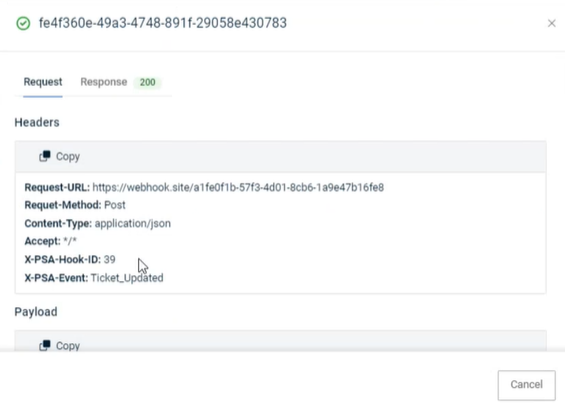
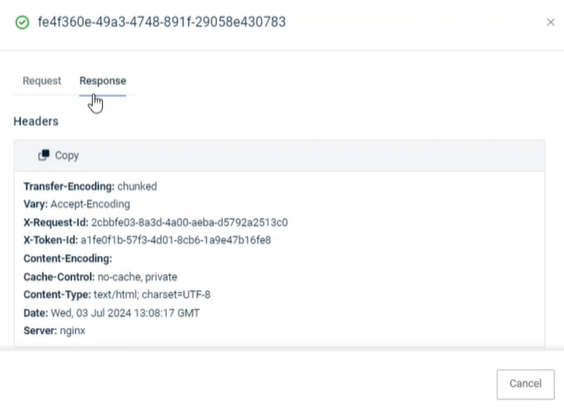
Alternatively, you can see detailed information of the same notification in the target URL. 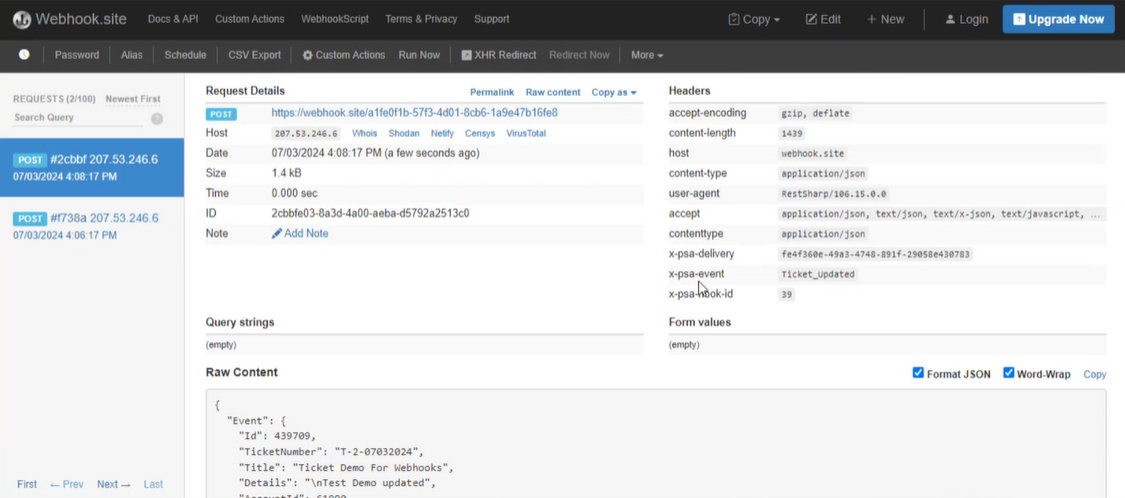
The newest ones will be displayed on the top in the Recent Deliveries section. You can redeliver the failed ones. The failed ones are marked with a red icon under the State column.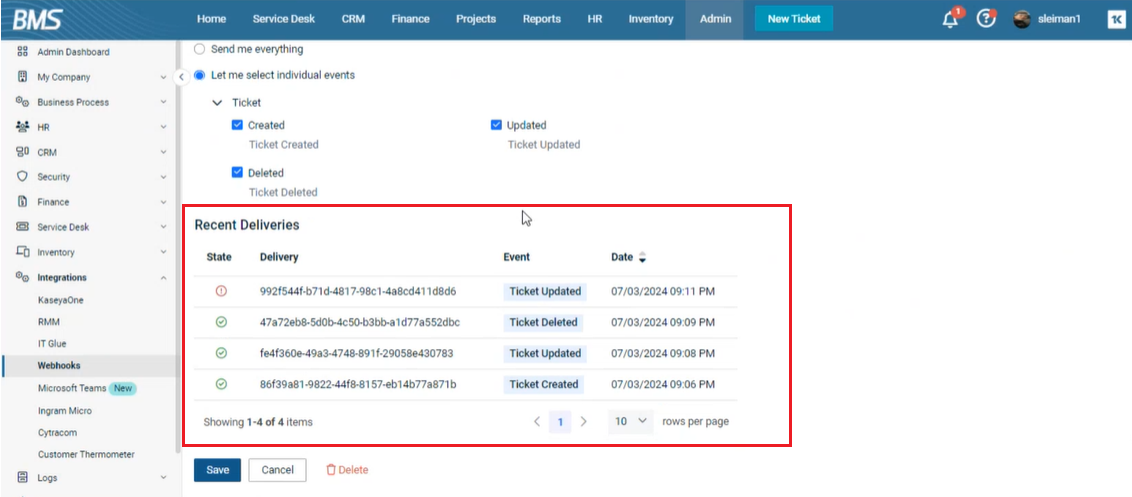
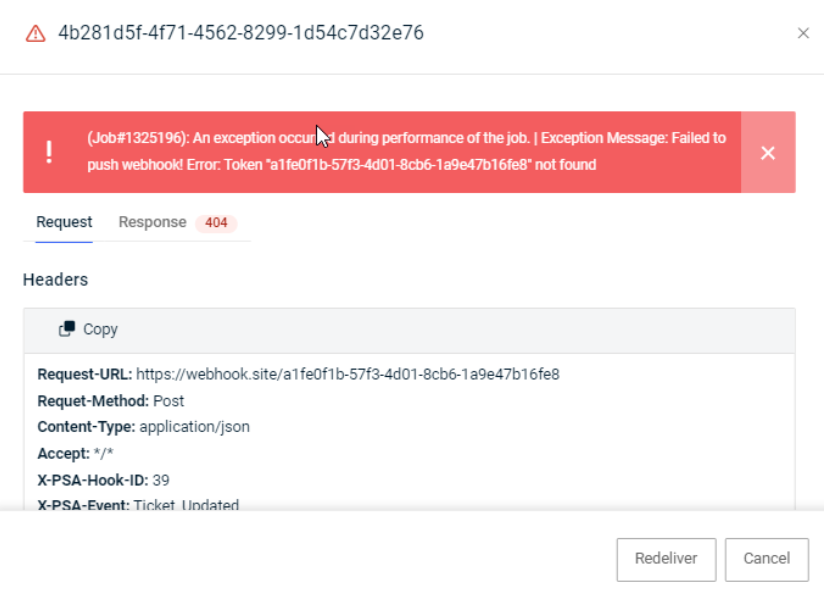
Redelivering an event notification
To redeliver an event notification, click the individual row of the event notification. The event notification opens in a separate window.
Click Redeliver. The Redeliver button appears only for failed event notifications (failed deliveries). Once an event notification is redelivered, an icon will appear next to the redelivered event notification in the grid.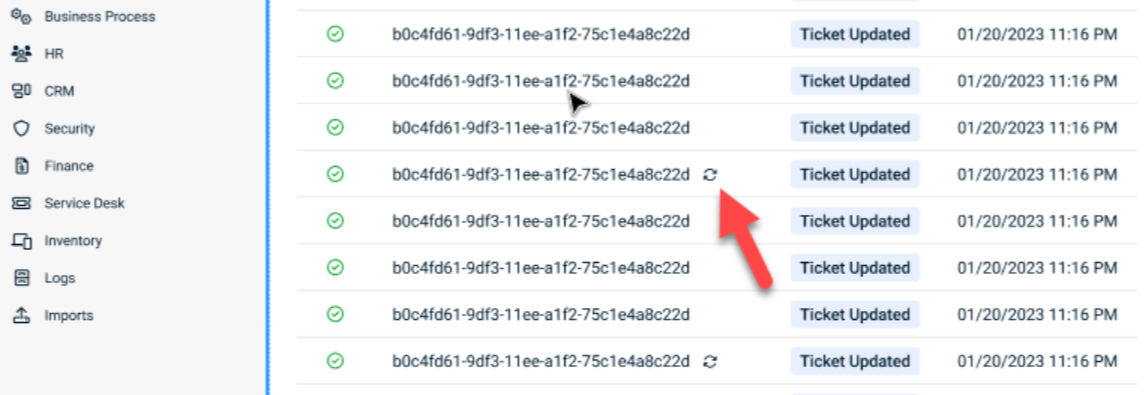
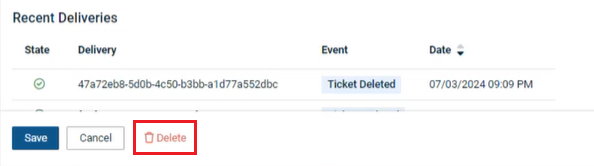
Deleting a BMS-webhook integration
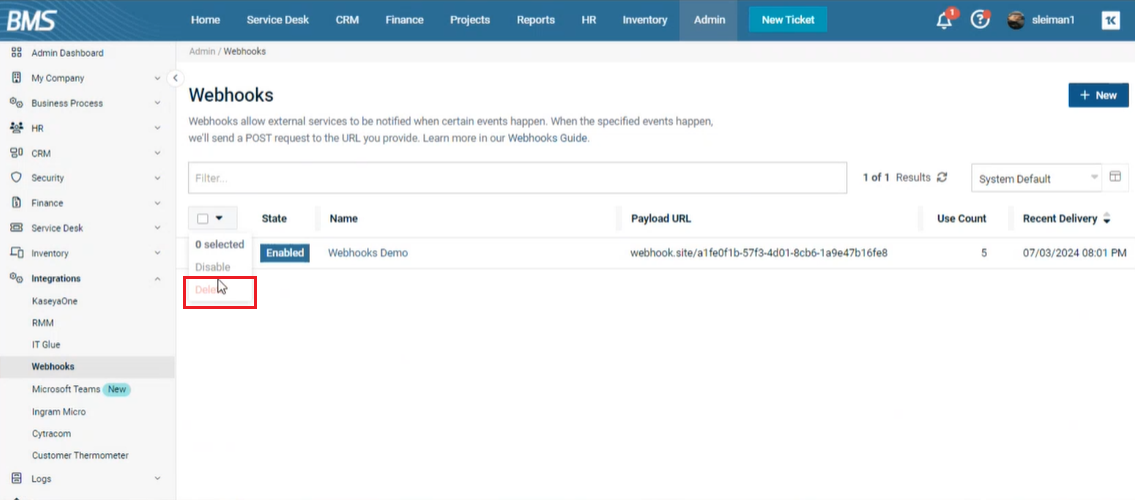
Click the delete icon (towards the bottom of the page) while you are in the add or edit mode of the individual integration. Alternatively, you can delete a BMS-webhook integration by selecting the checkbox next to the individual integration's row in the webhooks listing page and then by clicking Delete from the dropdown in the header of the grid.