IT Glue embedded checklists
Introduction
IT Glue embedded checklists are a list of task templates that are available in the form of a checklist that can be attached to a ticket. These checklists ensure speedy and timely processing of tasks that are attached to a ticket, one after the other. The checklists also make sure that the processing follows a certain hierarchy or order. The tasks that are mentioned in the checklists can be completed in the order they are mentioned. (You can also change the order.)
Security roles have the option to enable/disable IT Glue checklists on tickets.
Prerequisites
- The IT Glue user must be an admin or manager to leverage this feature.
- You should have an active BMS - IT Glue integration for the checklists to appear as part of your ticket.
NOTE The integration only imports templates.
Steps
- Open a ticket of your choice.
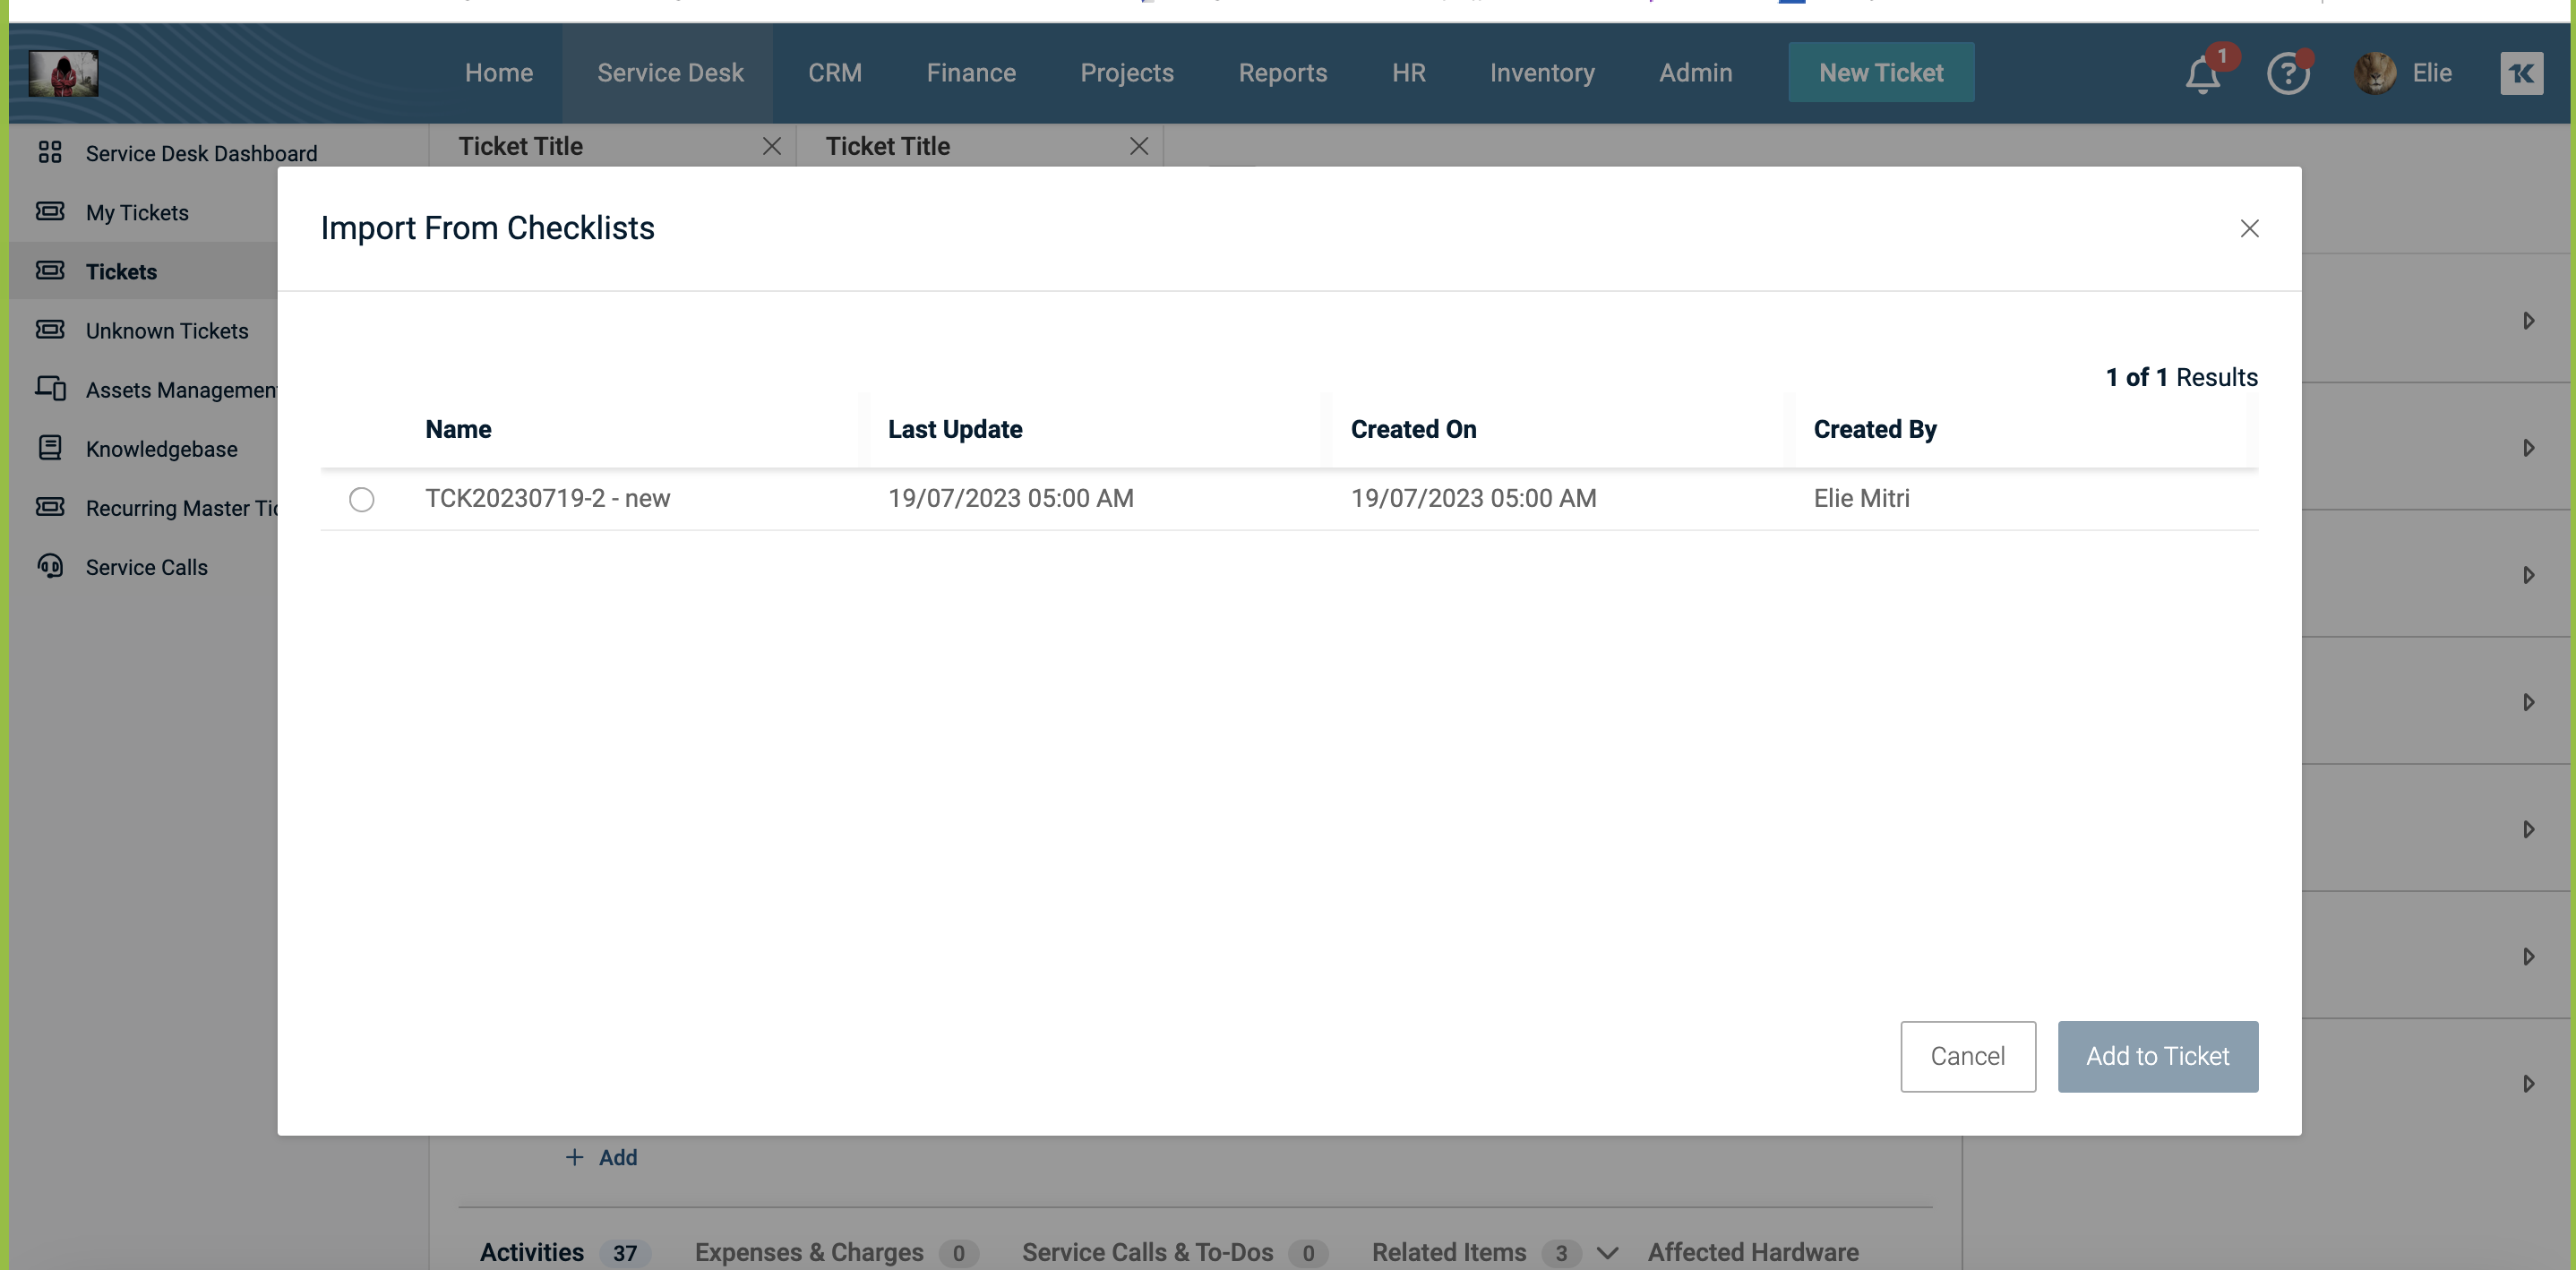
- On the right side your ticket area at the same level as the heading Checklist, you will find a small icon that says Import from Templates. (You will find this name if you hover the mouse over the icon and if your IT Glue integration is active.) This is a new addition which has its roots in IT Glue.

- Click the Import from Templates icon. A window with a list of templates will open. The Import from Templates window shows the name of the template, the last time it was updated, when it was created, and the name of the creator.

- Select as many radio buttons next to each template as you would want to and then click Add to Ticket.
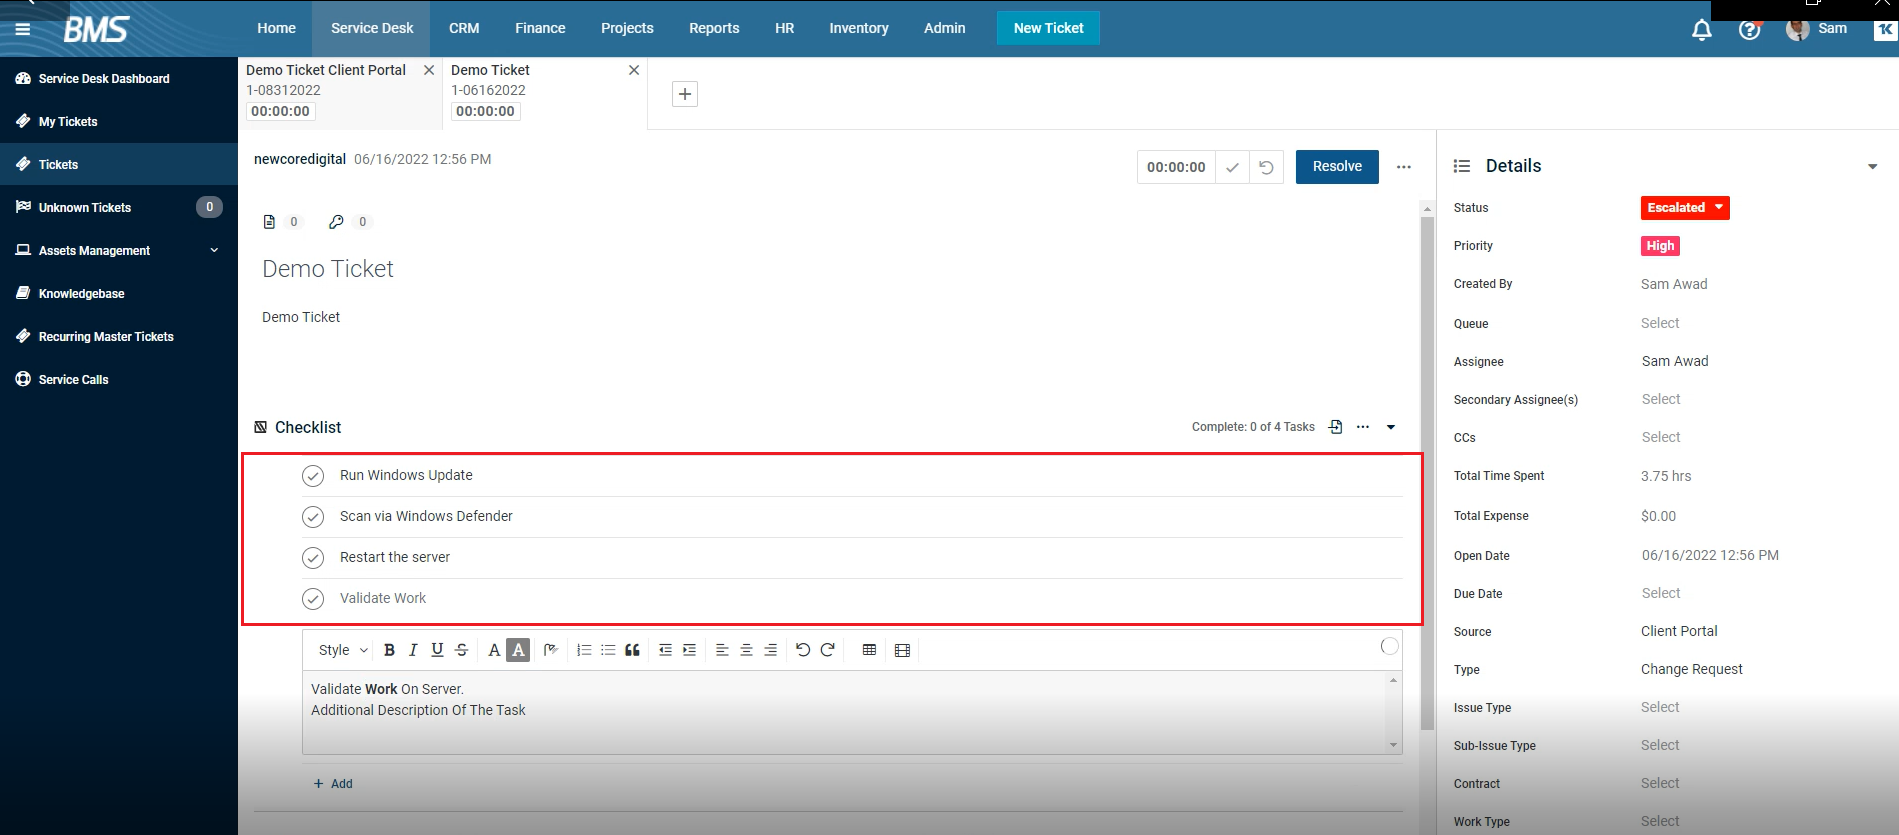
- As soon as you select the template to add, you can see the associated tasks above the ticket.

- Click each task to open and then provide a description for your tasks.
- You can mark the tasks as they are are completed. You can see a blue tick next to the task that has been marked completed. You can copy or even delete an individual task. You can move a task up or down.

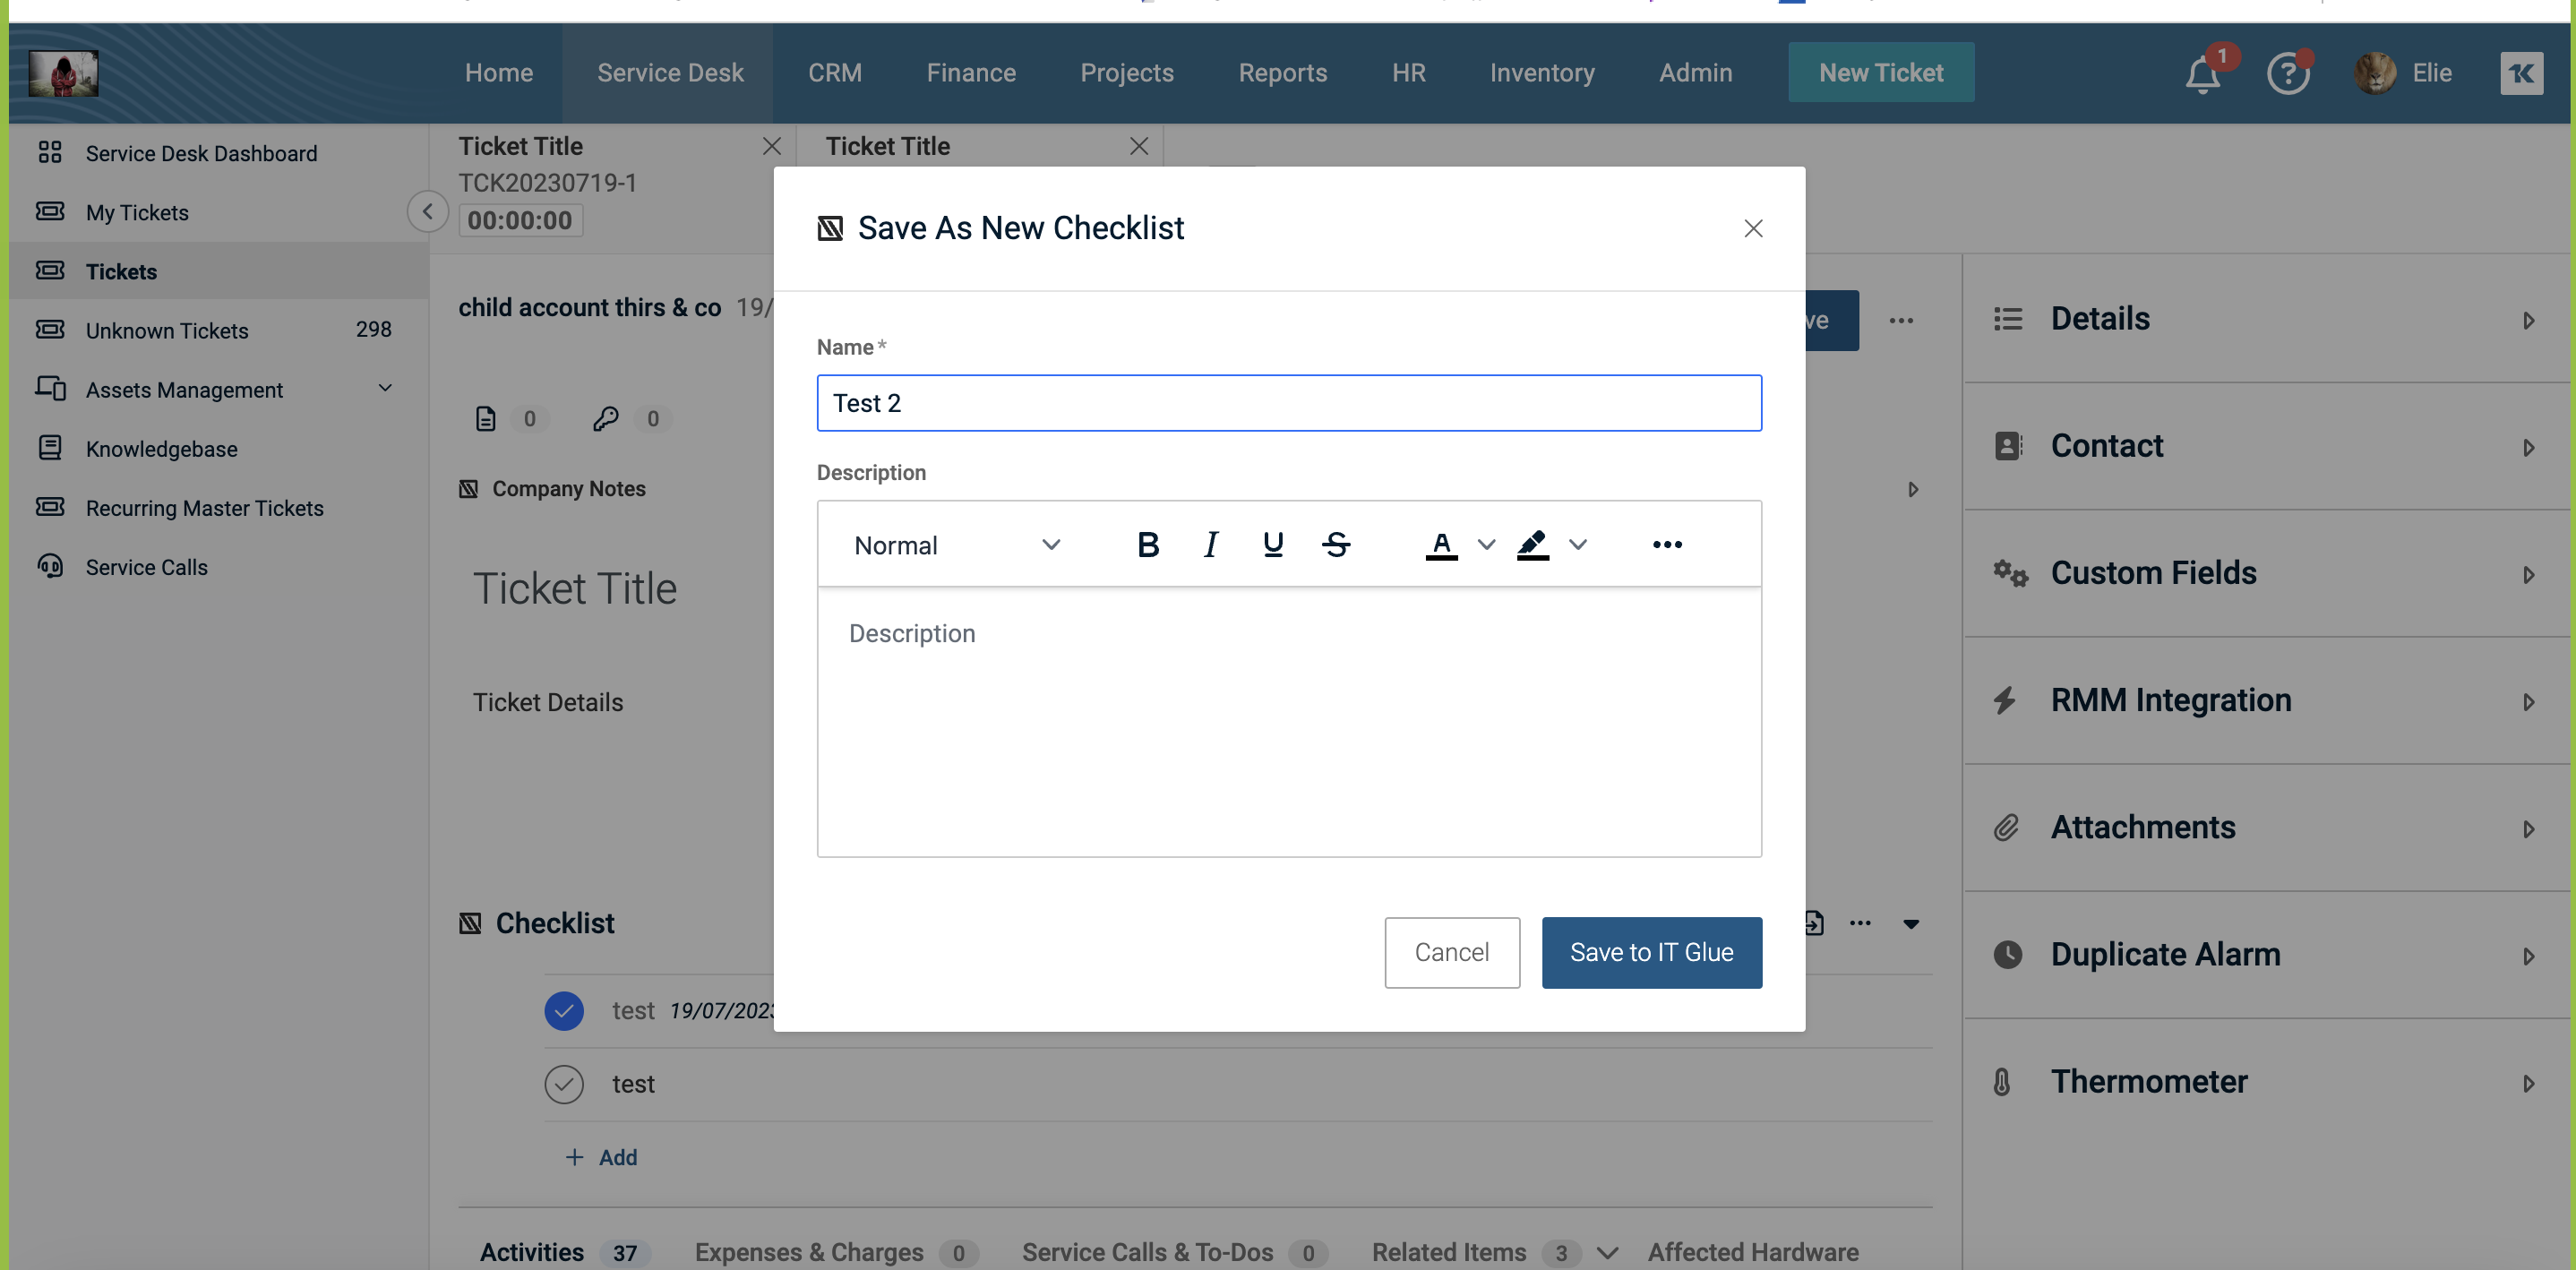
Additionally, you can save the set of tasks that you added above as a template by itself. Click the ellipsis option next to the Templates icon, and you will be able to explore more options. You can hide the checklist, copy the checklist to clipboard or save as a new template. Also, you can delete the checklist.
- Click the ellipsis icon next to the Import from Templates icon.
- Select Save As New Template option from the list.

- In the Save as New Template window, provide a name and a description for the template.
- Click Save to IT Glue button. You will find a success message in green on the top part of the ticket.
You can verify this with the following process:
- Click the Import from Templates icon.
- From the list of templates, go to the template that you saved just now.
- Select the template and click Add to Ticket. The entire set of tasks will appear above attached to the ticket. You will be able to see the blue tick marks appearing as the tasks are executed. Remember, the IT Glue embedded checklists work only if there is an active IT Glue integration connection. If the connection is disconnected for some reason, you will see a message to the effect and you will not be able to use the embedded checklists feature. In such a case, the icons will be grayed out and inactive.


