BMS-MS Teams integration
Introduction
The BMS integration with Microsoft Teams provides users with an alternate method for receiving the notifications generated by ticket workflow rules. Instead of a mailbox, the notification is sent to a webhook URL and posted to a Microsoft Teams channel. In BMS workflow, a notification is configured to be sent to a Teams channel when a specific event occurs. In addition, it is possible to add additional filters to the events.
Each post contains a variation of the following information: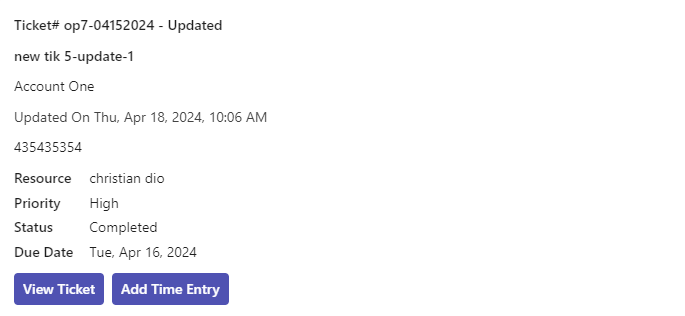
-
Ticket Number
-
Event (This is either "ticket created on" date or "updated on" date. The date displayed related to the event will be one of these.)
-
Ticket Title
-
Account (In case of a contact, then the format will be contact.account.) In case there is no contact present, then the format is just 'Account.'
-
Description
-
Primary Resource (If there is no primary resource, then the ticket falls back on to the queue.)
-
Priority
-
Status
-
Note Added by
-
Note Date
-
Time Added by
-
Time Log Date
-
Time Spent
-
Expense Added by
-
Expense Date
-
Expense Type
-
Expense Amount
-
Due Date (All dates and time are displayed based on the time zone of the user.)
Below the information fields are two action buttons:
-
View Ticket
-
Add Time Entry
Clicking a button will open the respective ticket or new time entry popup in BMS. If you are not logged in, you will be asked to authenticate.
Configuration
To set up the integration, the following steps are required in BMS and Microsoft Teams. You can either go to Teams > Ellipsis (...) > Workflows or go to Microsoft 365 account > My apps > Power Automate from the apps listed.
In Microsoft Teams, you can set up the channel or chat to which BMS will send notification via a webhook.
The configuration can be performed from Teams as follows:
Configuring incoming webhooks in Teams
To create a webhook for a channel from Microsoft account, do the following. (For steps according to Classic Teams, see Create an Incoming Webhook under this link and go to Classic Teams tab.)
-
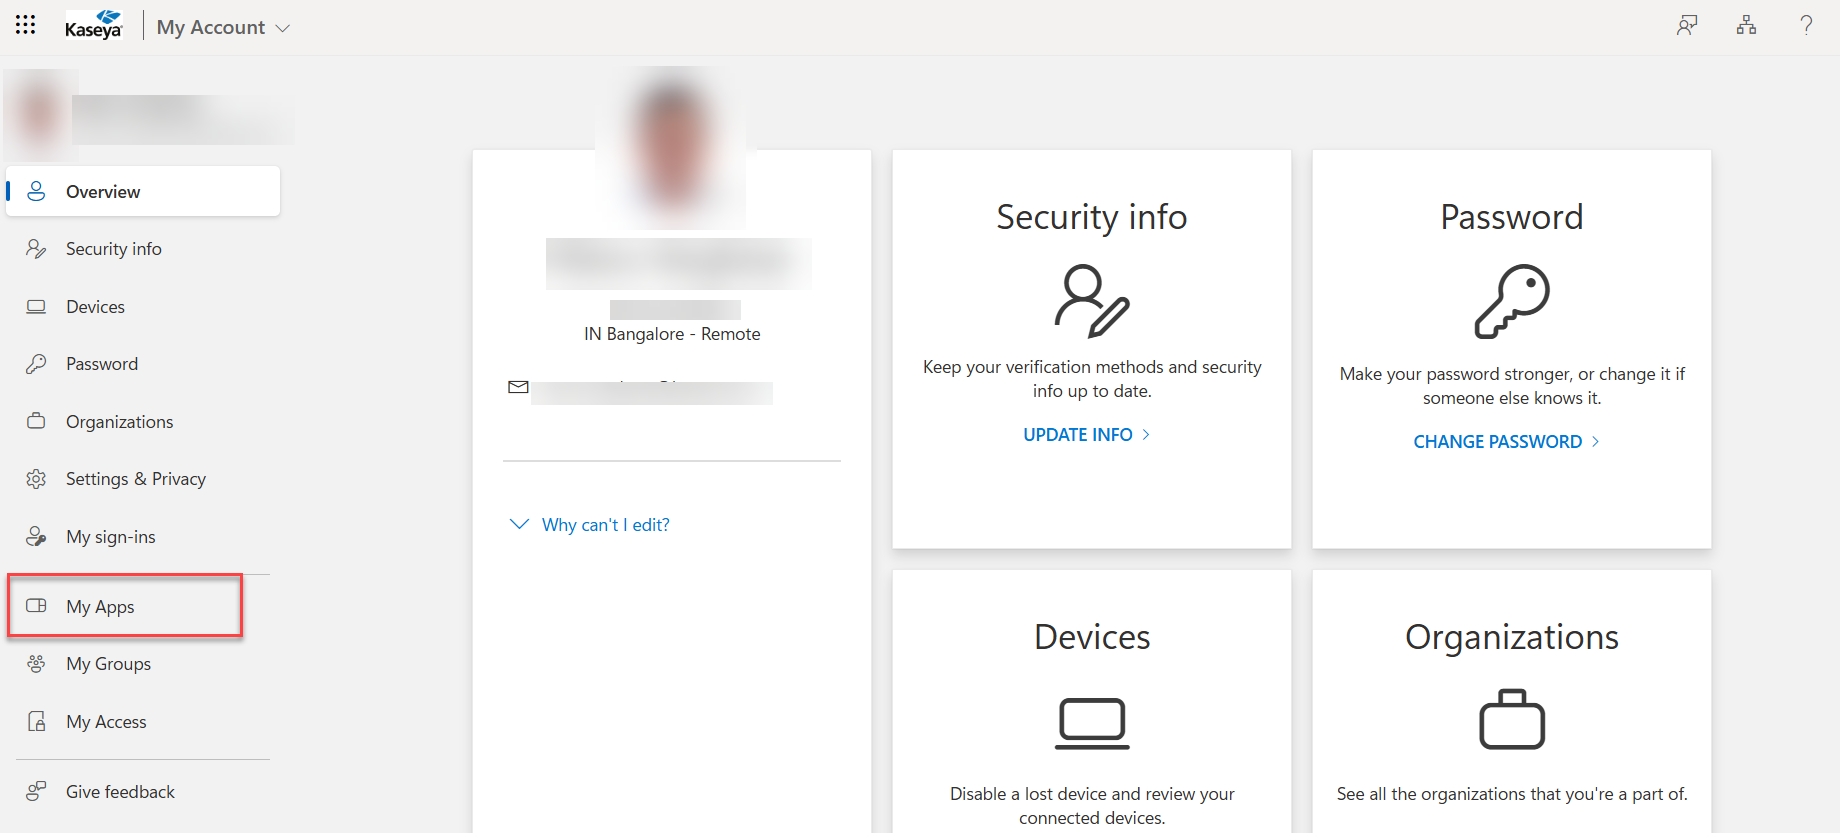
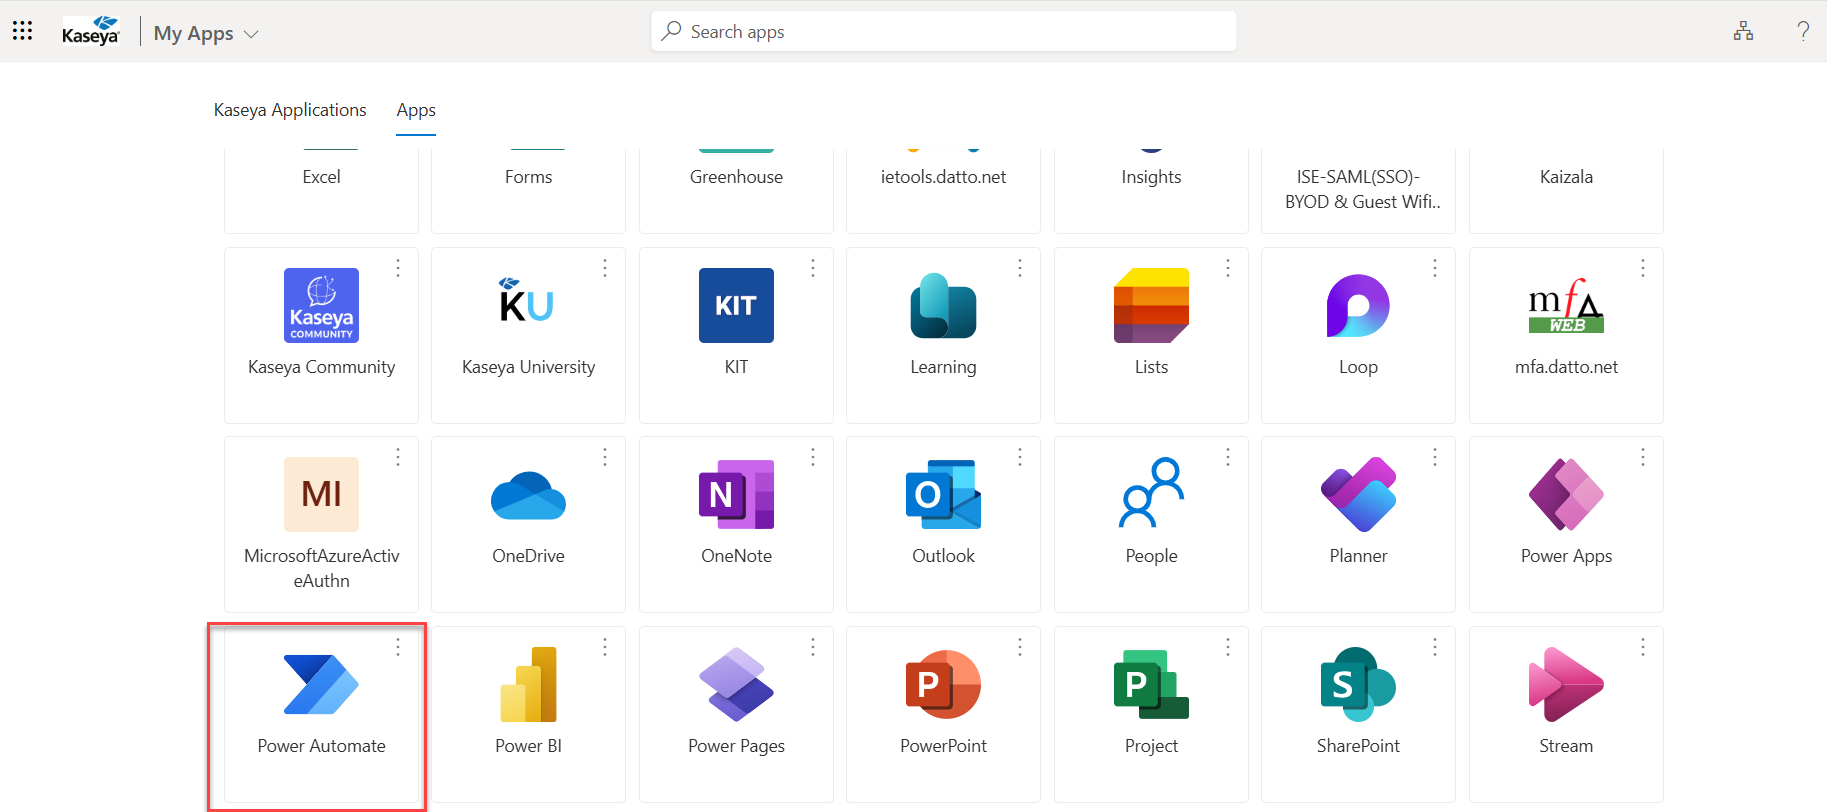
Log into your Microsoft 365 account > My Apps > Power Automate.
-
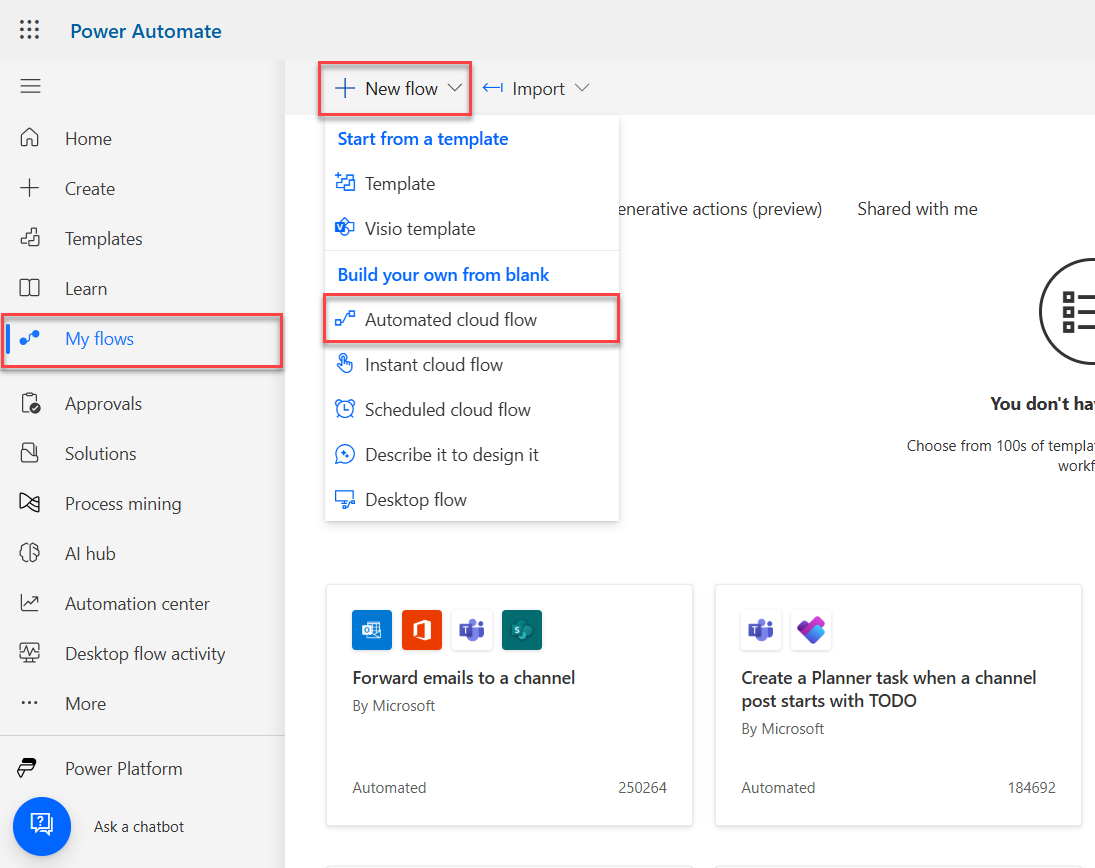
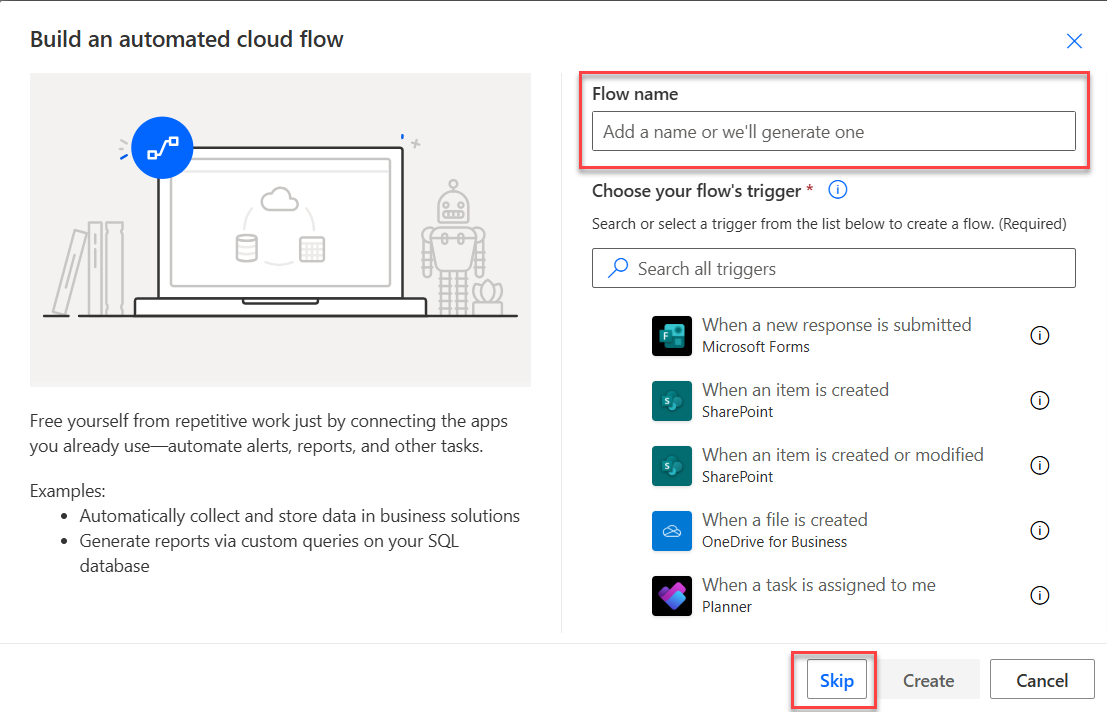
Next, go to My flows > New flow > Automated cloud flow.
-
Enter a flow name then click Skip.
-
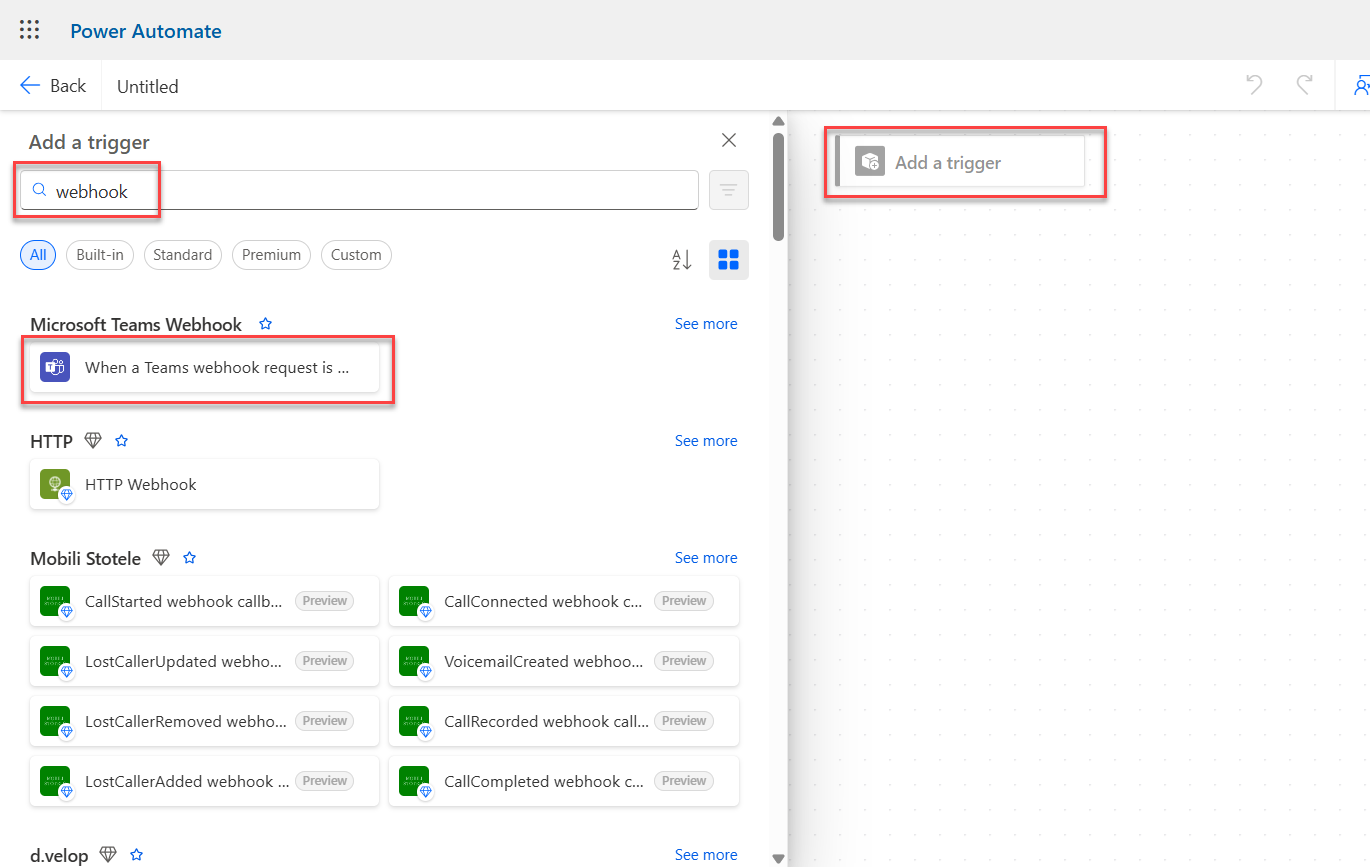
Add a trigger. Search webhook and select When a Teams webhook request is received when it appears below.
-
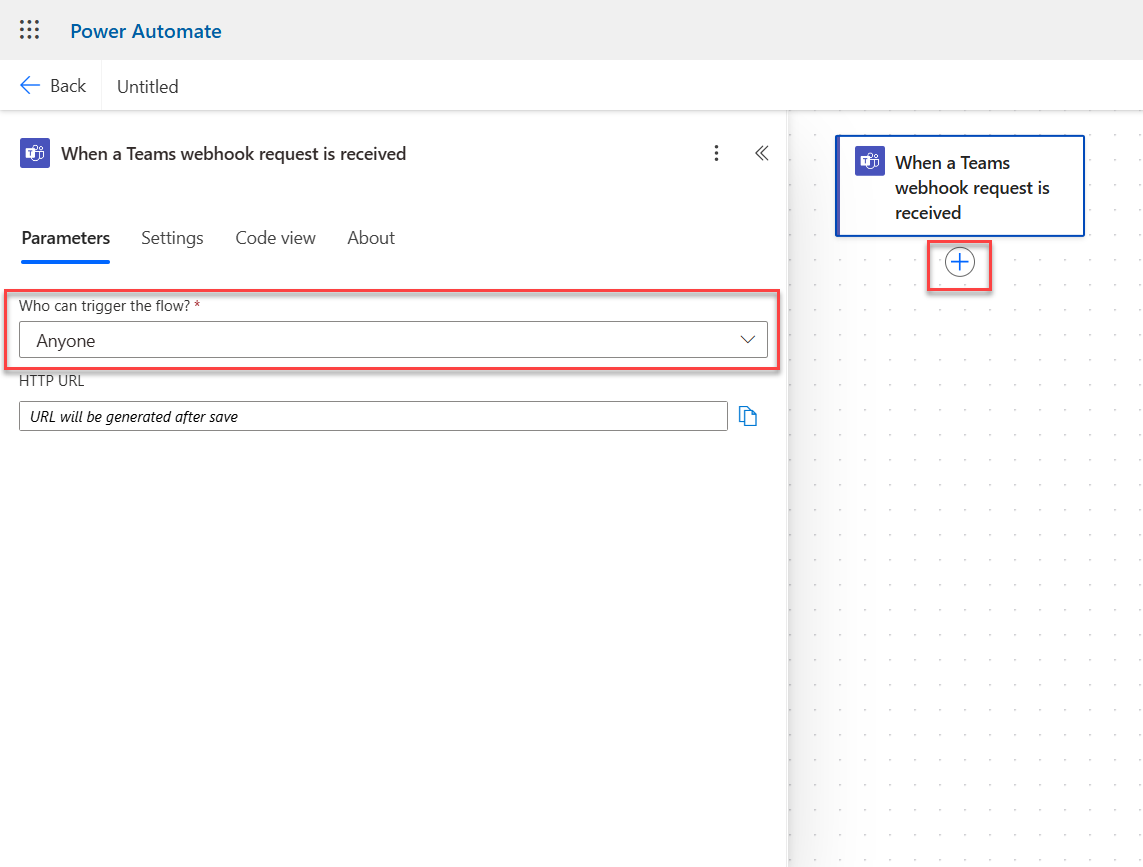
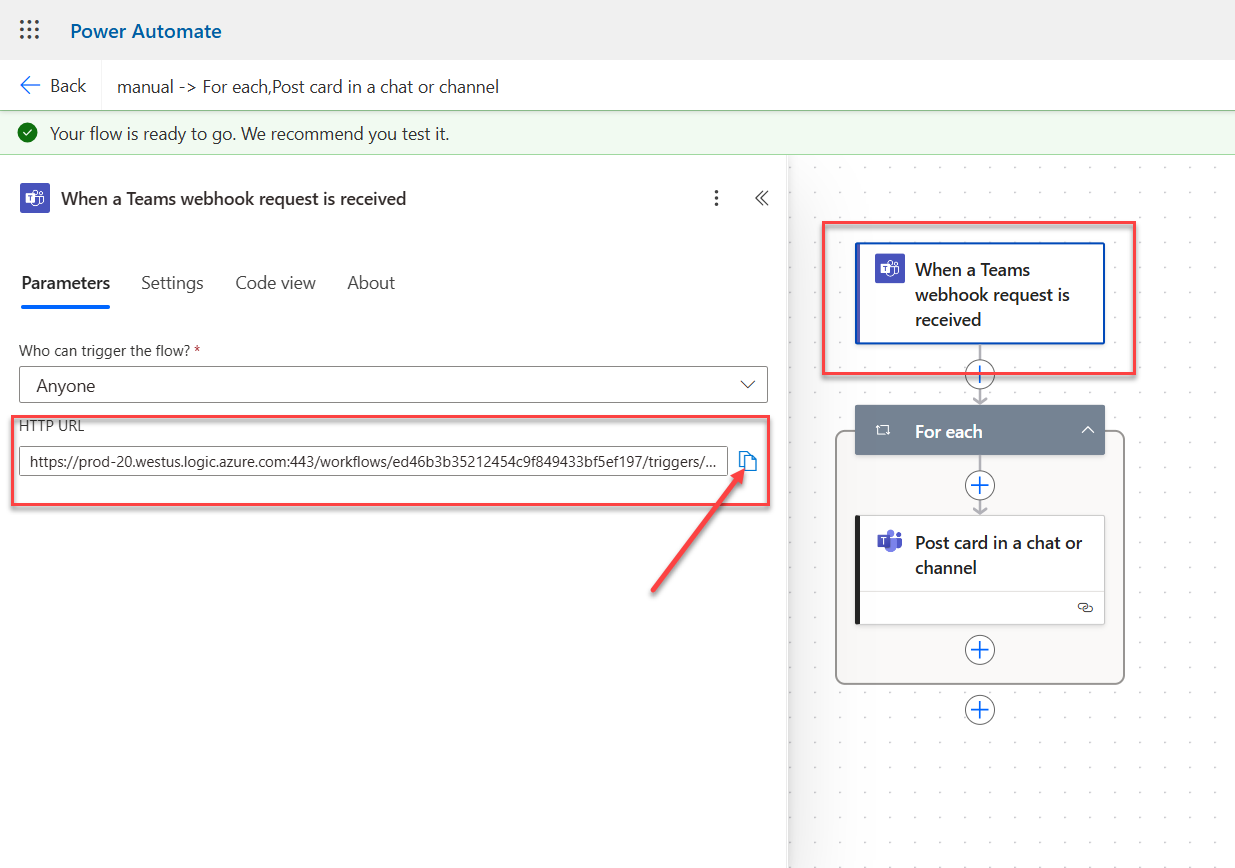
Under Who can trigger the flow?, select Anyone.
-
Click the + sign beneath When a Teams webhook request is received to add an action.
-
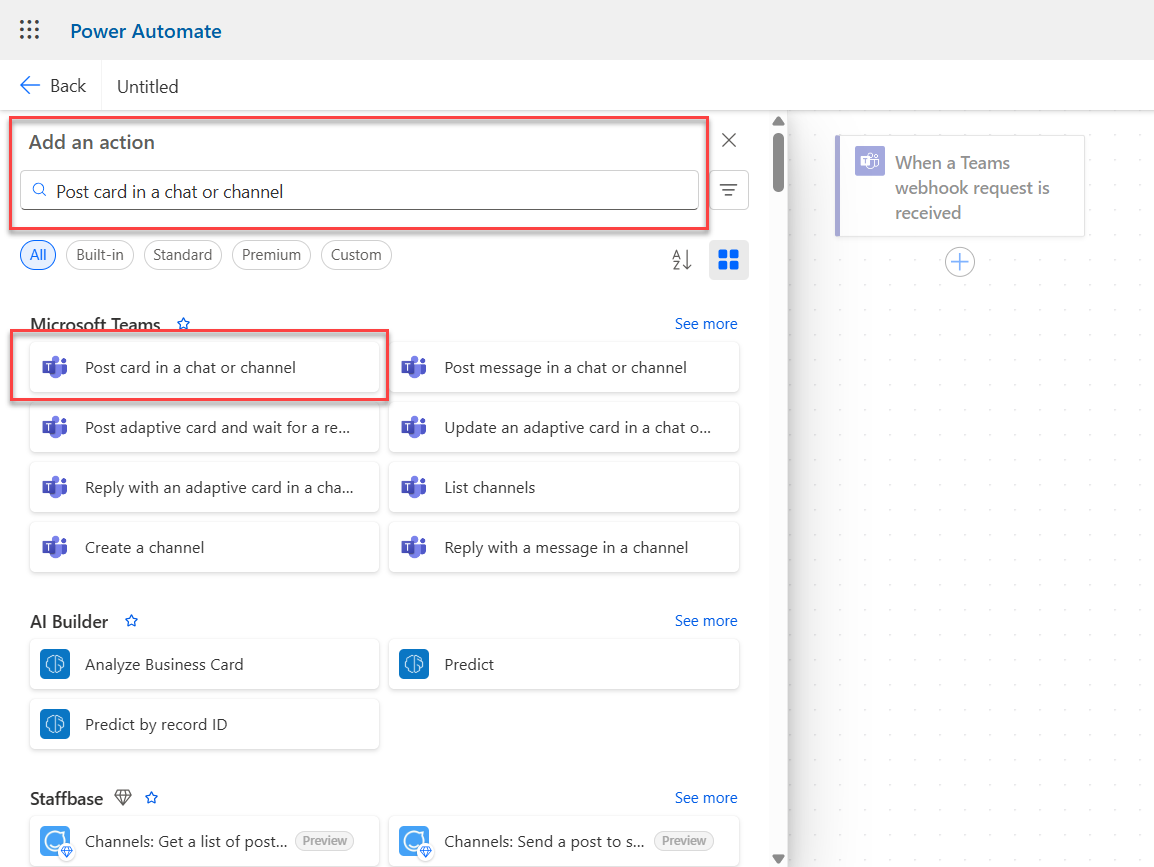
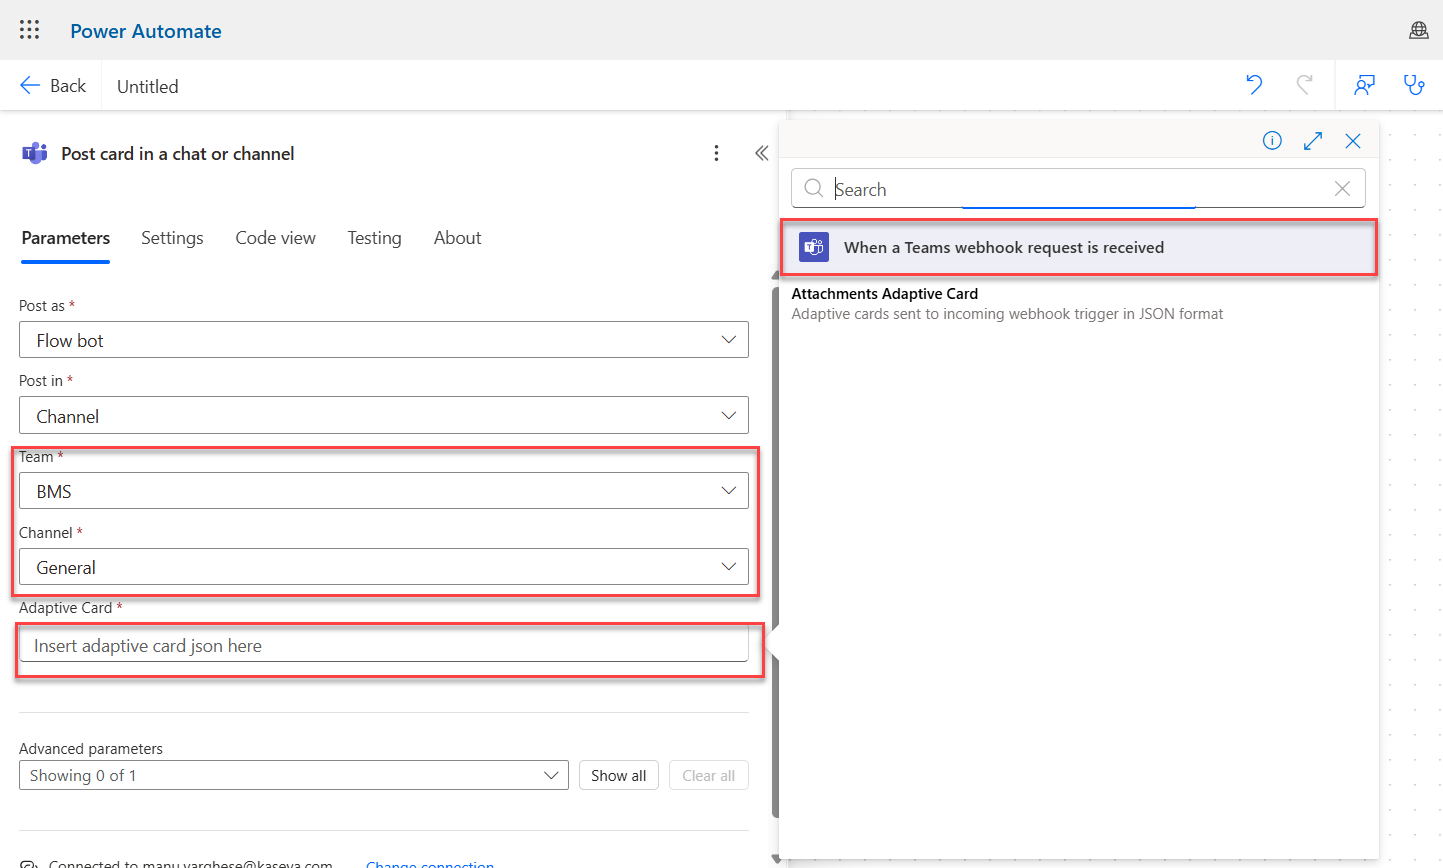
Search and select Post card in a chat or channel.
-
Do the following:
-
Post as: By default, Flow bot is selected. Leave it as it is.
-
Post in: By default, Channel is selected. Leave it as it is. Follow the steps indicated below in the image.
-
Team: Select the appropriate team from the dropdown.
-
Channel: Select the appropriate channel from the dropdown.
-
Adaptive Card: Click the end of the field and select When a Teams webhook is received.
-
-
After you save, click the trigger When a Teams webhook request is received. The screen will change slightly and the HTTP URL field will appear. Copy the HTTP URL by clicking the copy icon and paste it while creating the connector in BMS as shown in the image after step 6 in the next section.
Creating Teams channel connectors in BMS
Once the incoming webhook URLs are set up in Teams, the connectors must be set up in BMS.
-
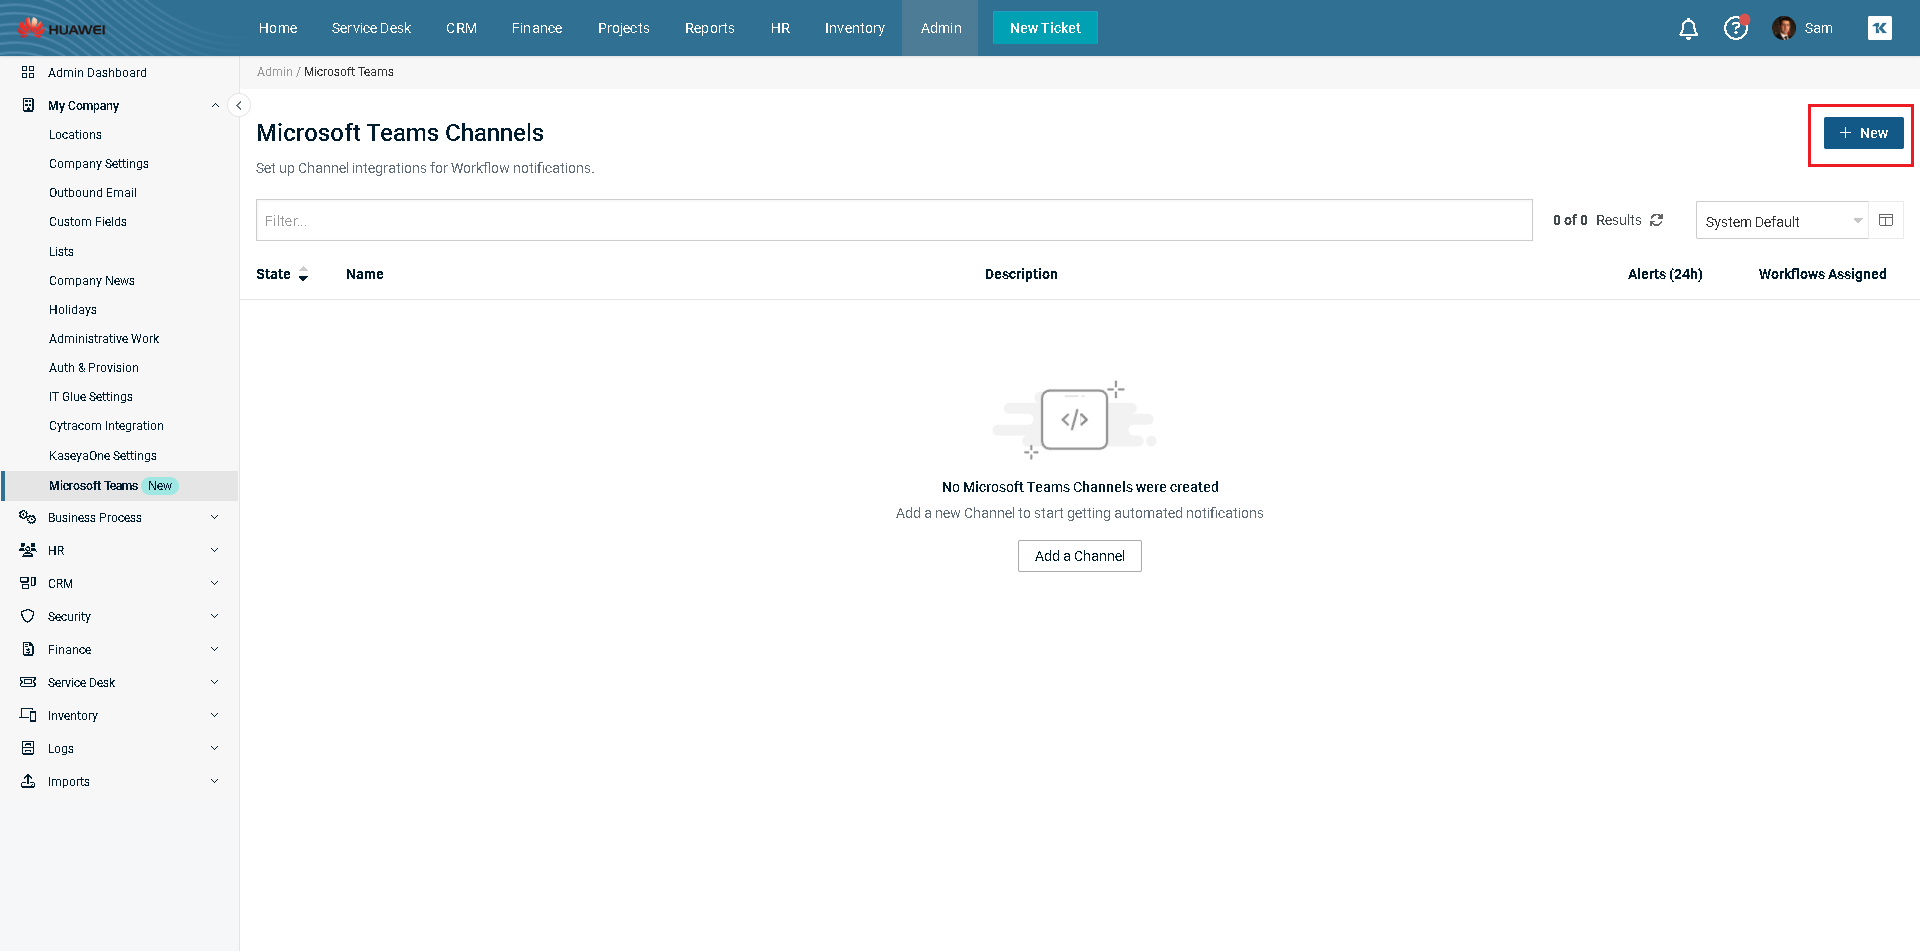
Go to Admin > Integrations > Microsoft Teams.
-
Click New. The Manage Teams Channel page opens.
-
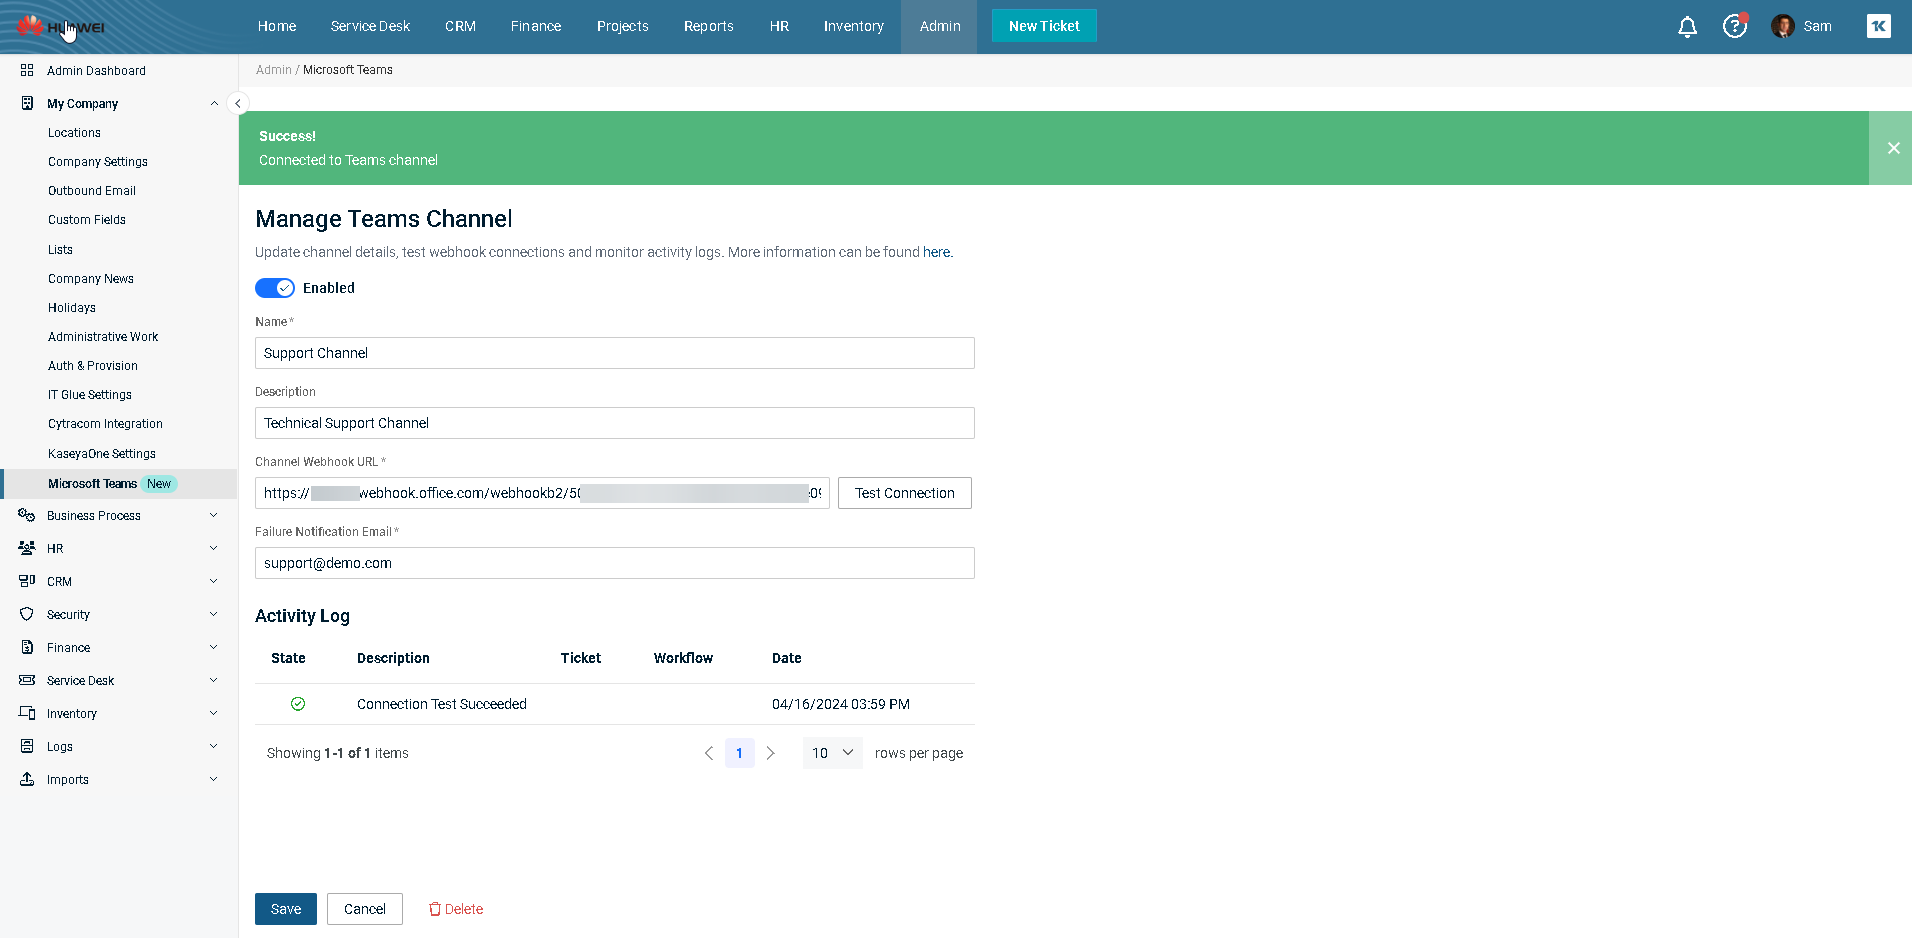
Name: Enter a name for the channel. The name can be anything.
-
Description: Enter a brief description for the channel.
-
Channel Webhook URL: Enter the same webhook URL that you copied earlier. Once you paste the URL, you can also test the connection by clicking Test Connection.
-
Failure Notification Email: Enter a valid email to be notified in case of failure.
-
Click Save.
Setting up workflow rules to post notifications to Teams
The final step is to configure ticket workflow rules to post notification to a Teams channel instead of, or in addition to, sending an email notification.
-
Create or edit a ticket workflow rule. For more information, see Getting started with workflows.
NOTE In this first iteration, tickets are the only entities that are supported.
-
Go to General tab > Triggers tab > Notifications tab of the workflow rule form.
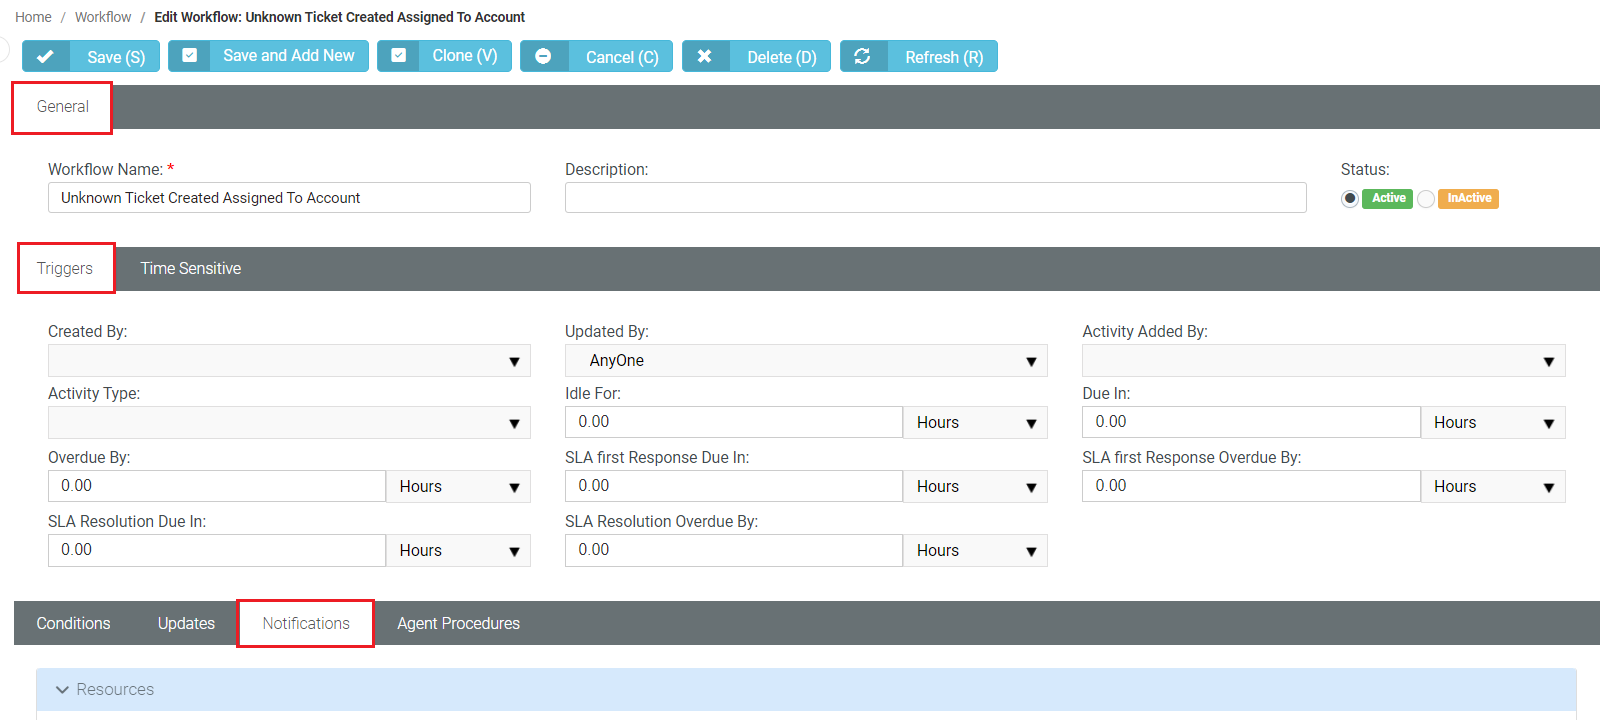
-
In the section called Channels, select the appropriate checkboxes under Microsoft Teams Channel.
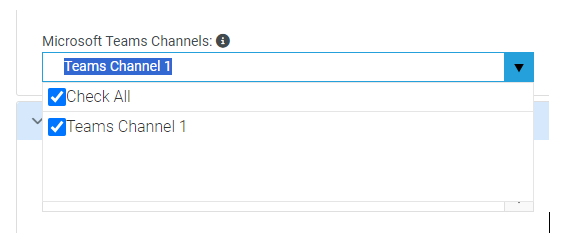
-
Click Save. Every time the workflow rule fires, the notification will be posted to the selected channels.
Failure notification emails
In case the notification delivery fails twice or more, a warning will be sent to the email address specified under the integration's Failure notification email. This will continue until the fifth failure, and in the sixth time, the integration will be disabled, and the same email address will be notified.
Limitations and restrictions
Supported entities
At this time, only tickets are supported.
Number of channels
Each customer can create up to 100 Microsoft Teams connections in BMS.
Message size and rate
On the Microsoft side, the following limits and restrictions apply:
| Parameter | Limit |
| Message Size | 28 KB |
| Rate |
4 messages/second 60 messages/30 seconds 3,600 messages/hour 86,400 messages/day |


