Workforce Planner
PERMISSIONS Users with the Administrator or Project Manager security role and users with Modify permission for Home > Workforce Planner have full access to Workforce Planner. Users with only View permission for Home > Workforce Planner can view and filter the calendar but cannot modify tasks.
NAVIGATION Home > Workforce Planner
NAVIGATION Admin > Logs > Workforce Planner
Workforce Planner streamlines project management by providing a centralized view of resource availability, roles, and task assignments for each day. Administrators and project managers can efficiently allocate tasks to appropriate specialists and visualize upcoming task timelines for effective planning. Workforce Planner offers all users easy access to their current tasks and team schedules, fostering transparency and collaboration.
Personas and usage scenarios
Workforce Planner involves the following personas:
- Administrators, project managers, or other employees with Modify permission for Home > Workforce Planner (for example, lead engineers), who are responsible for assigning tasks to resources.
- The resources (for example, technicians or engineers) who are assigned to tasks and have only View permission for Home > Workforce Planner.
- The resources (for example, technicians or engineers) who are assigned to tasks and do not have permission to access Workforce Planner.
Tasks assigned via Workforce Planner are automatically reflected on the assigned resource’s My Calendar page regardless of their Workforce Planner permission level. Users with Modify or View permission have visibility of that resource's assigned task within the Workforce Planner calendar.
Your team’s experience with Workforce Planner is shaped by the way tasks are configured in the Projects module. Expand the following scenarios for workflow examples.
EXAMPLE In the following scenarios, Tara Tasker is a project manager with Modify permission for Home > Workforce Planner, Div Master is an engineer with only View permission for Home > Workforce Planner, and Ray Sponsive is a technician without permission to access Workforce Planner.
Tara Tasker uses this workflow to fully leverage Workforce Planner for task assignment and scheduling.
As the Members tab is left blank and the task is created, the task appears in the Workforce Planner Tasks pane as an unassigned task. To learn how to filter the Tasks pane by unassigned tasks, refer to Filtering tasks in Task management.
With her Modify permission, Tara Tasker has the option to assign this task in Workforce Planner. With his View-only permission, Div Master cannot see the unassigned task in the Workforce Planner Tasks pane and cannot assign it to himself or Ray Sponsive. With no access, Ray Sponsive also does not have visibility of the task in Workforce Planner.
If Tara Tasker assigns this task to Ray Sponsive in Workforce Planner, both she and Div Master can see that the task is assigned to Ray Sponsive in the Workforce Planner calendar. Ray Sponsive can see that the task has been assigned to him from his My Calendar page but not within Workforce Planner.
Tara Tasker uses this workflow to either leverage Workforce Planner for task scheduling or allow assignees to manage their own scheduling on the My Calendar page, which is then reflected in Workforce Planner.
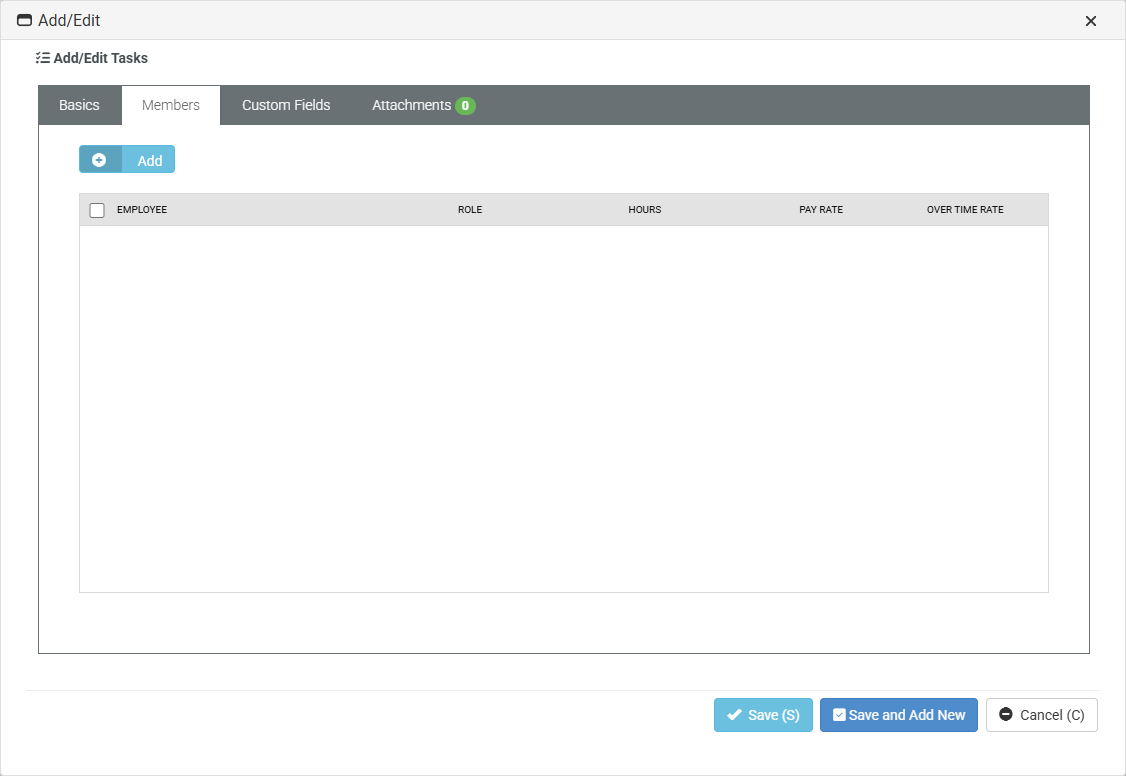
As Tara Tasker adds Div Master to the Members tab and the task is created, the task appears in the Workforce Planner Tasks pane as an assigned task. To learn how to filter the Tasks pane by assigned tasks, refer to Filtering tasks in Task management.
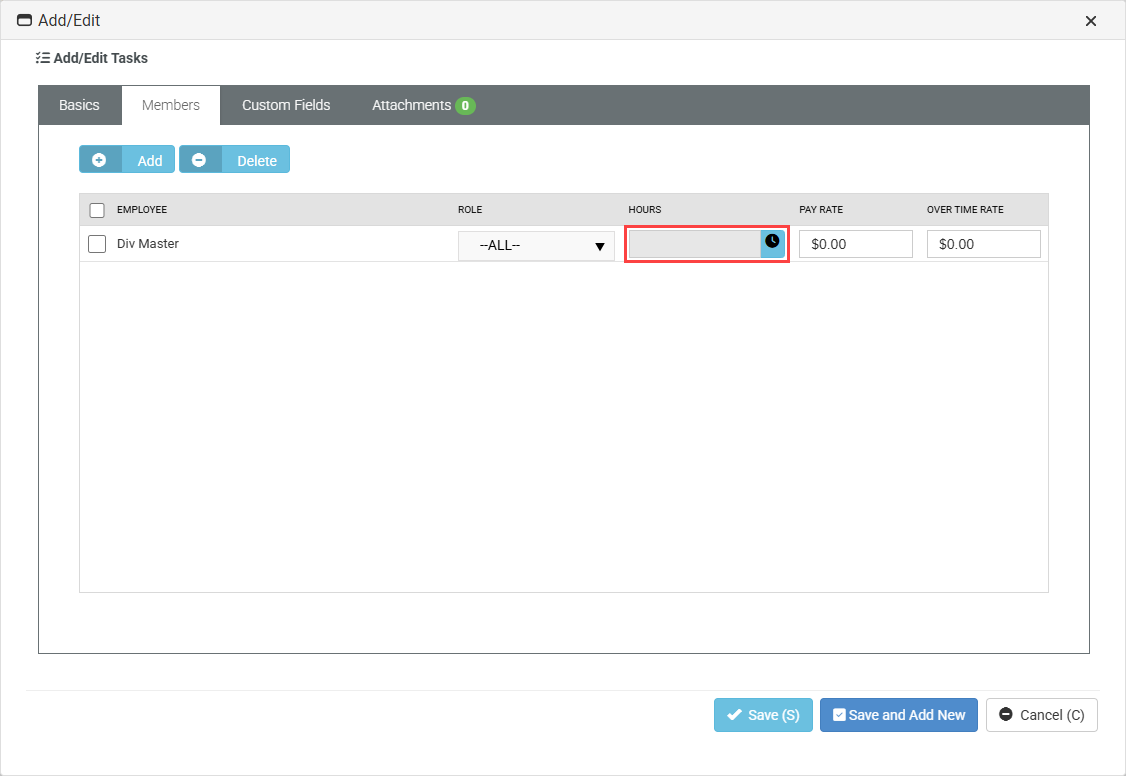
Div Master can see that the task is assigned to him from his My Calendar page but not within the Workforce Planner calendar, as Tara Tasker did not configure hours for the task. With his View-only permission, he also cannot see the assigned task in the Workforce Planner Tasks pane.
Because the task has no configured hours, it appears at the bottom of the My Calendar page, where Div Master can drag it to the appropriate time slot in his calendar. Once he does so, the task appears in that time slot in the Workforce Planner calendar, which is visible to both him and Tara Tasker.
Tara Tasker uses this workflow to establish task assignment and scheduling upon task creation, which is then reflected in Workforce Planner and on the assignee's My Calendar page.
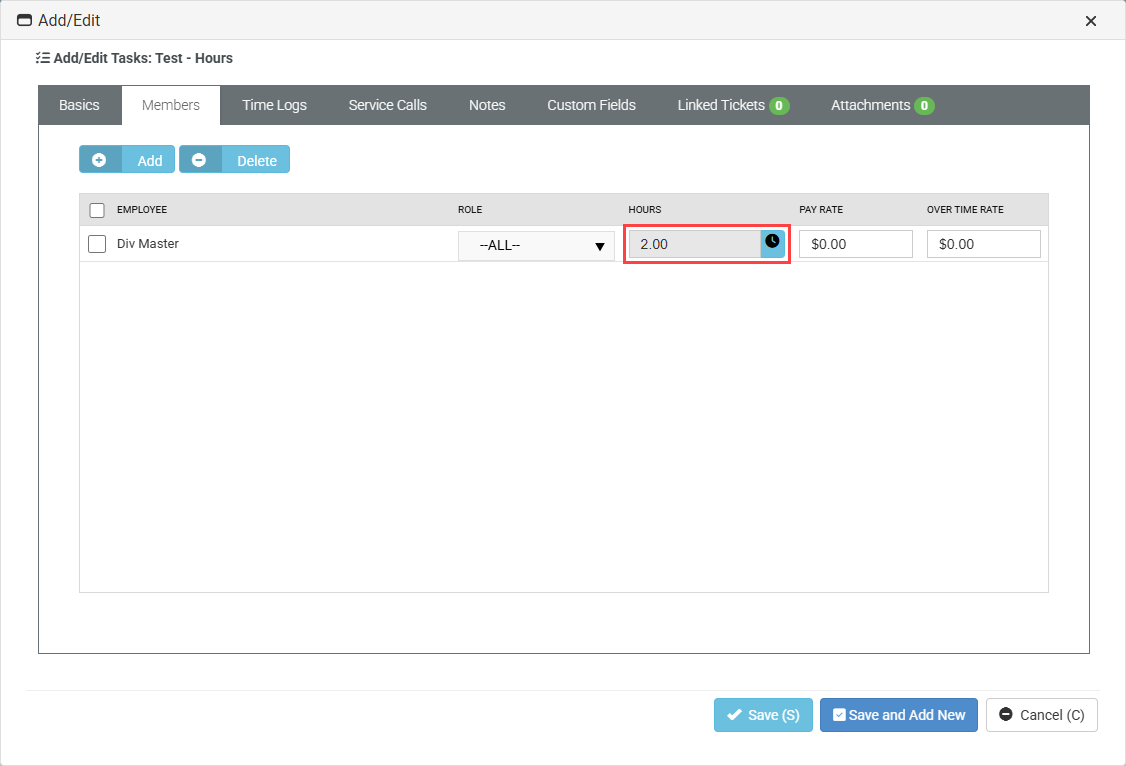
As Tara Tasker adds Ray Sponsive to the Members tab and the task is created, the task appears in the Workforce Planner Tasks pane as an assigned task. To learn how to filter the Tasks pane by assigned tasks, refer to Filtering tasks in Task management.
Because the task was created with set hours, it appears in its configured time slot in the Workforce Planner calendar, which is visible to both Tara Tasker and Div Master. Ray Sponsive can see that the task is assigned to him from his My Calendar page (in the time slot configured by Tara Tasker) but not within Workforce Planner.
Page layout
EXAMPLE The following screenshot shows the Workforce Planner calendar view for August 18, 2025. The Tasks pane is filtered by a project named Miami Office Opening. The resources April Time, Bill Ledger, and Tim Tracker are assigned tasks for this project during their scheduled shifts. Tim Tracker's task appears with a warning indicator because it has a start date and end date of August 15 but was scheduled within Workforce Planner for August 18.
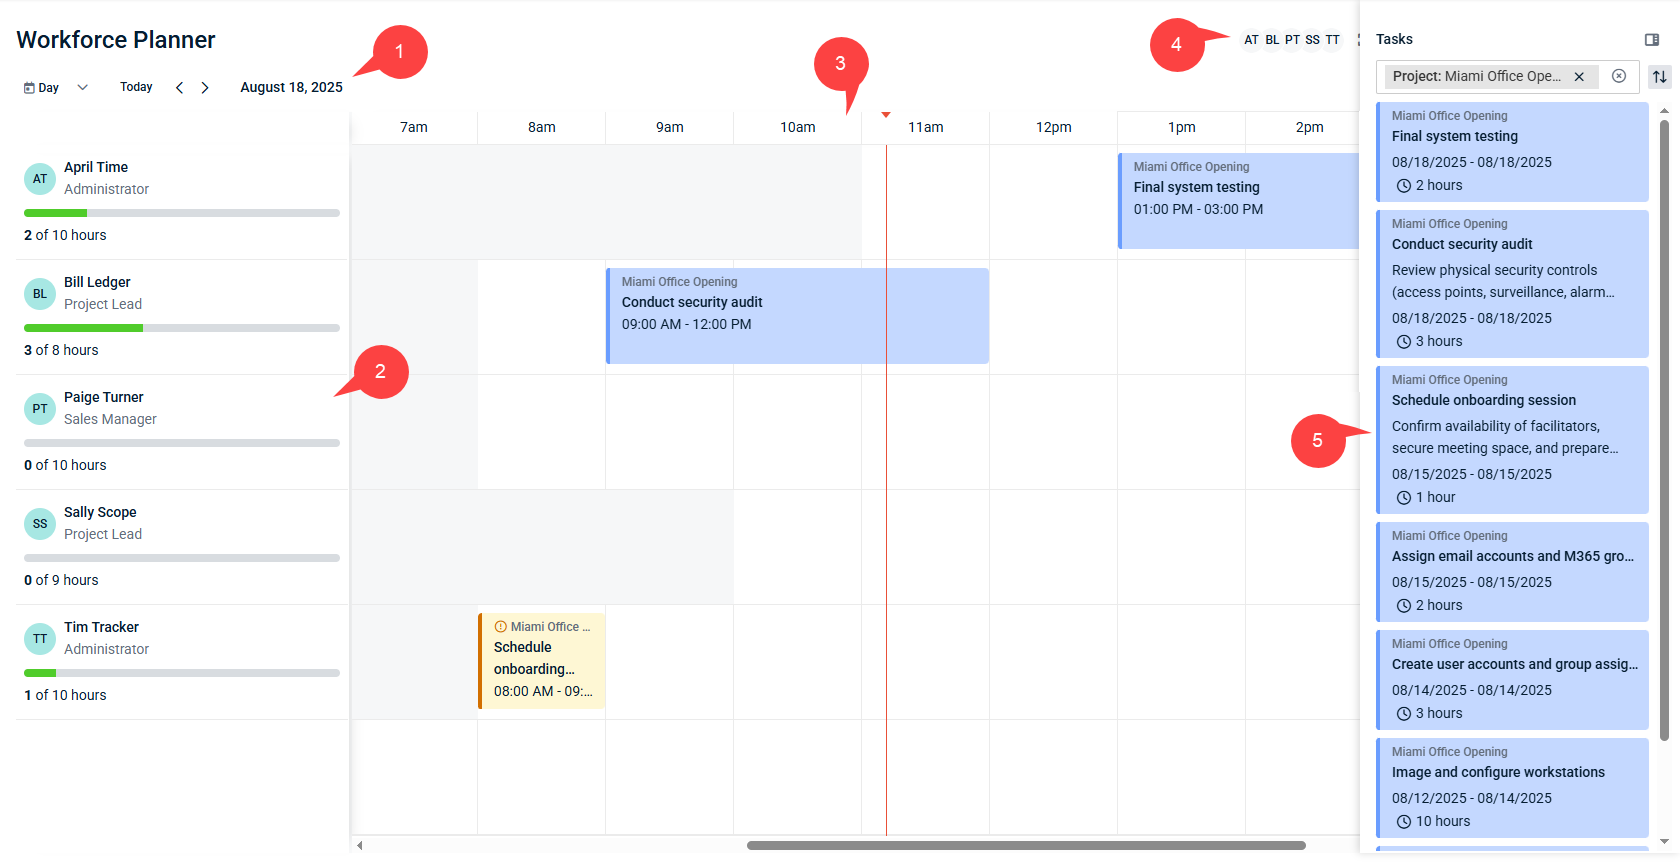
The following are descriptions of the various components of Workforce Planner highlighted in the preceding screenshot:
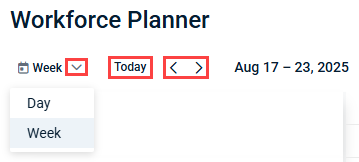
1. Calendar view selector
In the upper-left corner of the page, view the calendar for a specific week or specific day using the Week/Day drop-down menu, the Today option, and/or the left and right arrows. You can sort employees by available hours (how much time is not scheduled). 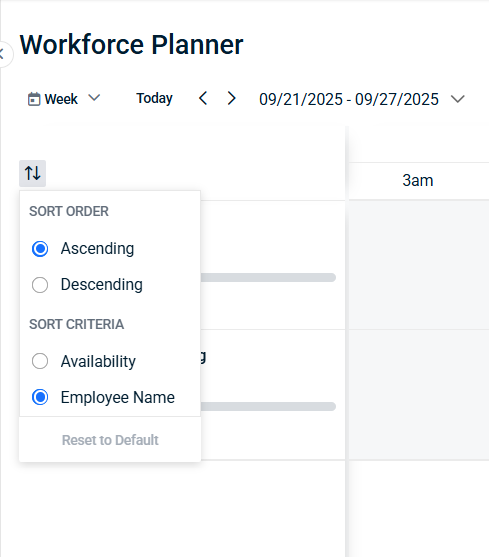
You can use calendar picker to select particular date or week without moving units one by one with arrows.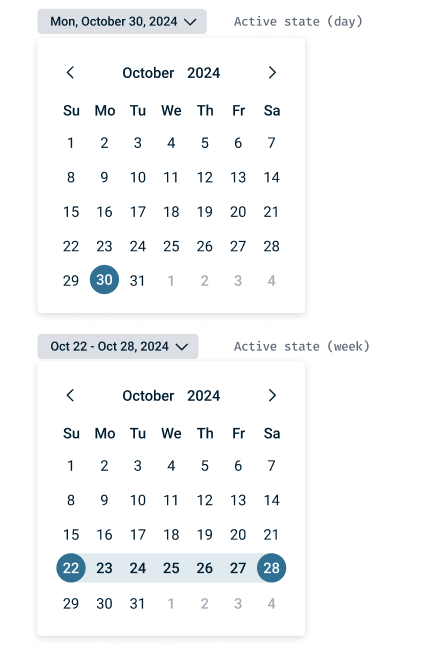
For more details, refer to Calendar views.
2. List of resources
On the left side of the page, view the list of employees in your company, including their job titles and availability for tasks within the selected calendar view.
For more details, refer to Resource management.
3. Calendar
In the middle of the page is the calendar that reflects the selected calendar view. The red line on the calendar marks the current time based on the logged-in user’s time zone.
The white blocks and gray blocks represent resources' work hours. In each resource's row of the calendar, white blocks represent hours within their shift and gray blocks represent hours outside of their shift. Employee shifts are configured in the Shifts tab after selecting an employee from the HR > Employees page.
You can see all hours of the entire day or entire week, depending on your selected calendar view, using the scroll bar at the bottom of the page.
Tasks added to the calendar from the Tasks pane appear as tiles within the row of the resource who is responsible for the task.
4. Calendar options toolbar

In the upper-right corner of the page, the following options are available in a toolbar:
- Resources filter: Allows you to filter Workforce Planner by resources. For more details, refer to Filtering by resources in Resource management.
- Full-screen mode: Click the icon to enter
 or exit
  full-screen mode. Entering full-screen mode enlarges the Workforce Planner page and hides the left navigation menu and header.
 - Tasks pane: Click the tasks icon
 to show or hide the Tasks pane. Refer to the next section for details.
5. Tasks pane
Users with Modify permission for Home > Workforce Planner can show or hide the list of tasks available to add to or remove from the calendar by clicking the tasks icon ![]() in the upper-right corner of the page. You can filter for and sort specific tasks using the Filter bar and sort option at the top of the pane.
in the upper-right corner of the page. You can filter for and sort specific tasks using the Filter bar and sort option at the top of the pane.
For more details about managing tasks from the Tasks pane and within the calendar, refer to Task management.
Understanding Workforce Planner
Expand the following sections to explore the key areas of Workforce Planner and learn how to use its tools.
The default view of the Workforce Planner calendar is the current week. The options available within the calendar view selector in the upper-left corner of the page allow you to change the current view. Upon navigating away from the page, the calendar view returns to the default view (current week).
Day view
To view a specific day's calendar, select Day from the drop-down menu. The default view is the current day. To view a different day's calendar, click the left or right arrows to proceed to previous or future days, respectively. To return to viewing the calendar for the current day, click Today.
Use the scroll bar at the bottom of the page to see all hours in the selected day.
Week view
To view a specific week's calendar, displayed as Sunday through Saturday, select Week from the drop-down menu. The default view is the current week (with the current day and time in the center of the page until you scroll). To view a different week's calendar, click the left or right arrows to proceed to previous or future weeks, respectively. To return to viewing the calendar for the current week, click Today.
Use the scroll bar at the bottom of the page to see all hours of all days in the selected week. The day you are currently viewing within the selected week appears at the top of the calendar as you scroll.
Resource management
Workforce Planner resources are the employees who belong to your company (users in the system). These resources can be assigned tasks on particular days within Workforce Planner by users with Modify permission for Home > Workforce Planner.
By default, the list of resources on the left side of the page displays all employees alphabetically by first name. The calendar contains a row for each resource in the list, where tasks can be assigned and monitored.
The list displays each resource's initials or photo uploaded in My Settings, first name and last name, job title, and availability.
Click and drag the edge of this section to resize the width of the list of resources. Narrowing the list of resources allows you to view more hours in the calendar. Navigating away from the page restores the list to its default size.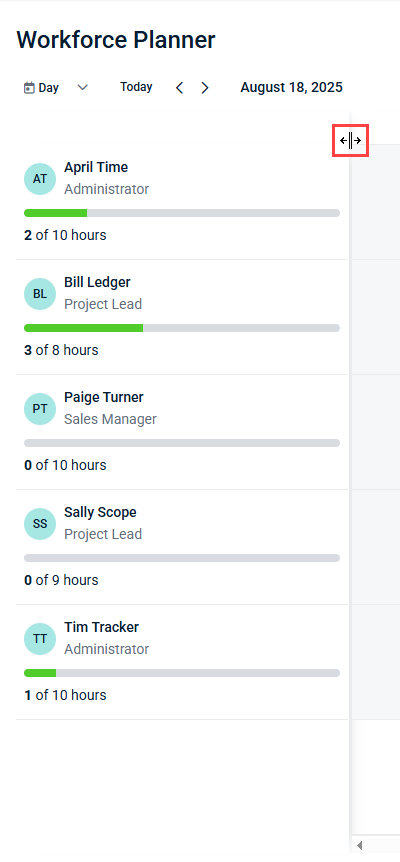
An availability bar is displayed for each resource. The bar indicates the number of hours the resource is scheduled for tasks in the selected calendar view out of their total number of working hours in the selected calendar view.
NOTE Employee shifts, which determine resources' total working hours displayed in Workforce Planner, are configured in the Shifts tab after selecting an employee from the HR > Employees page.
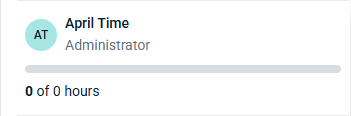
EXAMPLE The resource April Time is scheduled to work 10 hours per day, Monday through Friday. In a certain week, April has been assigned a two-hour task on Tuesday, a three-hour task on Wednesday, and a 15-minute task on Friday. In the day calendar view for Tuesday, her resource availability bar displays 2 of 10 hours. In the week calendar view, her resource availability bar displays 5.25 of 50 hours. In the day calendar view for Saturday, her resource availability bar displays 0 of 10 hours, as she is not scheduled to work any hours on the weekends.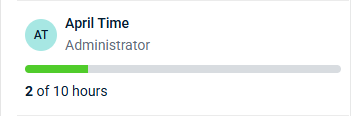

Availability bar color coding
![]() Gray indicates the portion of the resource’s total working hours that are not scheduled with tasks in the selected calendar view.
Gray indicates the portion of the resource’s total working hours that are not scheduled with tasks in the selected calendar view.
![]() Green indicates the portion of the resource’s total working hours that are scheduled with tasks in the selected calendar view.
Green indicates the portion of the resource’s total working hours that are scheduled with tasks in the selected calendar view.
![]() Red indicates that the hours scheduled with tasks exceed the resource’s total working hours in the selected calendar view, in which case the entire bar appears in red.
Red indicates that the hours scheduled with tasks exceed the resource’s total working hours in the selected calendar view, in which case the entire bar appears in red.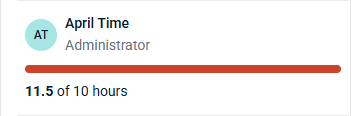
The resources filter in the upper-right corner of the page allows you to select which resources are displayed in the calendar. The filtering selections persist if you navigate away from the page and return to it.
The initials of up to six resources (alphabetical by first name) are visible. Hovering over an initial reveals the resource's full name.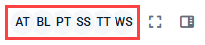
In environments with more than five resources, the initial of the first five resources are visible, and the full names of the additional resources are displayed in a drop-down menu.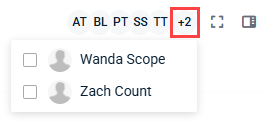
In environments with 10 or more resources, the drop-down menu includes a search box.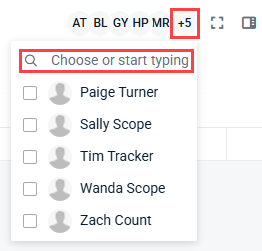
To filter Workforce Planner by resources, complete the following steps:
- Click any number of resource initials to filter by those resources.
- If applicable, click +[number of additional resources] to open the drop-down menu of additional resources.
- Select any number of check boxes to filter by those resources. If applicable, search for a specific resource by entering all or part of their first or last name in the search box. The results are narrowed as you type.
Your filtering selections are automatically applied. Once filtered, Workforce Planner shows only the resources you selected and their calendar rows. To clear selections, click the initials again or clear selected check boxes in the drop-down menu.
Task management
Task management plays a central role in Workforce Planner. Users with Modify permission for Home > Workforce Planner can assign tasks to resources from the Tasks pane. To learn about task management scenarios and how to leverage Workforce Planner alongside the My Calendar page, refer to Personas and usage scenarios.
IMPORTANT For tasks to appear in Workforce Planner, they must first be created in the Projects module. For details, refer to Tasks in Projects - overview.
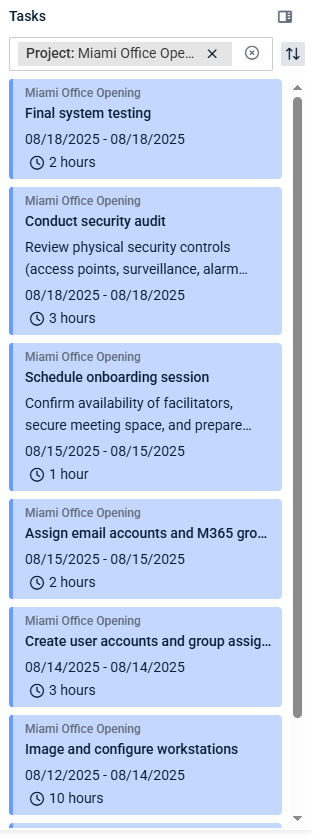
The Tasks pane on the right side of the page contains a list of all tasks with the statuses New, Open, In Progress, or Blocked from all projects in the system. Tasks with the statuses Completed or Closed are not included.
You can show or hide the Tasks pane by clicking the tasks icon ![]() . The Tasks pane is not available to users with only View permission for Home > Workforce Planner.
. The Tasks pane is not available to users with only View permission for Home > Workforce Planner.
Task tiles
Within the pane, each task tile displays the following information:
NOTE The fields specified in the following list are configured in the Basics tab when adding or editing a task.
- The name of the project the task belongs to.
- The name of the task, which is configured in the Task Name field.
- If applicable, the description of the task, which is configured in the optional Task Description field.
- The date range of the task, which is configured in the Start Date and End Date fields.
- The hours planned to be spent on the task, which is configured in the Planned Hours field.
Color-coding
The color of the tile is determined by the Project Color configured when creating or editing a project. You may wish to apply a unique color to each project to easily distinguish tasks in this list by project.
Filtering tasks
To filter for tasks of a certain type, click the Filter bar at the top of the pane. The search box allows you to search for a specific filter.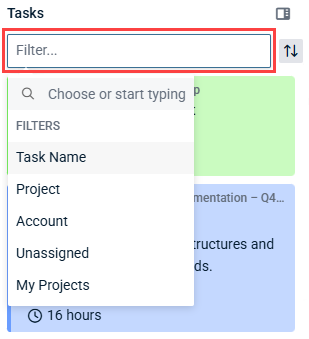
The following filtering options are available:
| Filter | Description | Instructions |
|---|---|---|
| Task Name | Filter by the name of the task. | In the Task Name field, enter all or part of a task name. Press Enter on your keyboard to apply the filter based on your task name search entry. |
| Project | Filter by tasks that belong to one or more specific projects. | From the drop-down menu, select the check boxes for any number of projects in the system. The filter is automatically updated with each selection. |
| Account | Filter by tasks that belong to one or more specific accounts. NOTE Accounts are assigned at the project level when creating or editing projects. |
From the drop-down menu, select the check boxes for any number of accounts in the system. The filter is automatically updated with each selection. |
| Unassigned | Filter by tasks that are unassigned or assigned. NOTE On each page in the Projects module that the task can be managed, the Members field or tab includes the name(s) of any assigned resource(s). |
Select No to filter by tasks that are assigned to a resource either within or outside of Workforce Planner. Select Yes to filter by tasks that are not yet assigned to a resource. Select both check boxes to filter by both assigned and unassigned tasks (default). |
| My Projects | Filter by tasks that belong to projects for which you are the project manager and/or lead engineer (that is, projects that you created). | Select No to filter by tasks outside of your own projects. Select Yes to filter by tasks within your own projects. Select both check boxes to filter by tasks both outside of and within your own projects (default). |
You have the option to apply any combination of filters at once. Applied filters are displayed in the Filter bar and can be individually cleared by clicking the x. The filtering selections persist if you navigate away from the page and return to it.
Sorting tasks
To sort the tasks in the list, click the Sort icon at the top of the pane. At any given time, one option from the Sort Order section and one option from the Sort Criteria section can be selected.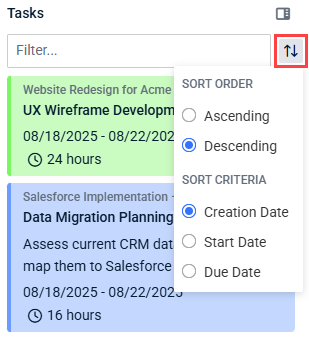
The following sorting options are available:
| Option | Description |
|---|---|
|
Sort Order |
|
| Ascending | Depending on your selection in the Sort Criteria section, this selection sorts the tasks by the oldest creation date, start date, or due date at the top to the newest creation date, start date, or due date at the bottom. |
| Descending | Depending on your selection in the Sort Criteria section, this selection sorts the tasks by the newest creation date, start date, or due date at the top to the oldest creation date, start date, or due date at the bottom. |
|
Sort Criteria |
|
| Creation Date | Sort tasks by when they were added. |
| Start Date | Sort tasks by the Start Date field, which is configured when adding or editing a task. |
| Due Date | Sort tasks by the End Date field, which is configured when adding or editing a task. |
Workforce Planner allows users with Modify permission for Home > Workforce Planner to schedule work by assigning tasks to resources directly from the Tasks pane. To assign a task to a resource in the Workforce Planner calendar, click the task tile in the pane and drag it into the calendar row that corresponds with the resource you want to assign the task to.
When a task is assigned in Workforce Planner, it is visible in the following ways:
- The assigned task is visible in the Workforce Planner calendar for users with Modify or View permission for Home > Workforce Planner.
- The assigned task is visible on the assigned resource's My Calendar page regardless of their Workforce Planner permission level.
- The assigned task is visible on the assigned resource's My Tasks page regardless of their Workforce Planner permission level. Upon opening the task from this page, the Allocated Hours field displays the amount of time configured in Workforce Planner to be spent on the task.
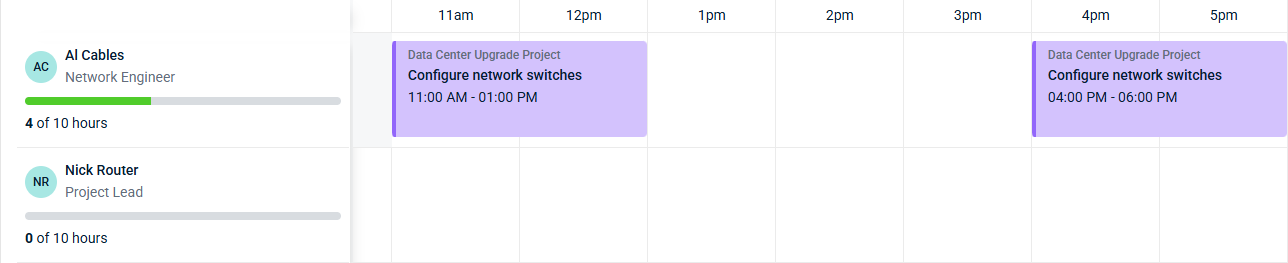
EXAMPLE In this example, the two-hour task Final system testing has been assigned to the resource April Time with a start time of 1 PM and an end time of 3 PM on August 18, its configured start and end date. While the task is now assigned, it remains as a tile in the Tasks pane because the Unassigned > Yes filter is not applied.
Unassigned vs. assigned tasks
Tasks are considered assigned if they have been assigned to a resource either within or outside of Workforce Planner. Tasks assigned outside of Workforce Planner are visible in the Tasks pane. Refer to Personas and usage scenarios to learn how assigned tasks can be managed in Workforce Planner depending on how they were configured in the Projects module.
NOTE If a task is assigned either within or outside of Workforce Planner, on each page in the Projects module that the task can be managed, the Members field or tab includes the name(s) of the assigned resource(s).
While you have the option to assign an already assigned task, you may wish to apply the Yes option in the Unassigned filter if you would like to manage only unassigned tasks. If you do so, a task that you drag into the Workforce Planner calendar will disappear from the Tasks pane, and assigning all tasks will clear out the Tasks pane.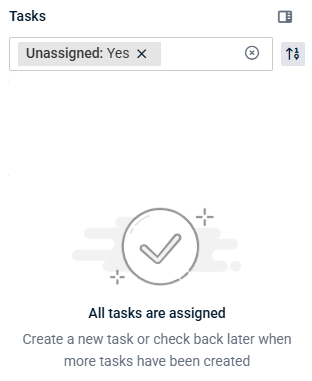
Unassigning tasks
To unassign a task from the Workforce Planner calendar, click the task tile and click the Unassign Task icon ![]() . The tile will disappear from that spot on the calendar and on the resource's My Calendar page. If the task is not assigned anywhere else in the Workforce Planner calendar or outside of Workforce Planner, the task is now considered unassigned and has no members.
. The tile will disappear from that spot on the calendar and on the resource's My Calendar page. If the task is not assigned anywhere else in the Workforce Planner calendar or outside of Workforce Planner, the task is now considered unassigned and has no members.
Once a task is assigned to a resource in Workforce Planner, users with Modify permission for Home > Workforce Planner can manage it from within the calendar. Users with only View permission have visibility of the assigned task within the calendar but cannot modify it.
Clicking an assigned task tile reveals the following information:
- The name of the project the task belongs to.
- The name of the task, which is configured in the Task Name field in the Basics tab when adding or editing a task. Click the task name to open the task in a new tab.
- The start time and end time of the task configured within the Workforce Planner calendar.
- If applicable, the description of the task, which is configured in the optional Task Description field in the Basics tab when adding or editing a task.
- If applicable, a list of any configured task dependencies. Click a task name to open the task, which may or may not be already completed or closed, in a new tab. Different icons are displayed for different types of task dependencies, and hovering over an icon reveals the nature of the task dependency:
 : This linked task must be started in order for the task assigned in Workforce Planner to be started. The task dependency is the Start-to-Start type.
 : This linked task must be started in order for the task assigned in Workforce Planner to be completed. The task dependency is the Start-to-Finish type.
 : This linked task must be completed in order for the task assigned in Workforce Planner to be started. The task dependency is the Finish-to-Start type.
 : This linked task must be completed in order for the task assigned in Workforce Planner to be completed. The task dependency is the Finish-to-Finish type.
- If applicable, a list of any tickets linked to the task. Click a ticket name to open the ticket in a new tab.
Adjusting task start and end times
Once you drag a task into the calendar, it is scheduled for a two-hour time frame by default. You can adjust the time frame by clicking and dragging either edge of the task left or right. Each drag extends or shortens the time frame by 15 minutes.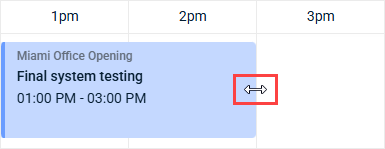
Moving tasks
To assign a task to a different resource or move it to a different time, simply click and drag the entire task tile to a new slot within the selected calendar view.
NOTE This method cannot be used to move the tile to a different day (in the Day calendar view) or to a different week (in the Week calendar view). To do so, you should unassign the task and reassign it with the appropriate calendar view selected.
Splitting tasks
For convenient task management, you have the ability to split one task into multiple tiles, which may be useful for tasks with a high number of planned hours or tasks that require multiple resources.
To split a task, click the task tile and click the Split Task icon ![]() . The task is split into two tiles, each spanning half the amount of time as the original single task tile. By default, the two tiles appear side by side within the original time slot in the original resource's calendar row.
. The task is split into two tiles, each spanning half the amount of time as the original single task tile. By default, the two tiles appear side by side within the original time slot in the original resource's calendar row.
From here, you can leverage the split task in any of the following ways:
- Move one of the tiles to a different resource's calendar row, causing the task to be assigned to more than one member.
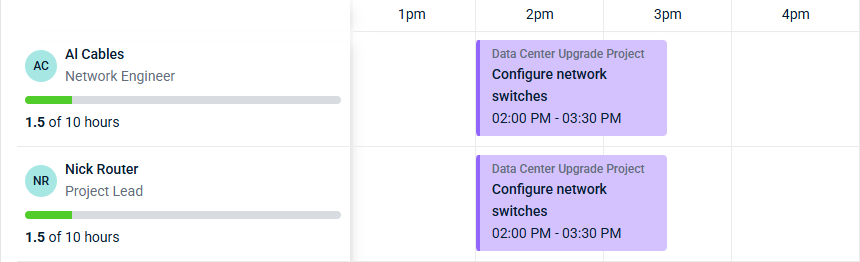
- Move one of the tiles to a different time slot within the original resource's calendar row, causing one resource to be assigned the same task for multiple blocks of time within the selected day or week. The resource will see this scheduling on their My Calendar page.
- Resize either of the tiles to adjust start and end times.
You can split a task more than once. However, the Split Task icon is grayed out ![]() for task tiles that are set to time frames shorter than 30 minutes.
for task tiles that are set to time frames shorter than 30 minutes.
NOTE Splitting a task in Workforce Planner does not create duplicate tasks in the Projects module.
Warning indicators
A task tile appears in yellow with a warning indicator if either or both of the following scenarios apply. Click the tile to view the warning message(s).
The selected time is not within the task's start and end dates
This warning is displayed if the task is assigned to a date within the Workforce Planner calendar that does not fall within the Start Date and End Date configured for the task. To prevent this warning indicator, you may wish to edit the task start date and/or end date directly in the Projects module or move the task to the configured time frame in the calendar.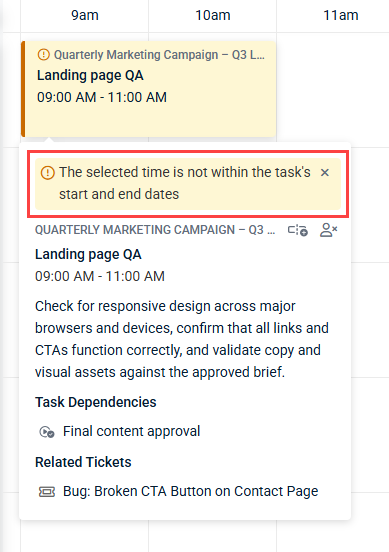
Time overlaps with other task
This warning is displayed for all task tiles that overlap each other within one resource's calendar row.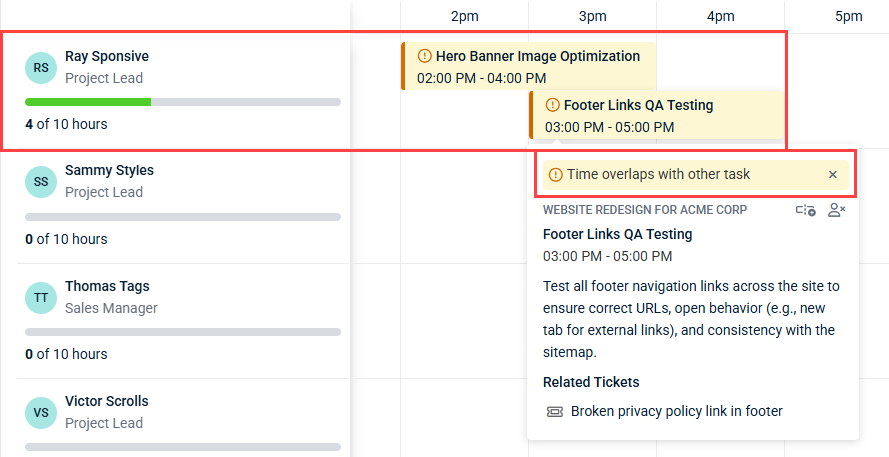
If both of the preceding warnings apply to a task tile, you can cycle through them by clicking the left and right arrows after clicking the tile.
To override a warning, click x in the warning message after clicking the tile. Once all warnings are overridden, the tile appears in its default color with no warning indicator.
Logs
Workforce Planner has its own logs page within Admin > Logs > Workforce Planner, where all task activities executed from Workforce Planner and the Projects module are logged.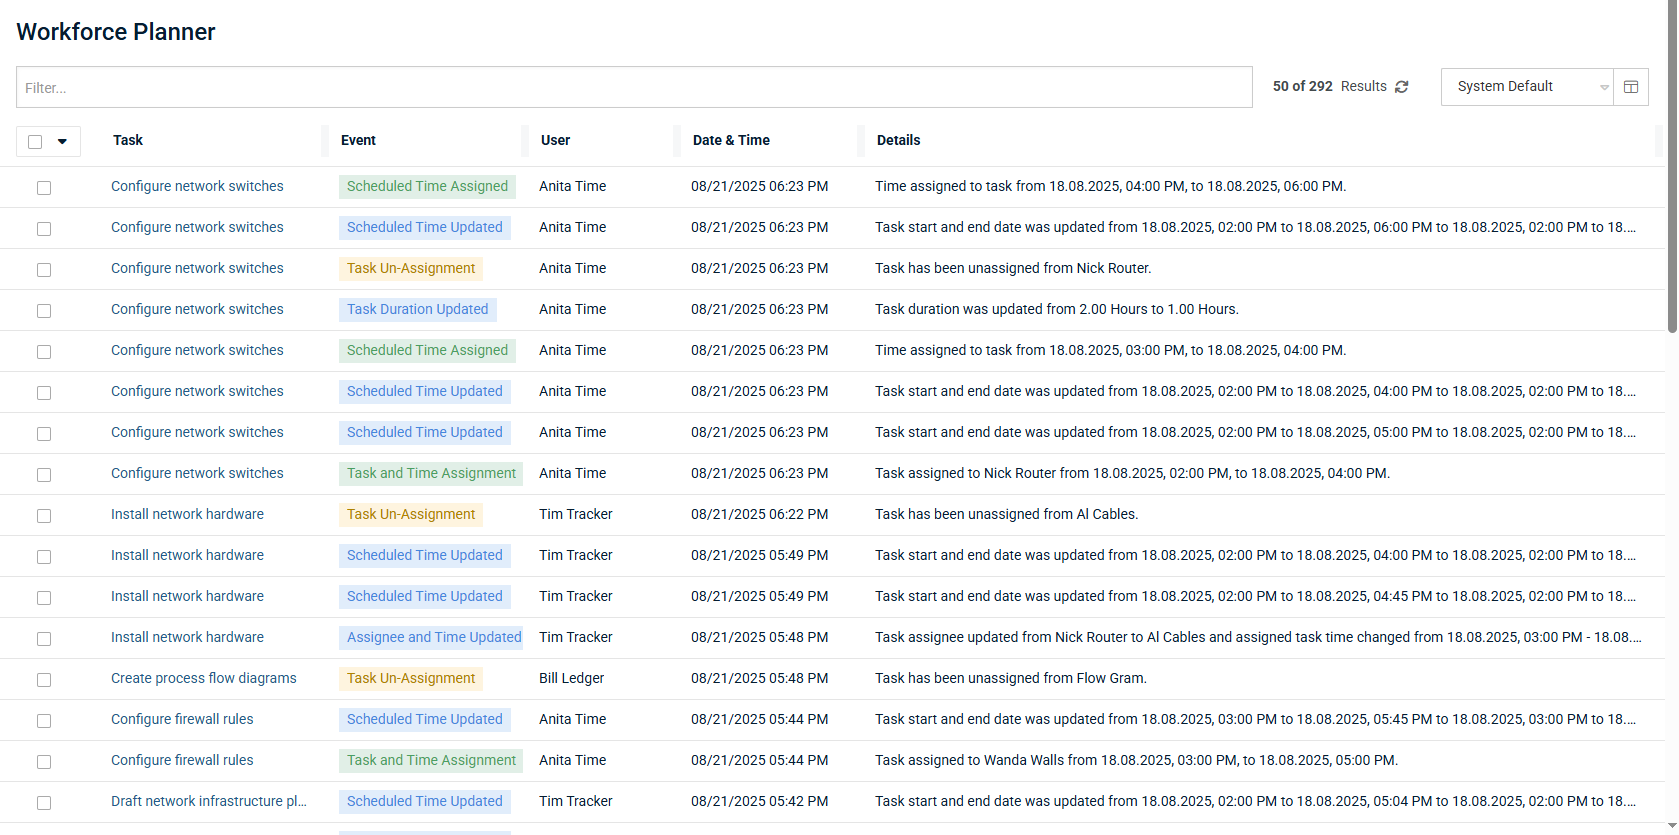
Available data
You can select or clear the following options from the Table View Options ![]() to determine which columns and data are visible in the log:
to determine which columns and data are visible in the log:
- Task: The name of the task. Clicking the link opens the task in a new tab.
- Project: The name of the project the task belongs to. Clicking the link opens the project in a new tab.
- Event: The activity performed in Workforce Planner or from the Projects module, including the following:
- Task and time assignments
- Scheduled time updates
- Task duration updates
- Task assignee updates
- Task unassignments
- Task deletion (can be initiated only from the Projects module)
- User: The user who initiated the event.
- Date & Time: The date and time the event was initiated.
- Details: The details of the event, including assignee names and specific dates and times configured or changed.
You can use the Filter bar at the top of the page to filter the log by any of the preceding options (other than Details).
Log views
Log views allow you to save custom Workforce Planner log configurations for use in the future. You can save log views with certain applied column filters, column ordering, column widths, column sorting, and column selections. You can switch to, create, edit, share, and delete log views.
NOTE While you can apply column filters, change the order of columns, change column widths, change column sorting, and select columns in the System Default log view, changes cannot be permanently saved to the System Default log view.
To create a Workforce Planner log view, complete the following steps:
- From the drop-down menu in the upper-right corner of the page, select System Default or another log view to populate that view as a jumping-off point.
- Customize the view as desired, which you will save as a new view when done. The changes you make are not permanently saved to the current view automatically. To customize the view, you can do the following:
- Select any number of log filters from the Filter drop-down menu.
- Drag the bars between columns to adjust column widths.
- Sort the values in the columns.
- To configure which columns appear in the view, click the icon
 in the upper-right corner of the page to open the Table View Options dialog box. Select or clear the check boxes for any number of columns you want to add to or hide from the view, respectively. Drag and drop the options to arrange the order in which the columns appear in the view. Click Apply.
- When done configuring your custom view, click the log view drop-down menu again, and click Save As.
- Enter a name for the new view, and click Save. The new view is saved as one of your options for use at any time and becomes the currently selected view. The view is available only in your own user account unless you choose to share it. Refer to Sharing log views.
You have the option to edit and save views that you created. With a view that you created selected, making any change to its configuration (for example, adding a filter that wasn't previously selected) appends the view with an asterisk and italicizes it in the view drop-down menu.
You can make any number of changes to the current view without permanently saving those changes. To scrap changes, simply refresh the page.
To permanently save changes, click Save in the view drop-down menu while the view you changed is selected. The asterisk and italicization is removed once the latest change is saved.
You can change the names of views that you created. From the log view drop-down menu, select Manage Views.
Click the edit icon ![]() to the right of the view, edit the name, click the check mark underneath the view to save the new name, and click Done.
to the right of the view, edit the name, click the check mark underneath the view to save the new name, and click Done.
You can delete views that you created. From the log view drop-down menu, select Manage Views.
Click the trash can icon ![]() to the right of the view, and click OK.
to the right of the view, and click OK.
You can share views that you created. From the log view drop-down menu, select Manage Views.
Click the share icon ![]() to the right of the view, select the user(s) this view should be available for, and click OK. The shared view is added to the log view options in the selected users' accounts.
to the right of the view, select the user(s) this view should be available for, and click OK. The shared view is added to the log view options in the selected users' accounts.
To see the views that have been shared with you by other users, click the Shared With Me tab.


