My Templates
Introduction
The My Templates page under the Home module is a place where you can create certain templates for tickets and ticket-related functionalities. The templates will allow you to quickly prefill ticket fields whenever you have matching criteria.
Searching for Templates
You can search for a template among the existing templates by using the search criteria. The search criteria are Name, Type, Shared with Accounts, and Shared with Team fields. You can search for a template by using any one of the above criteria or by using a combination of the criteria.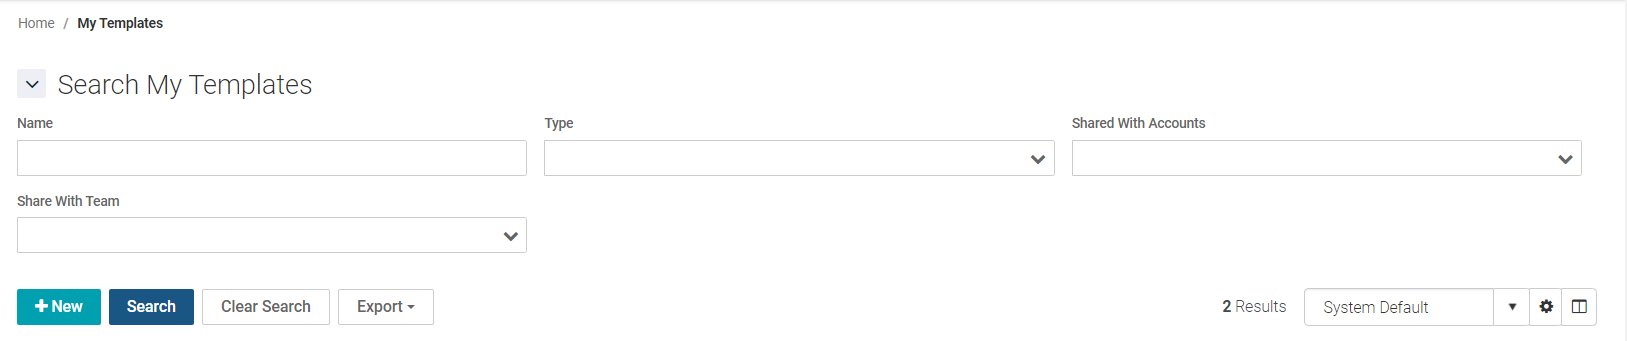
- To search for a template, enter a name or select a type from the dropdown or select an item from the Shared with Accounts dropdown or select an item from the Shared with Team dropdown or use a combination of the aforementioned items.
- Click Search.
Creating a Template
- Go to Home > My Templates.
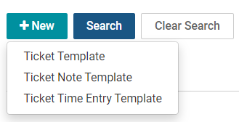
- Click New.
- Select one of the three options listed there.
- Follow one of the sections below according to your choice.
Creating a Ticket Template
(This template can be used on a fresh ticket.)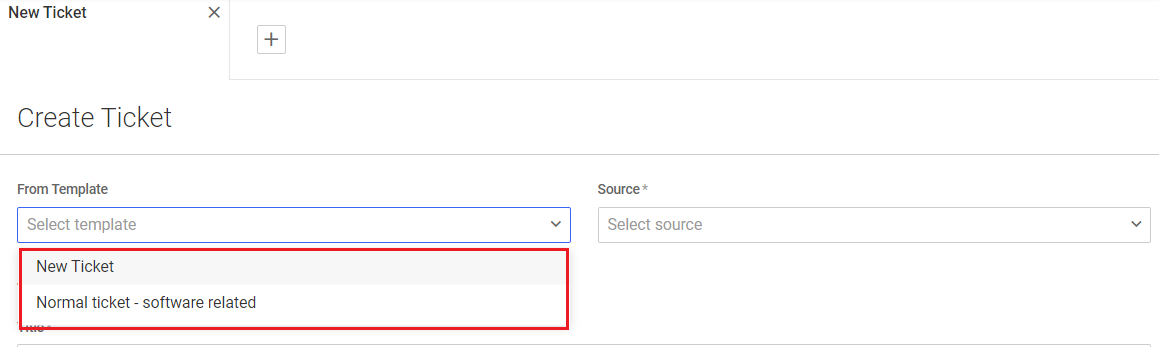
- Click New.
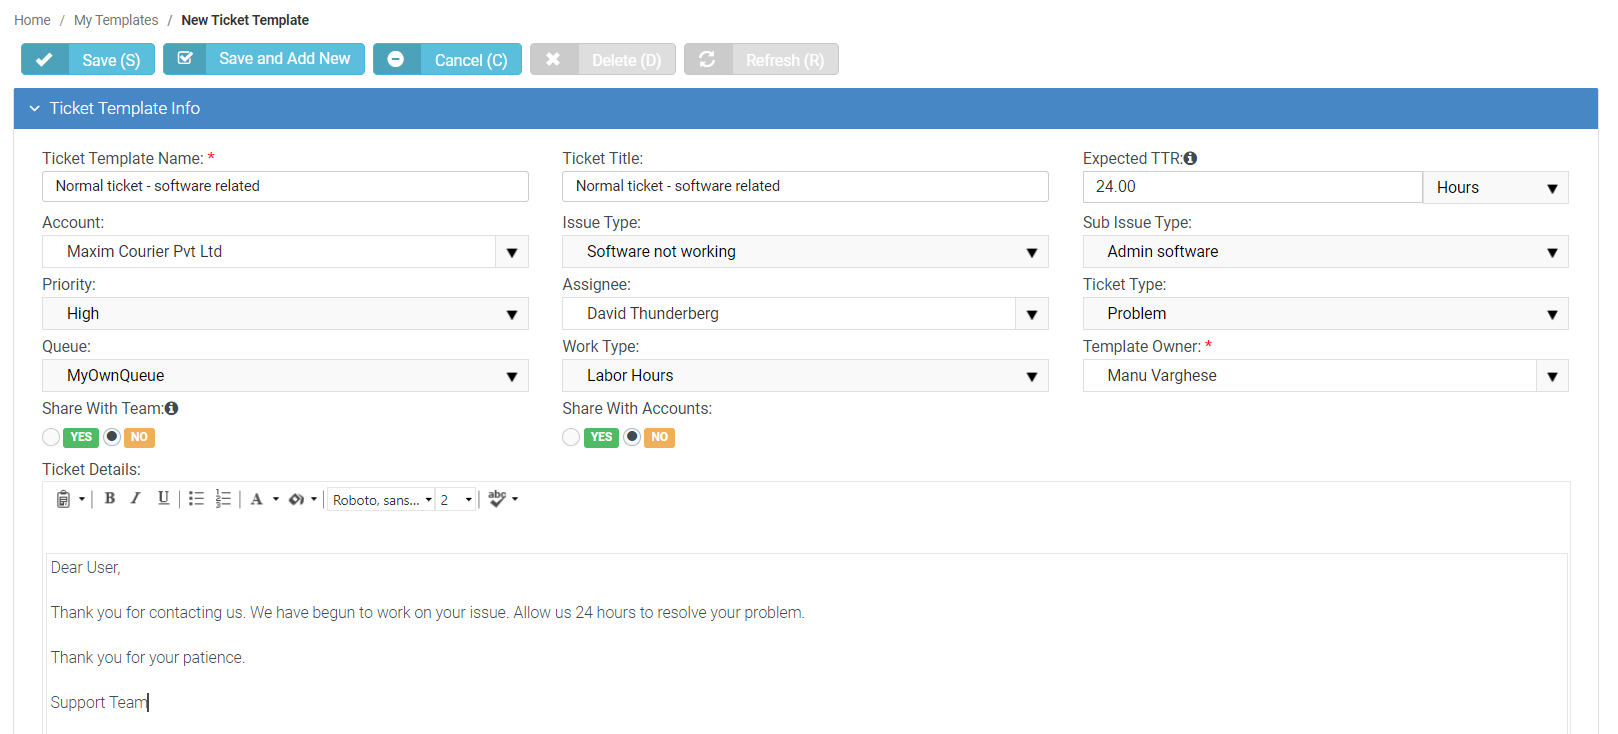
- Click Ticket Template from the dropdown. The New Ticket Template page opens.
- Ticket Template Name: Enter a name for the ticket template.
- Ticket Title: Enter a short title for the ticket.
- Expected TTR: TTR stands for "time to resolution." This is the expected time taken to resolve a ticket. You can enter the time in hours or minutes. Select Hours or Minutes from the dropdown and enter a number.
- Account: Select the appropriate account from the dropdown to associate the ticket template.
- Issue Type: Select the appropriate issue type from the dropdown. When you select an issue type, you will be able to see a list of related sub issue types for that issue type.
- Sub Issue Type: Select the appropriate sub issue type from the dropdown.
- Priority: Select the appropriate priority from the dropdown.
- Assignee: Select the appropriate assignee from the dropdown.
- Ticket Type: Select the appropriate ticket type from the dropdown.
- Queue: Select the appropriate queue from the dropdown. Remember that your personal queues would also reflect here in the dropdown.
- Work Type: Select the appropriate work type from the dropdown. Select either Labor Hours or Non Billable Labor Hours from the dropdown.
- Template Owner: This is automatically selected. This is the logged in user's name, and this is the user who created the template.
- Share with Team: Select either Yes or No depending on your choice. By default, No is selected.
- Share with Accounts: Select either Yes or No depending on your choice. By default, No is selected.
- Ticket Details: You can add standardized text here.
- Click Save. You will find the saved template in the grid in the My Templates page.

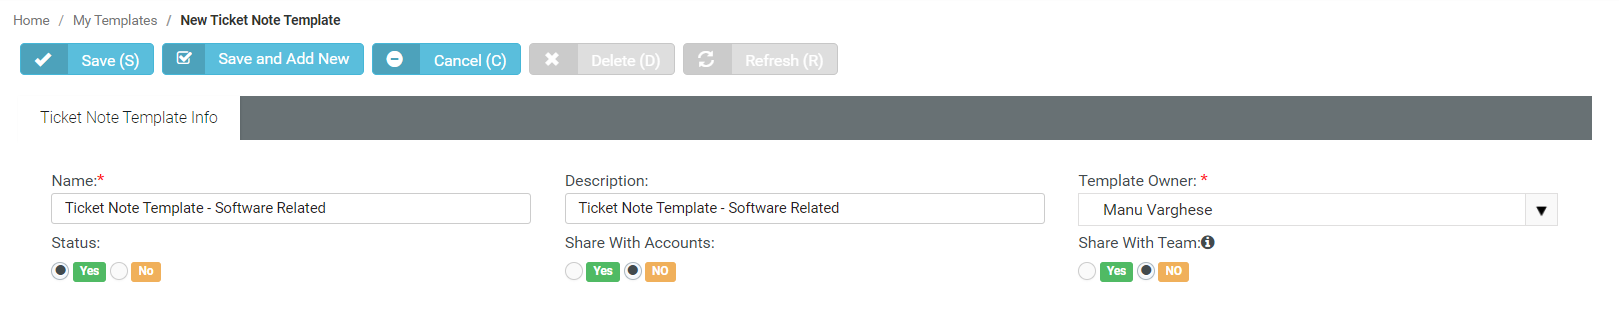
Creating a Ticket Note Template
(This template can be used on an existing ticket while adding a note.)
- Click New.
- Click Ticket Note Template from the dropdown. The New Ticket Note Template page opens.
- Name: Enter a name for the ticket note template.
- Description: Enter a brief description for the ticket note template.
- Template Owner: This is automatically selected. This is the logged in user's name, and this is the user who created the template.
- Status: Select either Yes or No. By default, Yes is selected.
- Share with Accounts: Select either Yes or No depending on your choice. By default, No is selected.
- Share with Team: Select either Yes or No depending on your choice. By default, No is selected.
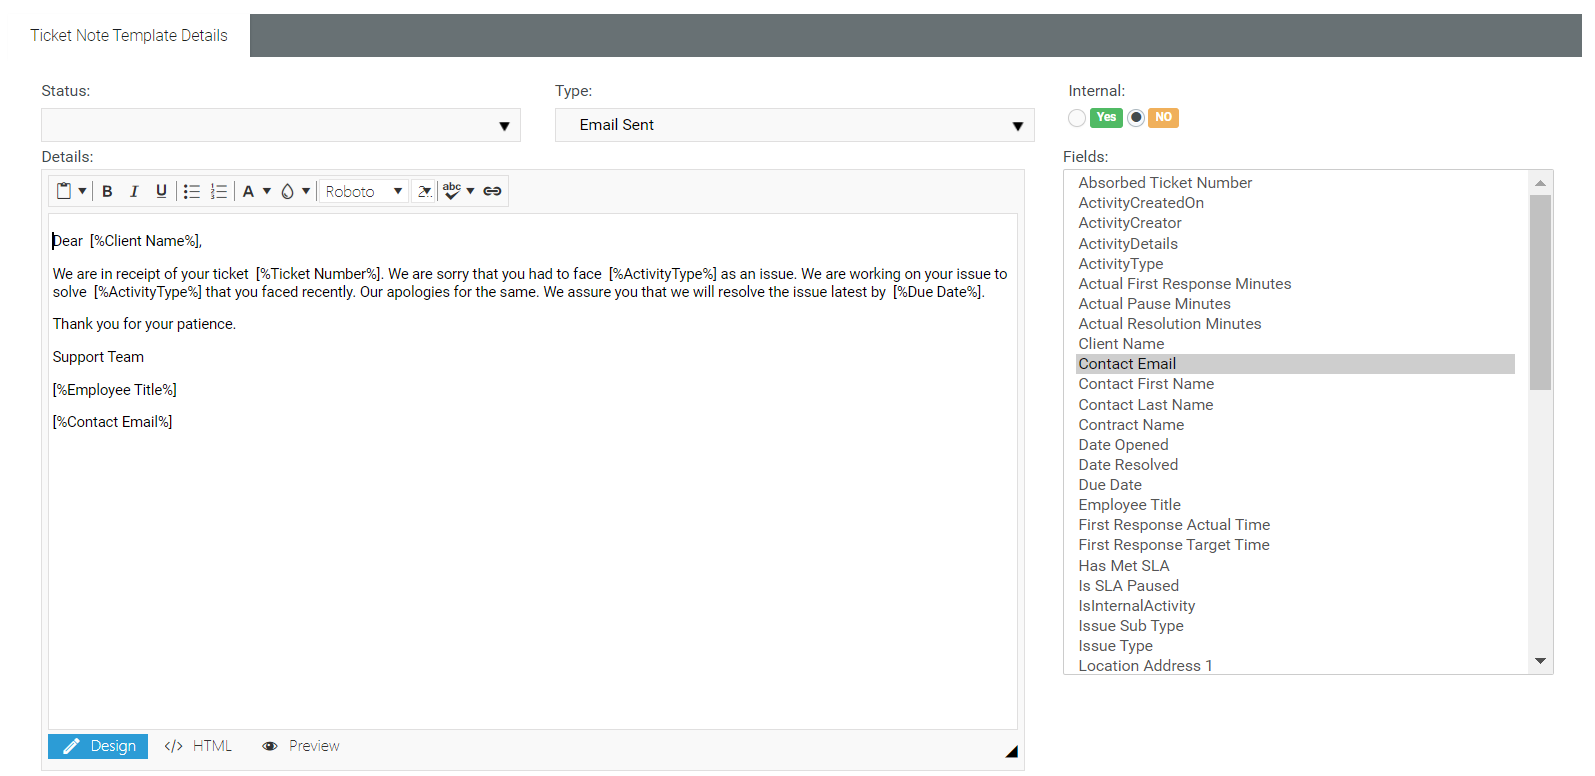
- In the Ticket Note Template Details section, do the following:
- Status: Select either Yes or No. By default, Yes is selected.
- Type: Select the appropriate type from the dropdown.
- Internal: Select either Yes or No. By default, No is selected.
- Details: You can create a standardized text here with the help of fields selected from the right. Select appropriate fields from the right as you frame sentences. Whenever you select a field (for example, Ticket Number), the field will be enclosed within percentage signs. The fields are variables where you can write custom text. Take a look at the example below. The Details text box has three views - Design, HTML and Preview. By default, when you open the page, you will see the Design view. You can explore HTML and Preview views as well.
- Click Save. You will find the saved template in the grid in the My Templates page.

Creating a Ticket Time Entry Template
(This template can be used on an existing ticket while adding time entry.)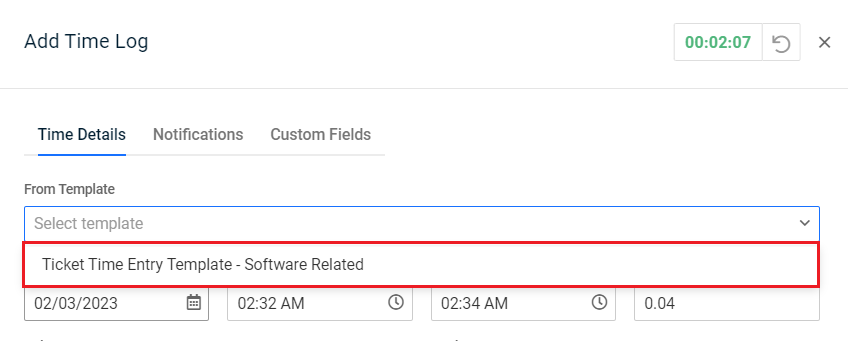
- Click New.
- Click Ticket Time Entry Template from the dropdown. The New Ticket Time Entry Template page opens.
- Name: Enter a name for the ticket note template.
- Description: Enter a brief description for the ticket note template.
- Template Owner: This is automatically selected. This is the logged in user's name, and this is the user who created the template.
- Status: Select either Yes or No. By default, Yes is selected.
- Share with Team: Select either Yes or No depending on your choice. By default, No is selected.
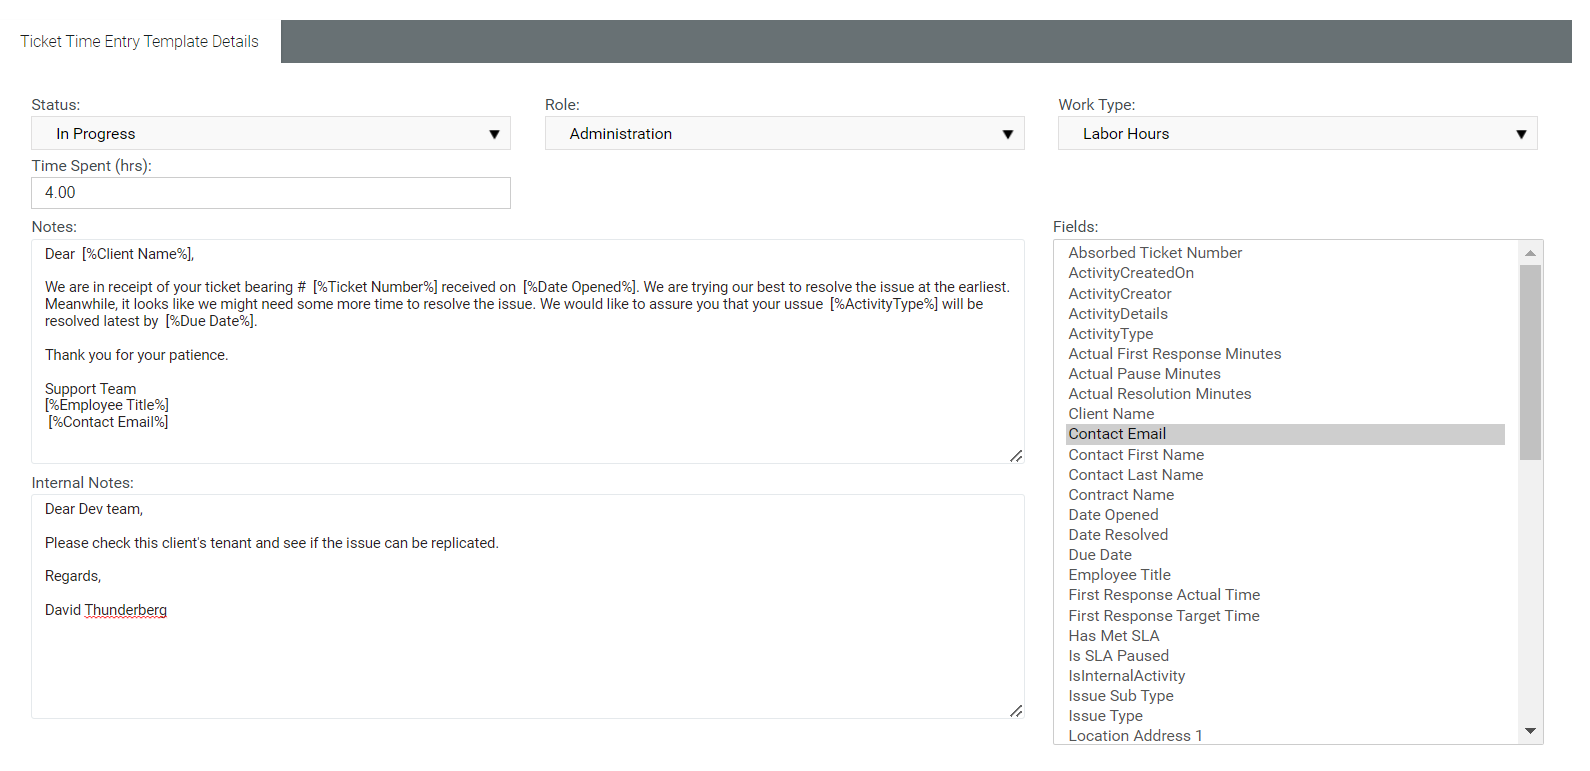
- In the Ticket Time Entry Template Details section, do the following:
- Status: Select either Yes or No as the status. By default, Yes is selected.
- Role: Select the appropriate role from the dropdown.
- Work Type: Select the appropriate work type from the dropdown.
- Details: You can create a standardized text here with the help of fields selected from the right. Select appropriate fields from the right as you frame sentences. Whenever you select a field (for example, Ticket Number), the field will be enclosed within percentage signs. The fields are variables where you can write custom text. Take a look at the example below. The Details text box has three views - Design, HTML and Preview. By default, when you open the page, you will see the Design view. You can explore HTML and Preview views as well.
- Click Save. You will find the saved template in the grid in the My Templates page.

Editing a Template
- Go to Home > My Templates. The My Templates page opens.
- In the grid, click the template that you want to edit. The template opens.
- Make changes to the relevant fields according to your choice. Some fields may be hidden or non-editable.
- Click Save.
Creating a Custom View
In addition to the System Default view that you see in the listing page, you can create custom views.
- Go to the Column Chooser icon, which is next to the settings icon.
- Select as many columns from the left and click the right arrow or just slide them to the right.
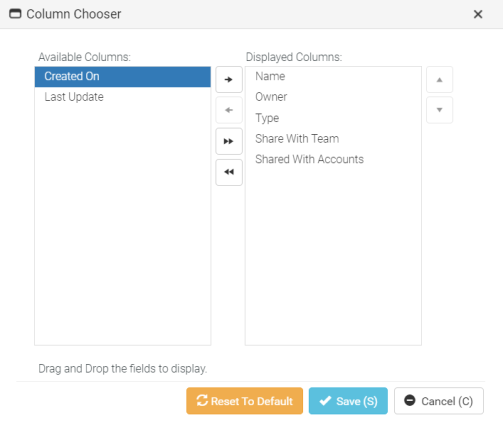
- Click Save. The additional columns will now appear in the grid. Click the settings icon and then click Save As.
- Provide a name for your custom view.
- Public: Click Yes or No according to your choice. If you select Yes, the view will be made public.
- Default: Click Yes or No according to your choice. If you select Yes, the view will be made the default view.
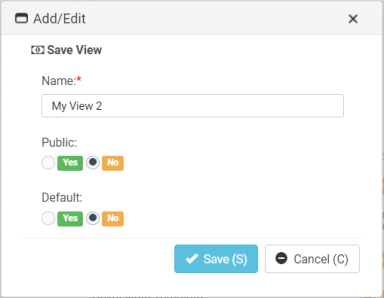
- Click Save.
Sharing a View
You can share your custom view with others. Once you create a custom view, other options will appear as dropdown in the settings icon.![]()
- Select the view from the view dropdown.
- Click Share. The Share View window opens. You will see two tabs - Queues and Employees. The Queues tab is open by default. You can use one of the tabs or both the tabs.
- Queue: Select a queue from the dropdown and click Add. The queue is added to the list below.
- Click to select the relevant checkboxes.
- Click Save.
- If you wish to share the view with certain employees, go to the Employee tab.
- Employee: Enter the first few letters of the employee. The employee name appears.
- Click Add. The employee name is added to the list below.
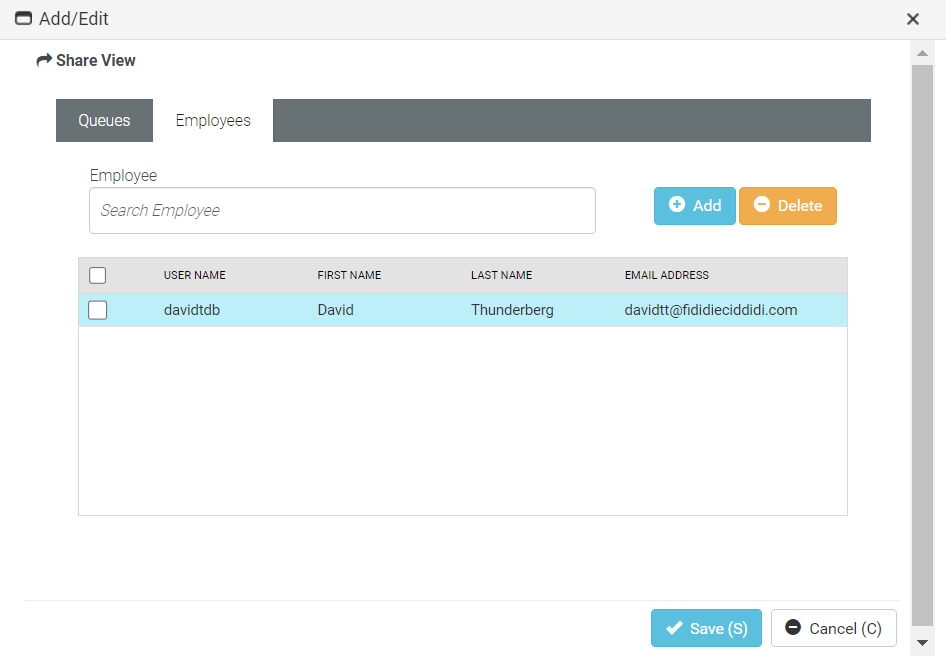
- Click to select the relevant checkboxes.
- Click Save.
NOTE The Home > My Templates page is different from Admin > Business Process > Email Templates page. The templates in My Templates page are exclusively used for tickets. They will not appear among the email templates that you create.


