Integrated customer billing
Introduction
Integrated Customer Billing is a feature that is part of billing automation. Using KaseyaOne, Integrated Customer Billing is available for Recurring Services Contracts under Admin > CRM > Accounts > Organization Mapping tab. Customer Billing integrates with K1 mapping the modules in K1 with the CRM accounts that the MSP has in BMS.
Features
- To use Integrated Customer Billing, you should be connected to KaseyaOne.
- You can set up K1 integration in Admin> Integrations > KaseyaOne page.
Prerequisite
You should have a KaseyaOne account. For more details, see Setting up KaseyaOne SSO v2 login with BMS.
K1 integration
- Alternatively, you can go to Finance > Contracts > respective recurring service contract > Billing Information.
- Click Add.
- Go to Integrated Customer Billing tab. You will see a message link which says "Requires K1 integration Set up."
- Click the link and you will be directed to Admin > Integrations > KaseyaOne page. Move the slider to the right to turn it on. You will see a blue screen with the KaseyaOne logo. After it logs you in, you will see a success message which says, "Operation is completed successfully." Once you have the KaseyaOne integration in place, you will have access to Admin > Integration > KaseyaOne Settings page > Admin > CRM > Accounts page.
Mapping the modules
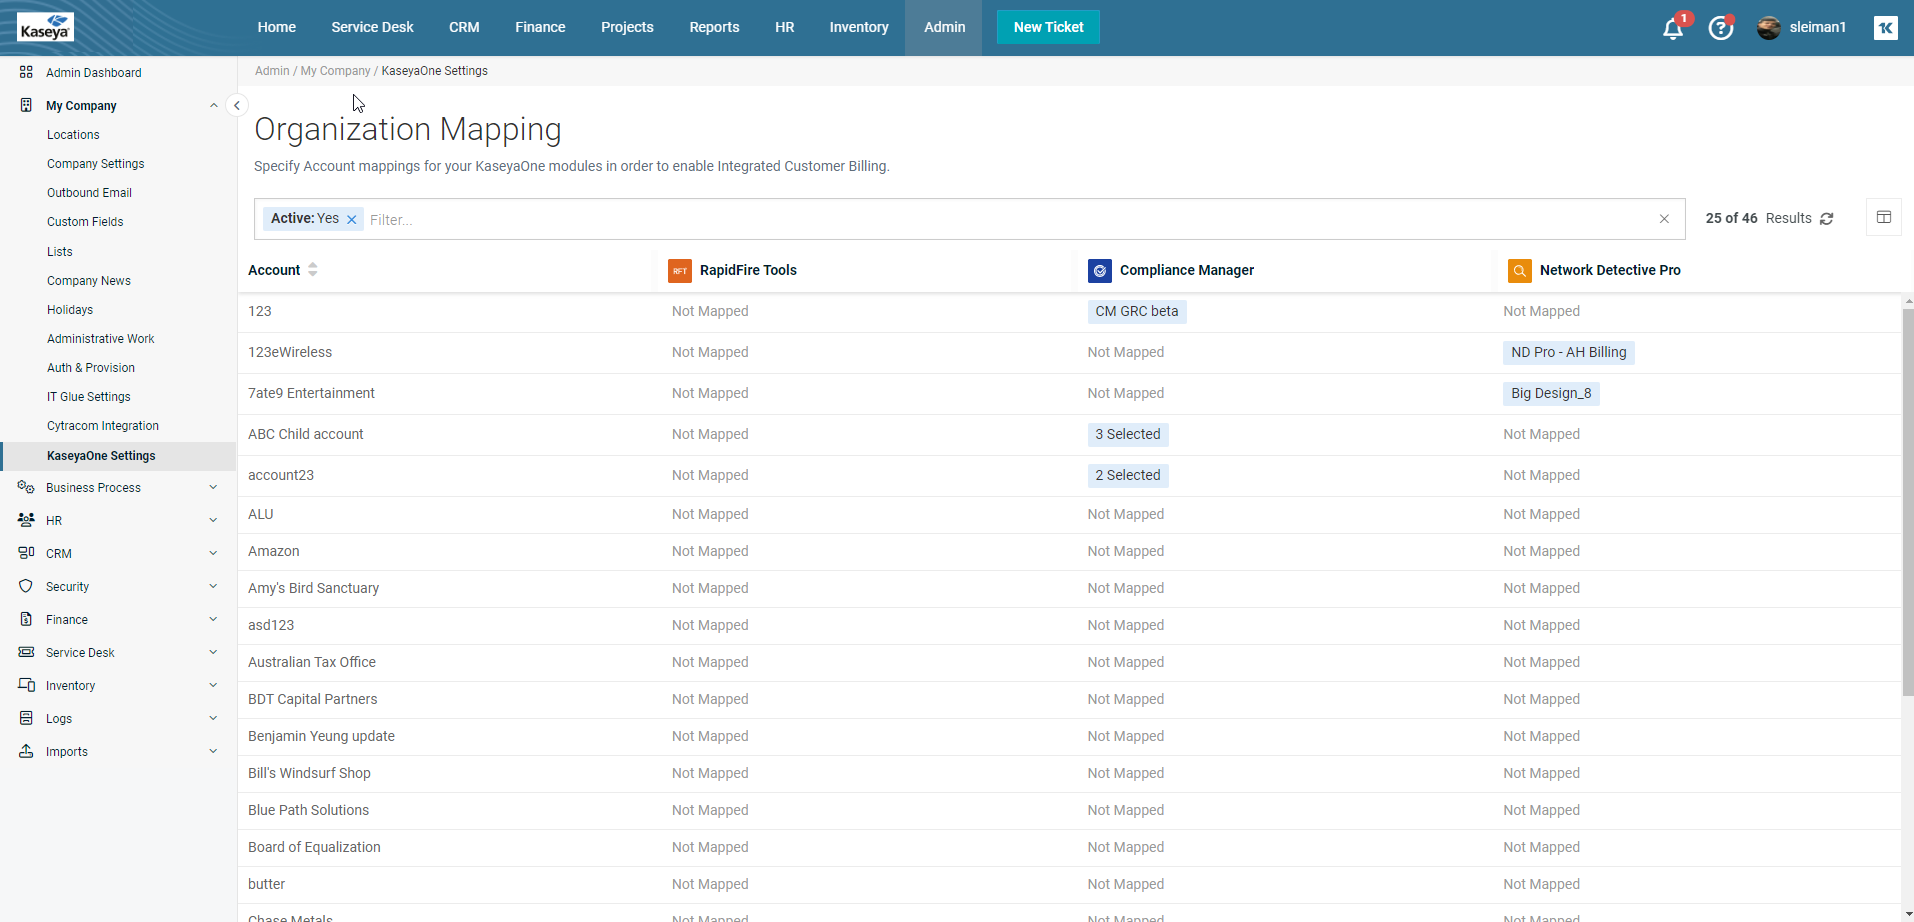
For the billing to take effect, you should first define relationships between modules and their organization IDs. The newly consolidated Organization Mapping page lets you define relationships between modules and their organization IDs. The centralized mapping page under Admin > Integrations > KaseyaOne supports Integrated Customer Billing, allowing you to map other Kaseya module organizations and sub-organizations to your BMS accounts, all in one view for accurate and automated usage billing. You can map more than one organization IDs to one account based on the one-to-many model and save them. You can use account name, account code and active/inactive status as filters to search the page.
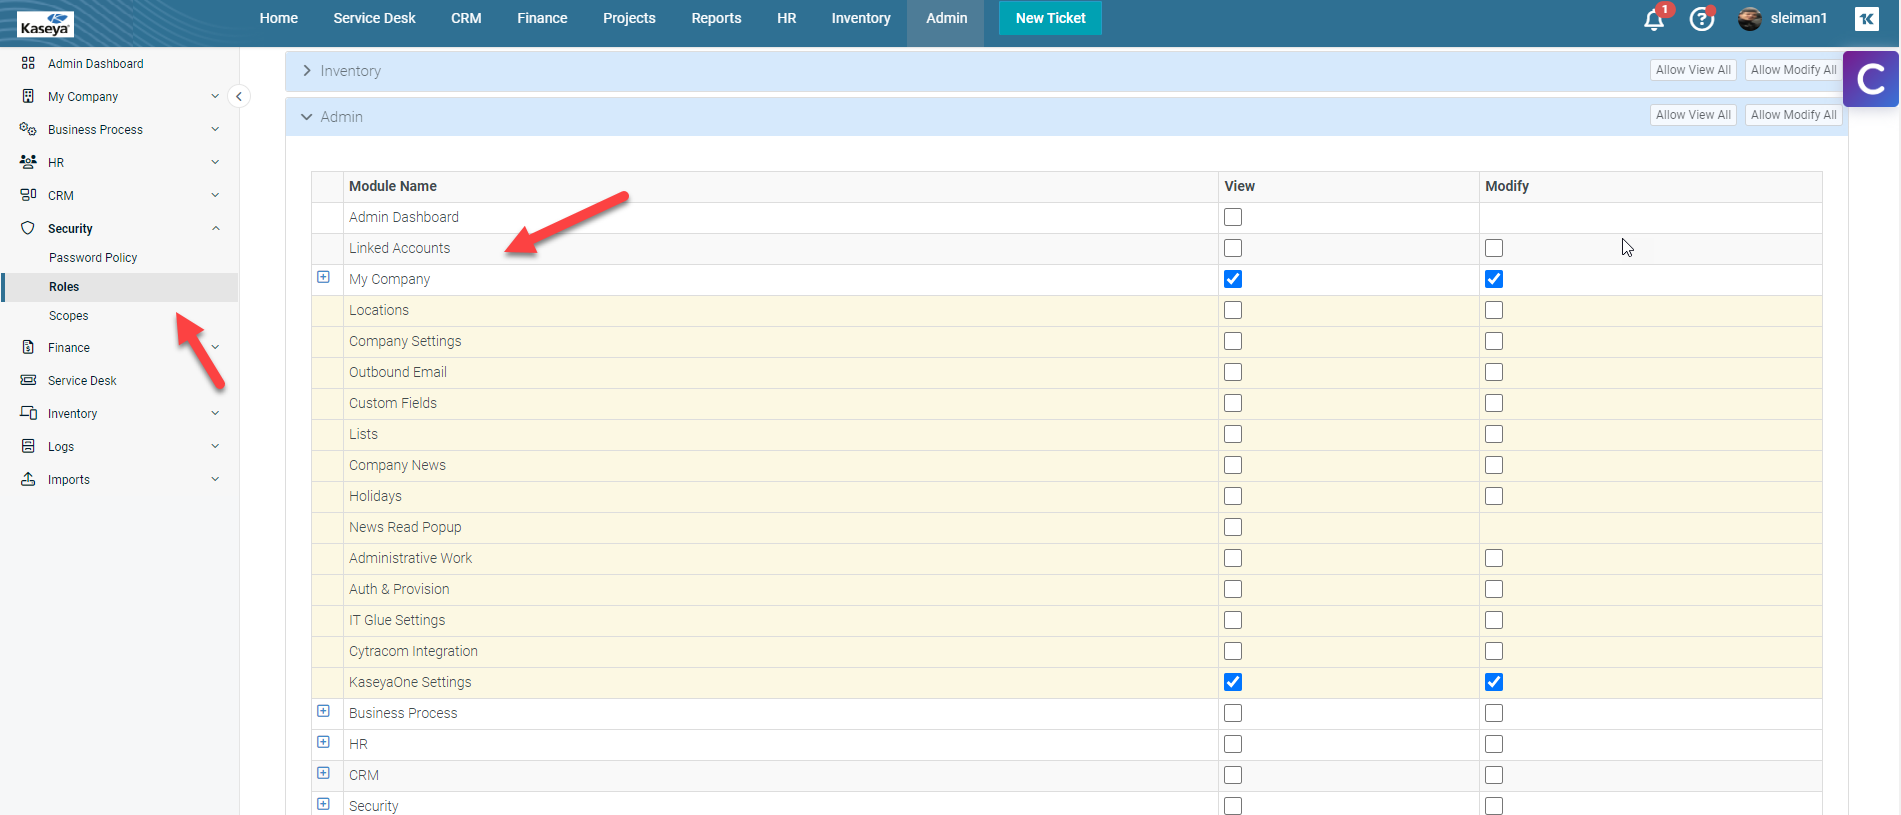
Access to the Organization Mapping page is defined by the KaseyaOne Settings permissions under Admin > Security > Roles page. If you have View permission, you will be able to only view the page. If you have modify permission, you can both view and modify the page. If you have admin permissions, by default, you will have access to this page. As an admin, you can create a new user and give only view permission. In such cases, that user will have only view permissions.

-
Go to Admin > Integrations > KaseyaOne page. The Organization Mapping page opens.
-
Click inside the field where it says Not mapped. It will automatically show the list of organization (both parent and child) IDs that are available. Select the relevant organizations.
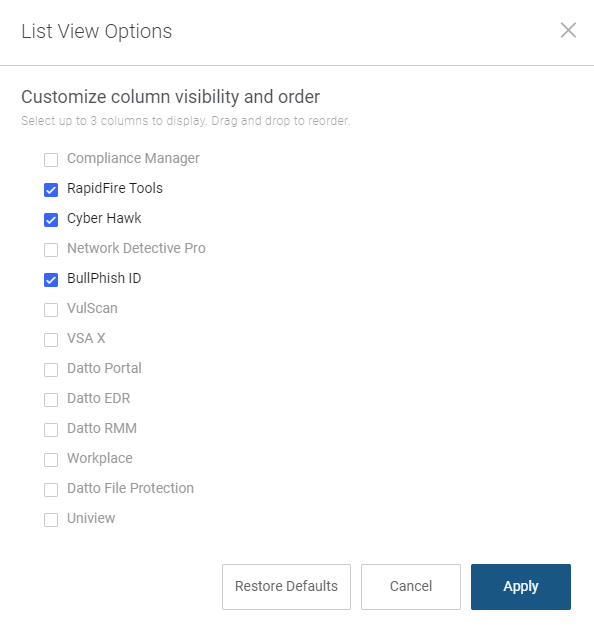
NOTE Additionally, you can choose the column chooser icon and select three columns (modules) of your choice. You have a limitation of three columns. You cannot choose more. Select upto three columns and click Apply.
-
Click Save. The organization mapping is saved.
Adding Automated Billing to a service
- To implement the billing, go to Finance > Contracts > respective recurring service contract > Billing Information tab.
- Click Add. The Add Service window opens.
- Go to Integrated Customer Billing tab.
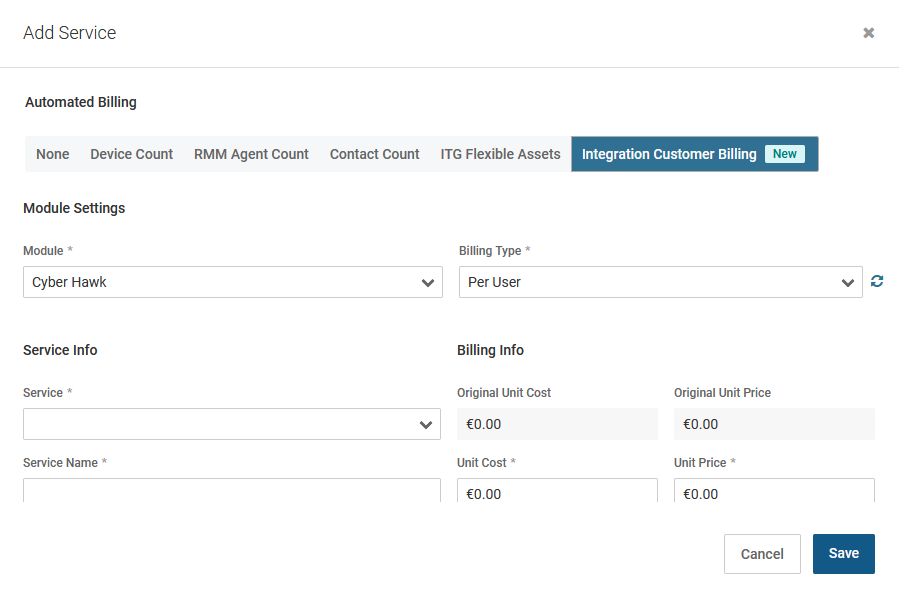
- Module: Select the appropriate module from the dropdown.
- Billing Type: Select the appropriate billing type from the dropdown.
- If there is no mapping between the module and the billing type, a yellow triangular icon appears. If you hover over this icon, you will see a message which says, "Module organization is not mapped to an account. Please complete ITC Mapping found in CRM Account, in order to utilize automated ITC billing." If you click the link Open the Integration Mapping, you will be redirected to the section called ITC Integrations Mapping under Integrated Customer Billing tab in Admin > CRM > Accounts > the respective account which you integrated with K1. This link will be hidden if the user has a role other than the admin.

- Map the relationship and save.
- If you do not click the link Open the Integration Mapping, but rather if you go ahead and save the service details, you will be able to save. However, when you open the same service for editing, you will see a message which says "Mapping Settings Incomplete" under the label Last Sync. This will disappear as soon as you save the module-organization ID relationship.

- Once you fill in the fillable fields, click Save. The service is saved with the details.
Syncing
The last part of the process is syncing. Syncing is done in two ways. You can manually sync the service when you open it for editing next time or you can leave the service as it is for the nightly job sync to happen. The nightly job sync happens automatically every day at midnight. Irrespective of how the sync is done, once the sync happens, you will be able to see the number of units in the Units field. (See image below.) You will also be able to see the last sync details (date and time) and the next sync details (date and time scheduled).
For a manual sync, click the icon that is highlighted in red in the image below.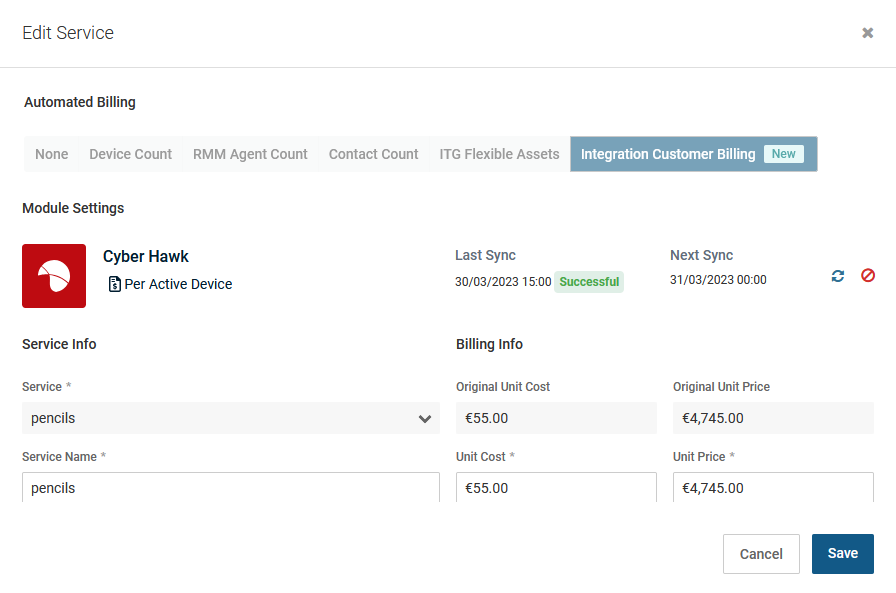
You can stop ICB service by clicking the red icon next to the sync icon. Once it is stopped, you can revert to billing manually.


