BMS-QuickBooks Online integration, configuration and how to use
Introduction
This article enumerates the steps involved in BMS-QuickBooks online integration.
Prerequisite
You should have an active QuickBooks (http://quickbooks.intuit.com) account.
Steps
In order to setup BMS with QuickBooks, you first need to connect to QuickBooks Online.
Connecting to QuickBooks Online

- Navigate to Finance Module, then select QuickBooks > Setup.
- Press the Connect button, and you will be redirected to QuickBooks Online automatically.

- Enter your QuickBooks credentials.

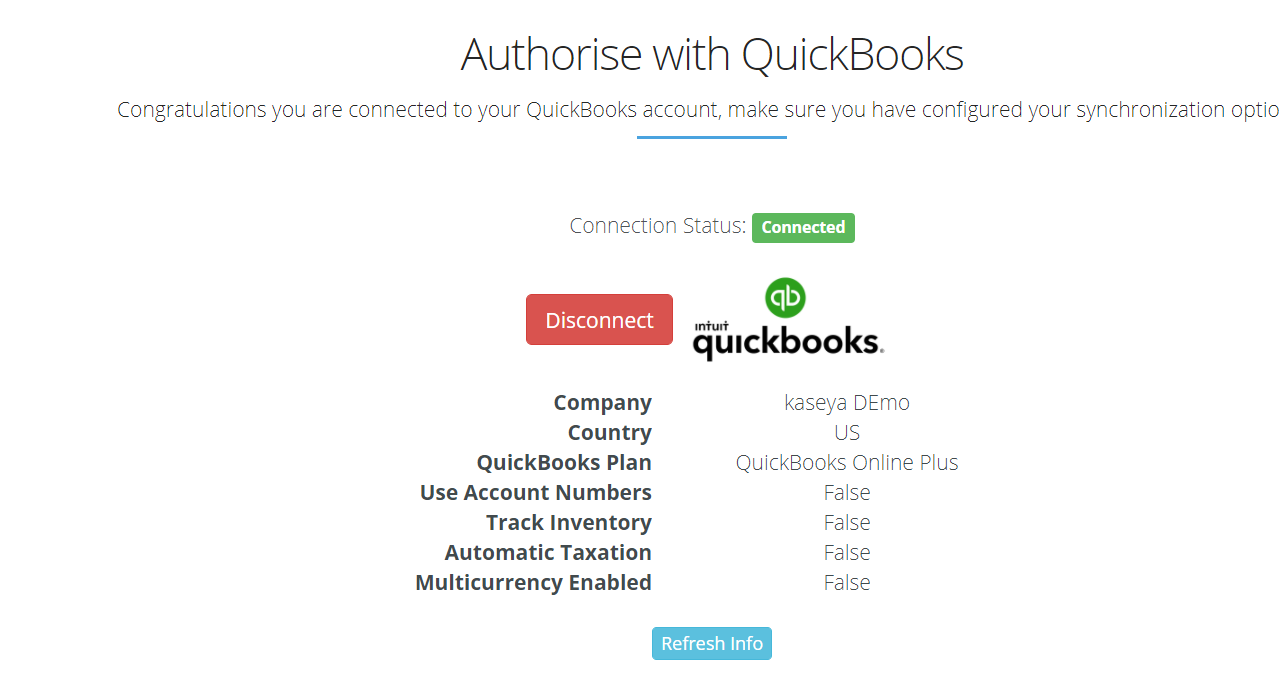
- After validating the entered credentials, you will be automatically redirected to BMS again with some of your QuickBooks Online information displayed:
- Company name
- Country
- QuickBooks online plan
- Use account numbers (settings for charts of accounts)
- Track inventory (settings for inventory products)
NOTE The length of the integration staying intact depends on the authentication process following OAuth 2.0. If you connect basically, you will get an access token which is valid for 60 minutes and a refresh token valid for 100 days.
Setup and Default Settings
In this latest version of the QuickBooks Online integration, a new Setup > Options page was introduced to address some business differences between BMS and QuickBooks Online.
- Navigate to Finance Module, then select QuickBooks > Setup.
- Select the Options tab and start filling your default settings.

The dropdowns under each section below are populated from QuickBooks Online data:
Services & Non Inventory Item Accounts
- Service and Non Inventory Income Account: Select an appropriate service and non inventory income account from the dropdown list.
- Service and Non Inventory Expense Account: Select an appropriate service and non inventory expense account from the dropdown list.
Inventory Item Accounts
- Inventory Item Income Account: Select an appropriate inventory item income account from the dropdown list.
- Inventory Item Expense Account: Select an appropriate inventory item expense account from the dropdown list.
- Inventory Item Asset Account: Select an appropriate inventory item asset account from the dropdown list.
Customer Defaults
Customer Tax Exemption Reason: Select an appropriate customer tax exemption reason from the dropdown list.
Invoice Defaults
- QuickBooks Invoice Numbers: By default, Use Invoice Number is selected. Select any other item from the dropdown if you would like to.
- Invoice Due Date: By default, Invoice Due Date is selected. Select any other item from the dropdown if you would like to.
- PO Number QuickBooks Custom Field Name and Order: This field is for entering PO Number QuickBooks Custom Field Name and the number representing the order. The number can be selected from the up or down arrow at the far right of the field.
Select Yes or No for the next set of options according to your choice.
After you have done all of the above, click Save.
NOTE For QuickBooks to take the next invoice number automatically when the invoice is transferred from BMS, you have to set your numbering preference in QuickBooks. Check the following link: How to change the invoice number on sales forms.
Import Section

Once connection and options are established, you can now start importing data from QuickBooks to BMS.
Import QuickBooks Customers
Once you click on Customers section, customers will be loaded from QuickBooks pages into a grid so that you are able to select your page size and retrieve as much data as you have:
NOTE Paging is applied on all the below grids for all items.
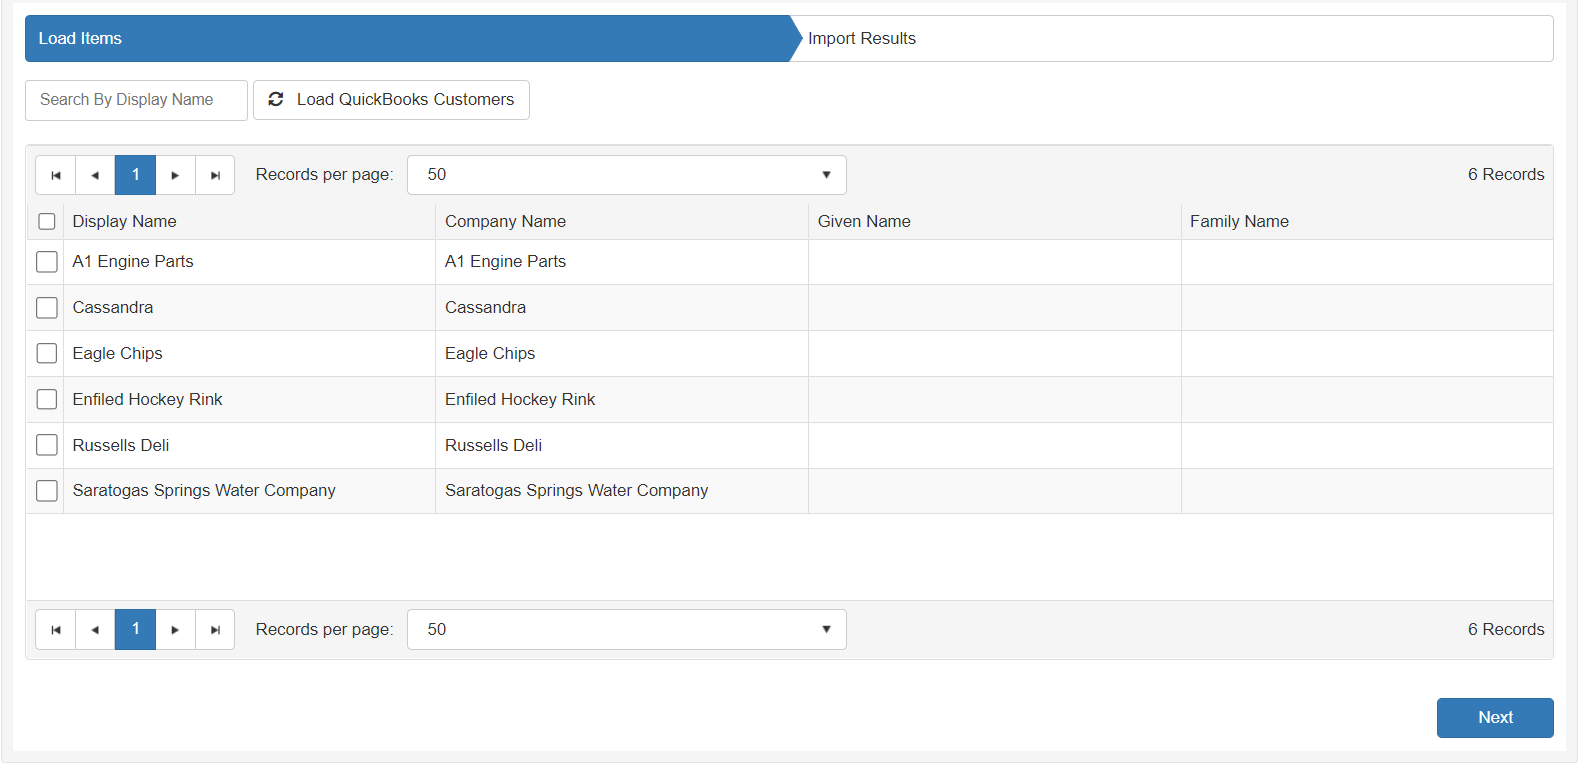
- You can search for specific customer by display name
- You can navigate to any page you want.
- You can select your page size. Page will load again with changed data based on your selection.
- Once you select your data, you can either press Next or the tab Import Results and your process will begin.
Import QuickBooks Vendors
Vendors follow the same procedure as customers. You are able to load page, search, and import your QuickBooks vendors to BMS.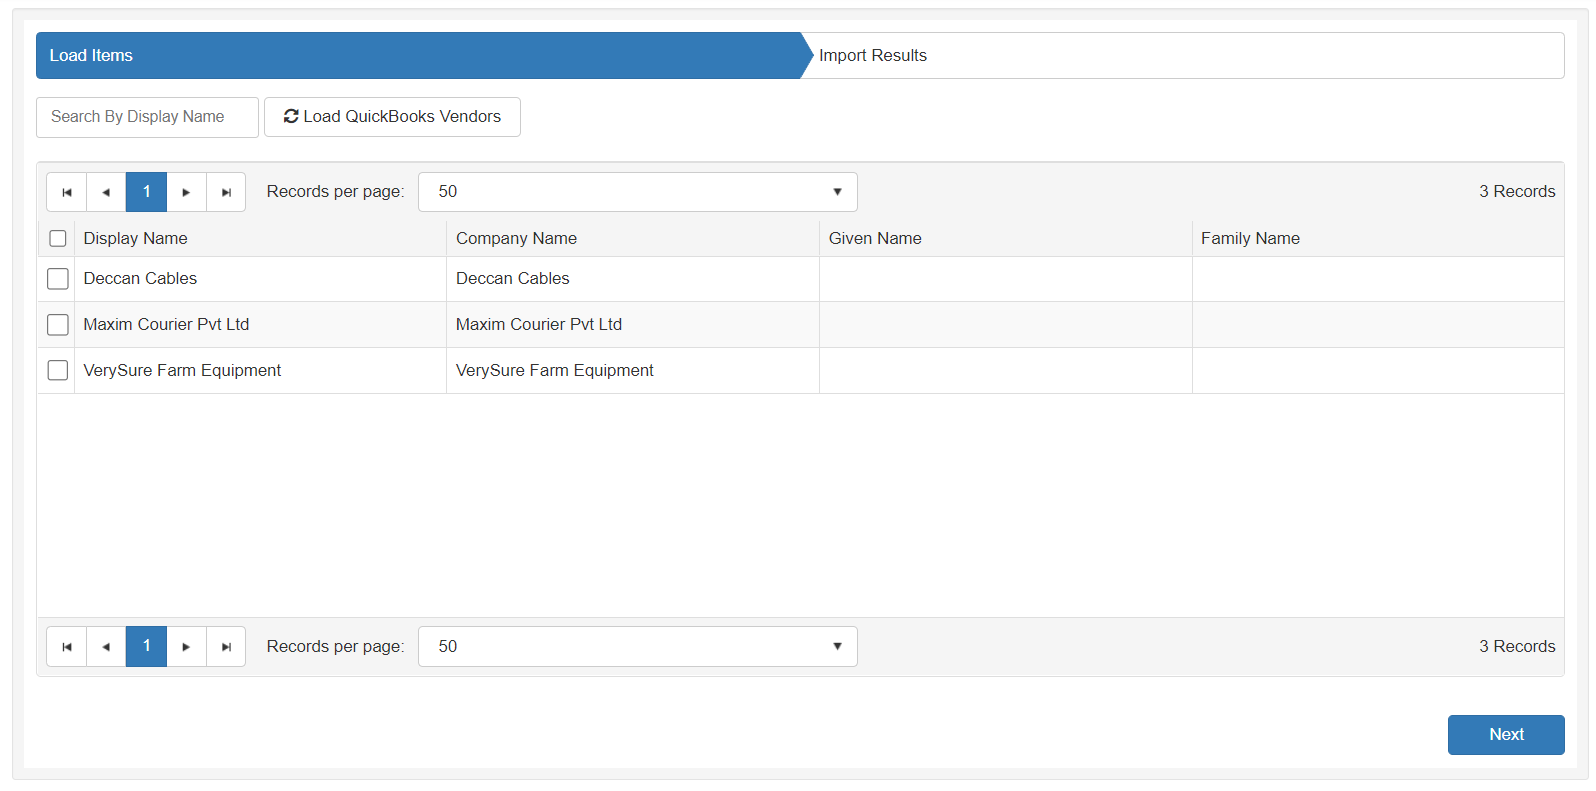
Important: For both customers and vendors, once a child account is selected and triggered for import procedure, the child is synced with its parent automatically in order to maintain the hierarchy. This works both in the case of QuickBooks online and desktop integration.
Import QuickBooks Sales Tax Items
Once selected all tax items and groups will be loaded from QuickBooks into a paged, searchable grid allowing you to select and import your taxes.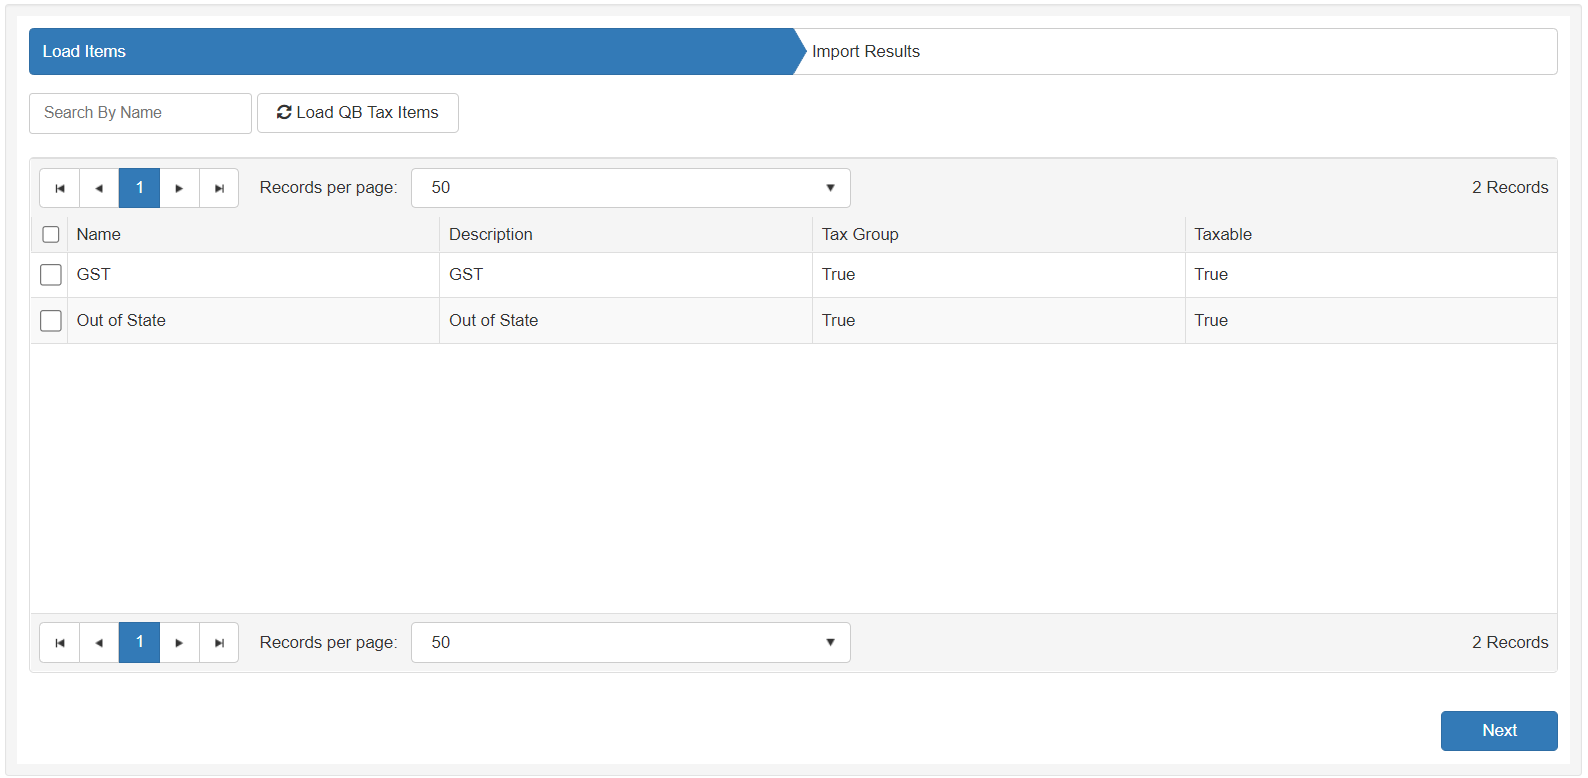
NOTE Once a group tax is selected, it will be imported with all of its items.
Import QuickBooks Items
In this section, services and products are loaded into the same, paged searchable grid. However, before starting the import procedure, you need to decide the target where you want to import your items.
Once Next or Choose Target tab is pressed, you will need to decide the target of your import (as on the image below).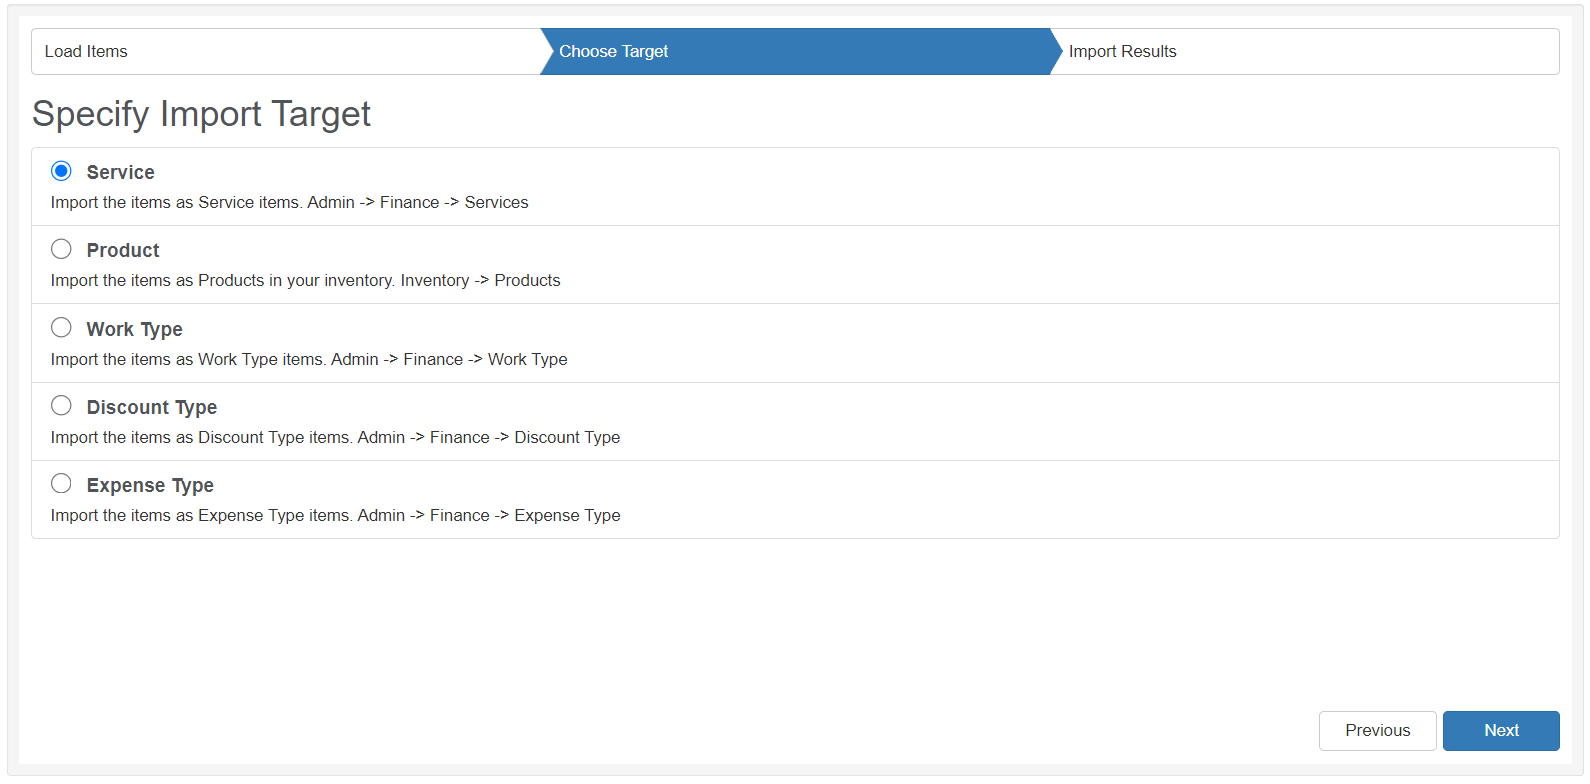
NOTE Same item may be imported into all available targets.
Import QuickBooks Accounts
Chart of Accounts are loaded from QuickBooks into a paged, searchable grid allowing you to select and import your accounts.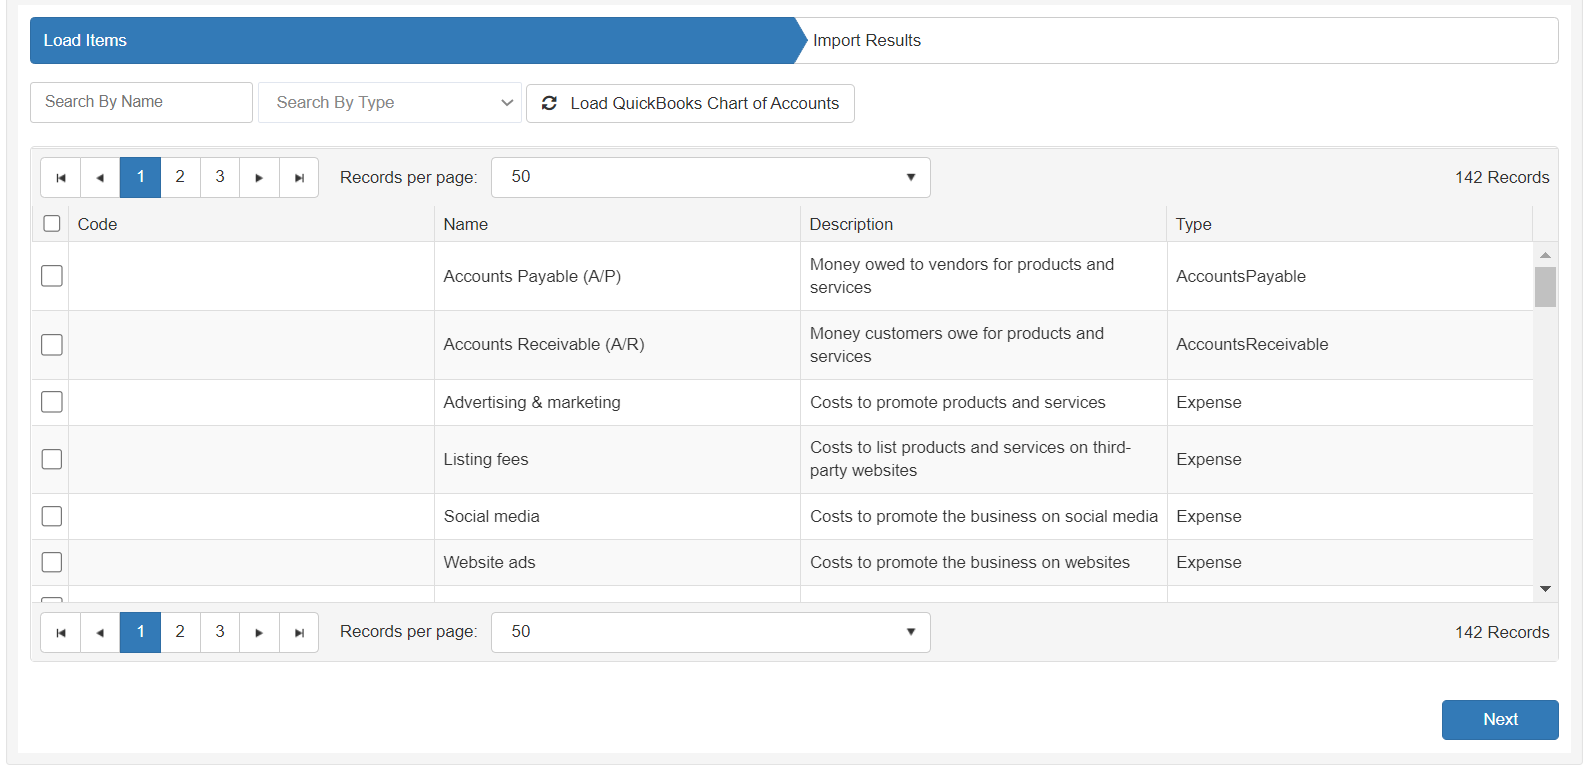
NOTE Once a child chart of an account is selected for import, it will be imported with its corresponding parent.
Export Section
This section is for exporting data from BMS to QuickBooks.
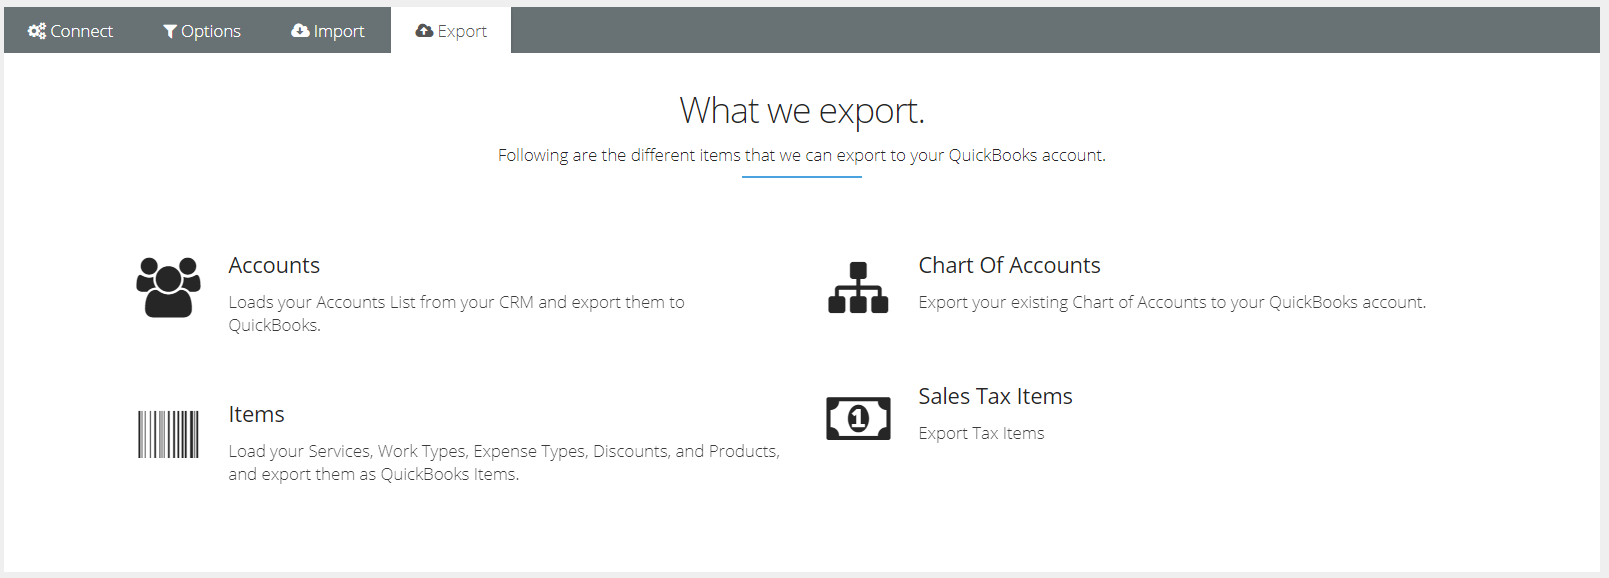
Export Accounts
In Accounts section, you must specify the account type before loading data from BMS.
After specifying the type of the accounts, data will be loaded correspondingly from BMS and then you can select and export data to QuickBooks.
NOTE Once a child account is selected for export, it will be exported with its corresponding parent.
Export Items
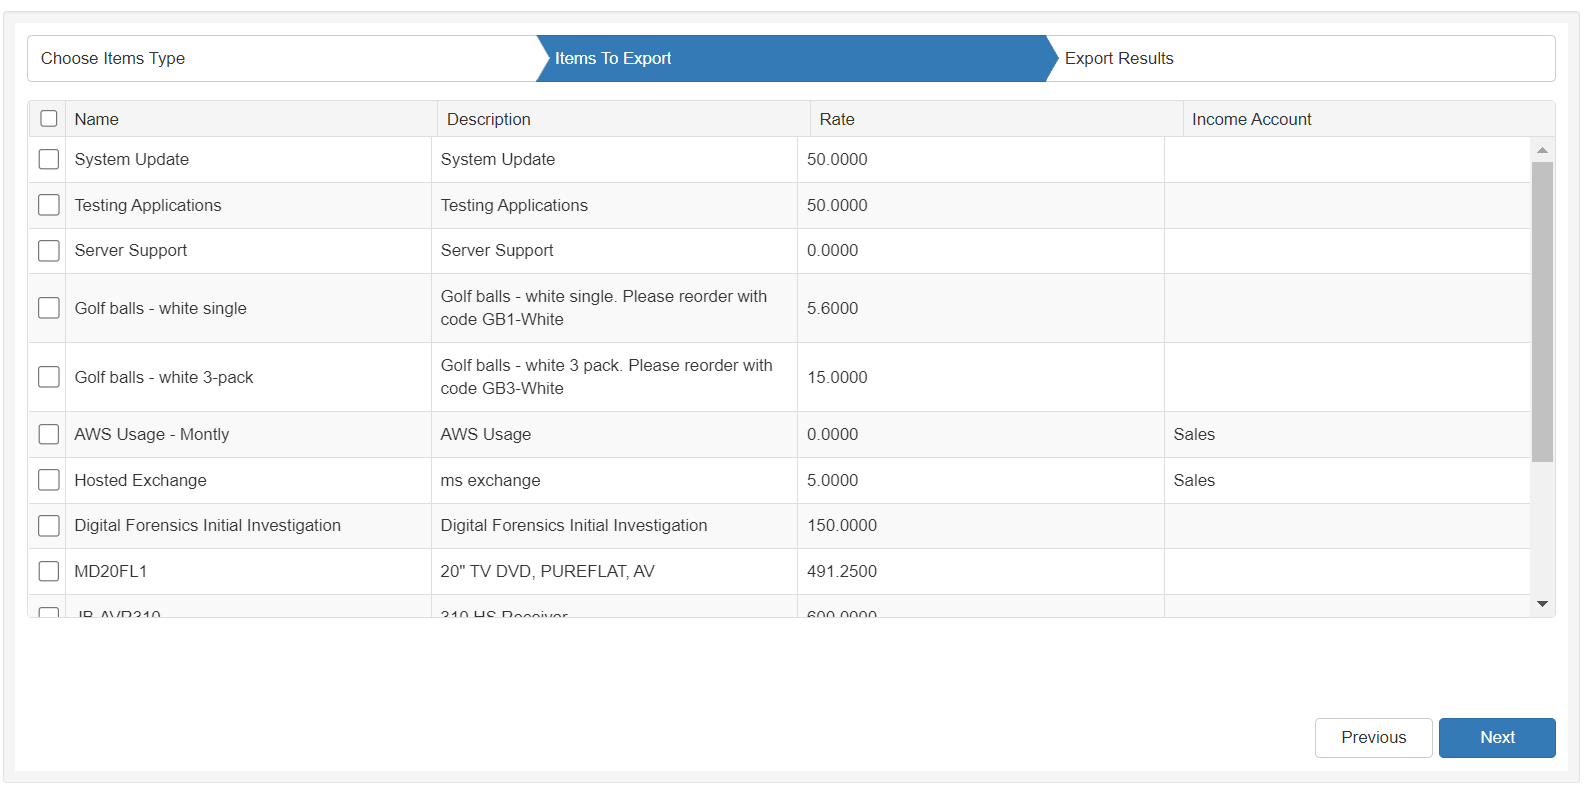
In this section, you should specify the item type first, which is the data source where grid will be populated from. Then, you can select items and proceed with your export.

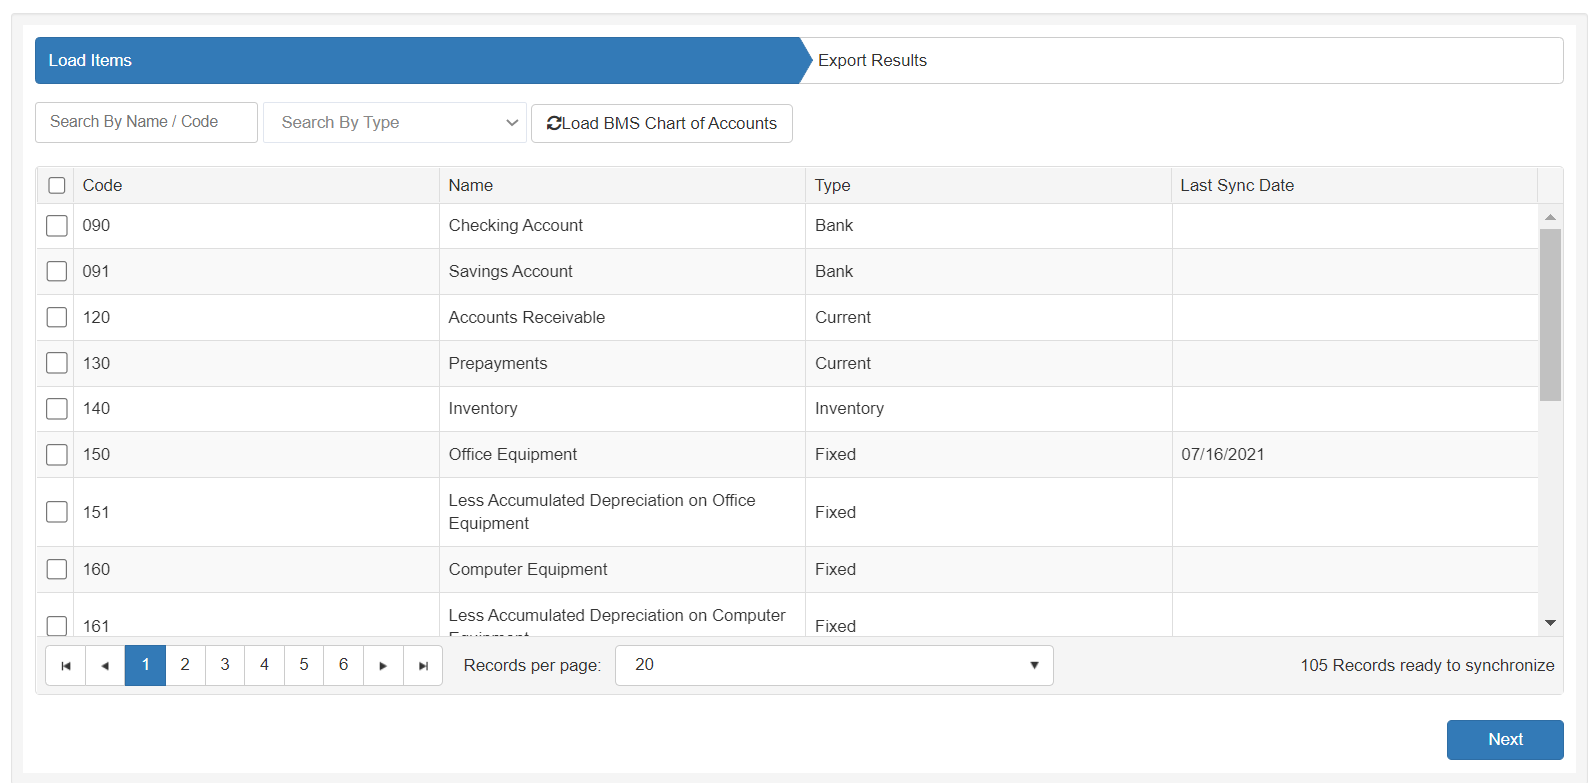
Export Chart of Accounts
Chart of Accounts are loaded from BMS. Select target and then proceed with your export.
Export Sales Tax Items
Once selected, all tax items and groups will be loaded from BMS into a paged, searchable grid allowing you to select and export your taxes.

NOTE Once a group tax is selected, it will be exported with all of its items.
Export Invoices
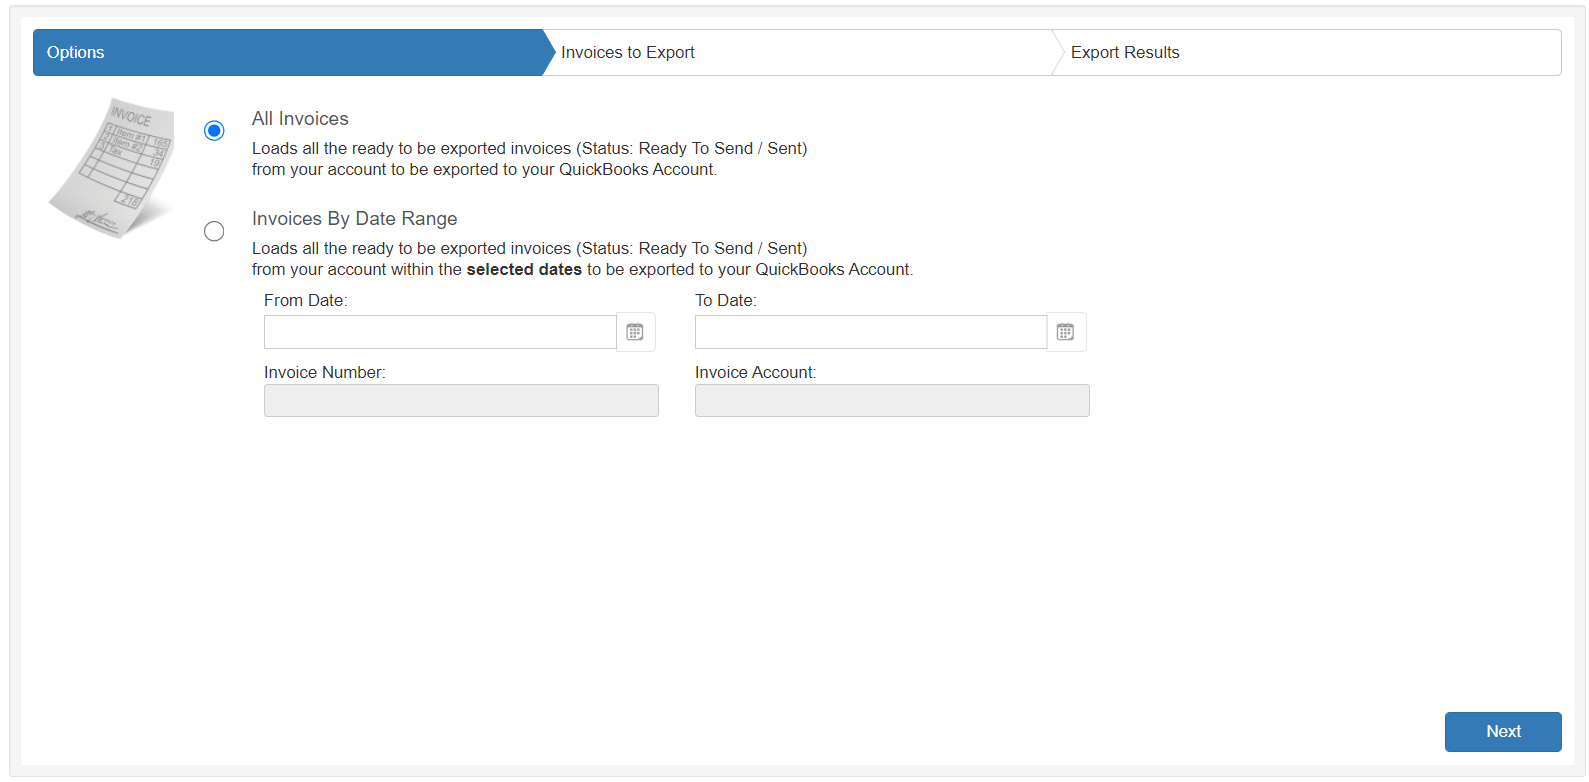
This procedure configures the synchronization of invoice data between QuickBooks and BMS.
NOTE Only after an invoice has been successfully generated and its status set to Ready to Send, Sent, Partially Paid, or Fully Paid, you can open the invoice in QuickBooks.
- Click the Export Invoices page.
- Search for your invoice by date range, invoice number , invoice account , or you can load all.
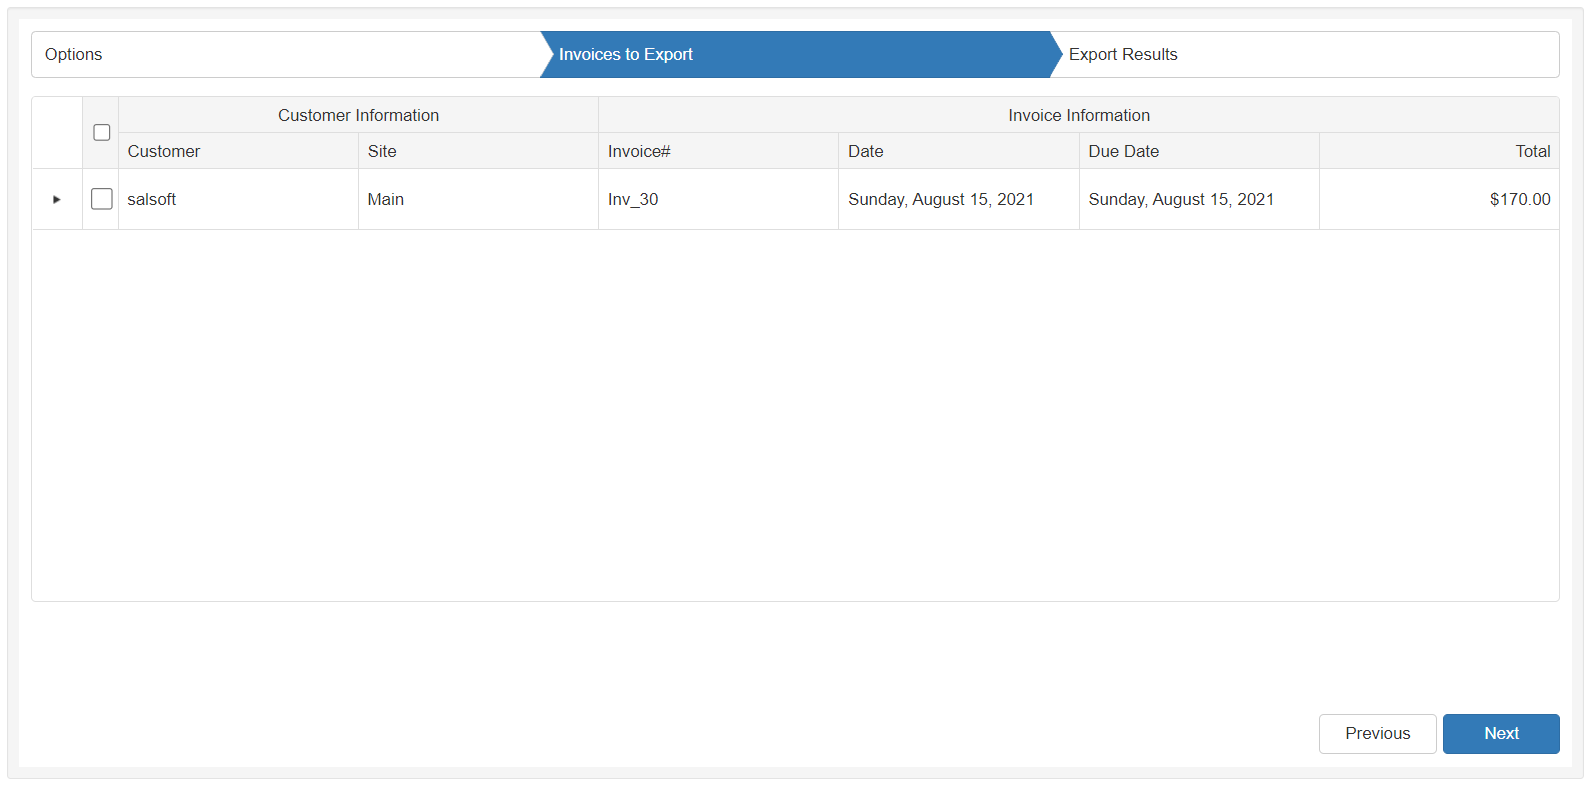
- Select the invoices to send to QuickBooks.
- Click Next and export selected invoices to QuickBooks.
Export Bills
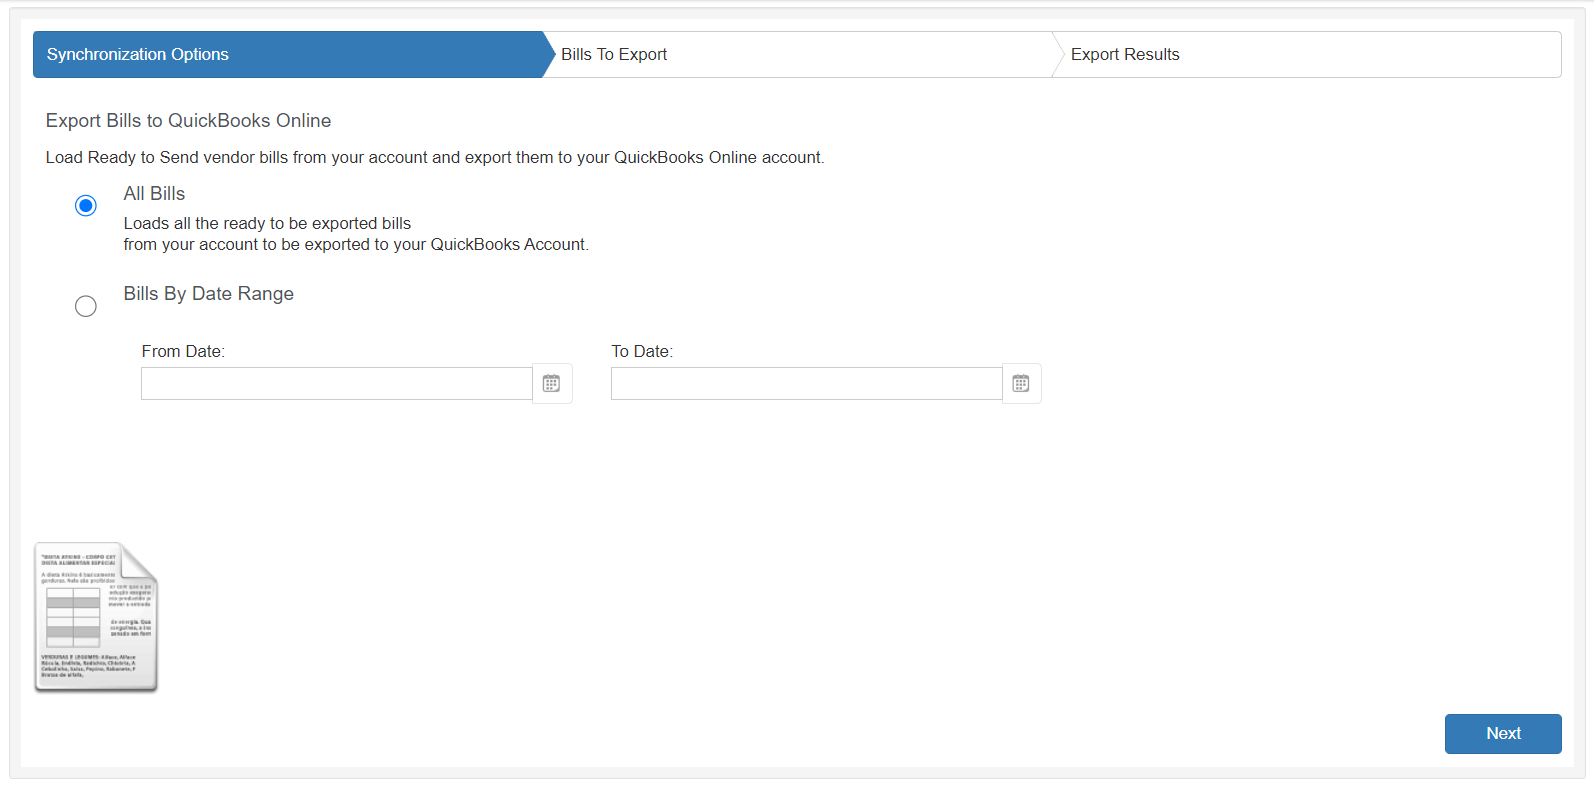
This procedure configures the synchronization of bills data between QuickBooks and BMS.
- Click the Export Bills page.
- Search for your bill by date range or you can load all.
- Select the bills to send to QuickBooks.
- Click Next.
- Once the selected bills come to Export Results tab, click Finish.
Import Payments
This procedure configures the synchronization of payment data between QuickBooks and BMS.
- Click the QuickBooks menu item > Import Payments page on the local menu panel.
- Search for payment by date range, payment number, or load them all.
- Select the individual payments to import.
- Review the list of imported payments on the Import Results tab.

Logging
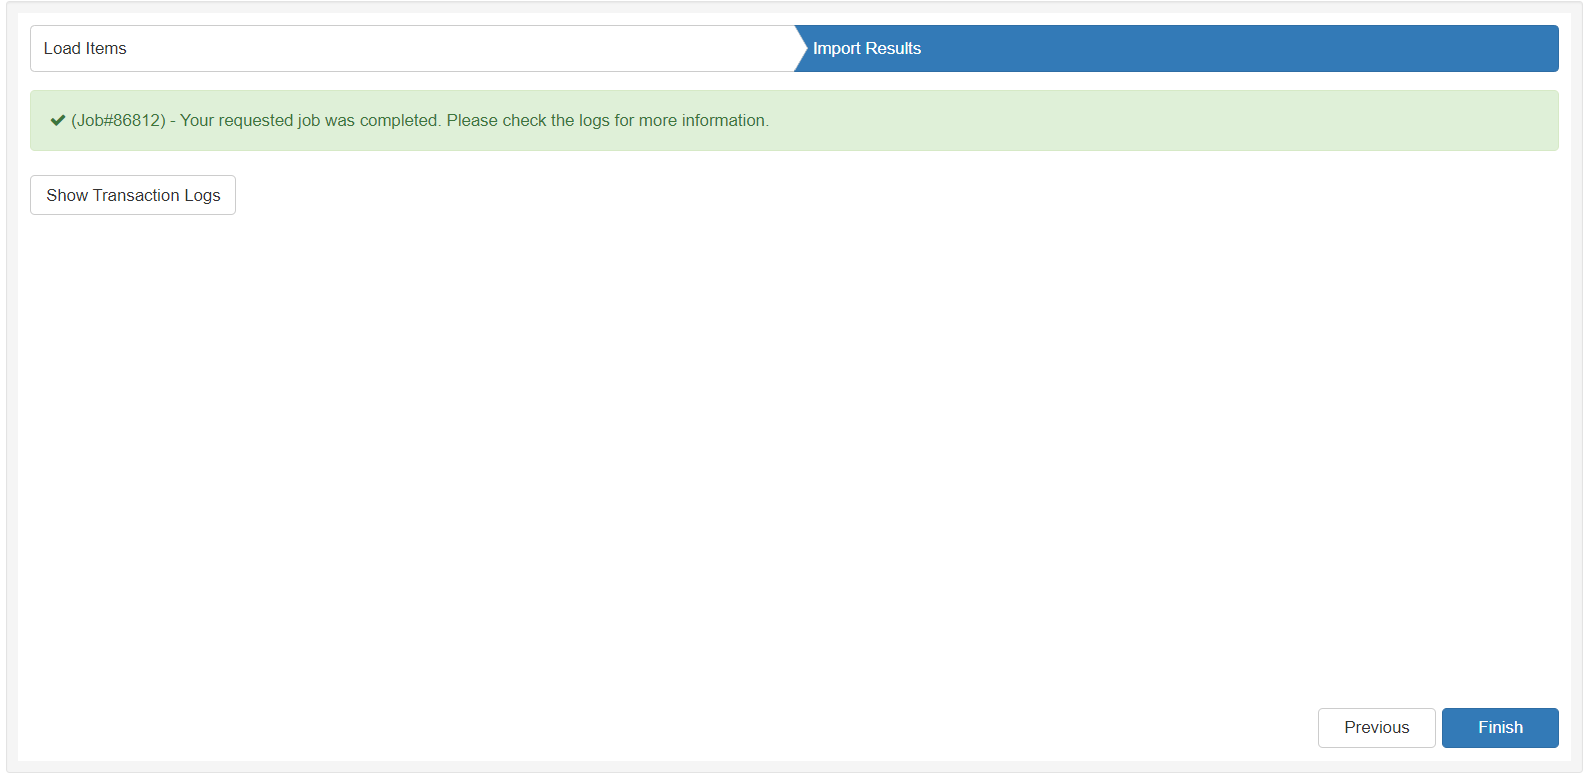
After any import or export procedure, you will get a final message describing the the status with all affected items during this procedure. You can press Show Transaction Logs and check all affected items.

Data Mapping
The following tables describe the data mapping between BMS and QuickBooks Online.
Account Code
QuickBooks entity: Account
| BMS Field | QuickBooks Field |
|---|---|
|
Account Code |
Field Number |
|
Account Name |
Name |
|
Description |
Description |
|
Account Type |
Account Type |
|
Parent Account |
Parent Account |
Product
QuickBooks entity: Inventory/Non-Inventory Product
| BMS Field | QuickBooks Field |
|---|---|
|
Product Name |
Name |
|
Product Description |
Description |
|
Expense Account |
Expense Account |
|
Income Account |
Income Account |
|
Requires Procurement (Yes/No) |
Inventory/Non-Inventory |
Work Type
QuickBooks entity: Service
| BMS Field | QuickBooks Field | Notes |
|---|---|---|
|
Work Type Name |
Name |
|
|
Description |
Description on sales form |
|
|
Income Account |
Income Account |
|
|
Taxable |
Inclusive of tax |
non-US companies |
|
Expense Account |
Expense account |
Services
QuickBooks entity: Service
| BMS Field | QuickBooks Field | Notes |
|---|---|---|
|
Service Name |
Name |
|
|
Unit Price |
Sales price/rate |
|
|
Description |
Description on sales form |
|
|
Income Account |
Income Account |
|
|
Taxable |
Inclusive of tax |
non-US companies |
|
Expense Account |
Expense account |
Expense Type
QuickBooks entity: Service
| BMS Field | QuickBooks Field | Notes |
|---|---|---|
|
Name |
Name |
|
|
Description |
Description on sales form |
|
|
Income Account |
Income Account |
|
|
Taxable |
Inclusive of tax |
non-US companies |
|
Expense Account |
Expense account |
Discount Type
QuickBooks entity: Service
| BMS Field | QuickBooks Field | Notes |
|---|---|---|
|
Name |
Name |
|
|
Description |
Description on sales form |
|
|
Income Account |
Income Account |
|
|
Taxable |
Inclusive of tax |
non-US companies |
|
Expense Account |
Expense account |
Tax Group
QuickBooks entity: Group rate
| BMS Field | QuickBooks Field | Notes |
|---|---|---|
|
Name |
Group Rate |
|
|
Tax Rate |
Sum of added sub tax items |
You can only add five children using Tax Rate dropdowns. |
|
Description |
Description |
|
|
Related Tax Items |
Sub Tax Items |
Refer to the following Tax Item mapping. |
Tax Item
QuickBooks entity: Custom Tax
| BMS Field | QuickBooks Field | Notes |
|---|---|---|
|
Name |
Group Rate |
|
|
Tax Rate |
Rate |
You need to check "I collect this on sales" first |
|
Tax Agency |
Tax Agency Name |
Accounts
QuickBooks entity: Customer/Vendor
| BMS Field | QuickBooks Field | Notes |
|---|---|---|
|
Account |
Display name as/Company |
|
|
Website |
Website |
|
|
Description |
Display name as |
|
|
Address Line 1 |
Street Line 1 |
|
|
Address Line 2 |
Street Line 2 |
|
|
City |
City/Town |
|
|
State |
State/Province |
|
|
Post Code |
Postal code |
|
|
Country |
Country |
|
|
Phone Number |
Phone |
|
|
Fax Number |
Fax |
|
|
Email Address (Billing Address Info) |
|
|
Invoice
QuickBooks entity: Invoice
| BMS Field | QuickBooks Field | Notes |
|---|---|---|
|
Account |
Customer |
|
|
P. O. Number |
Customer field, PO Number |
This field should be configured in company settings in quick books as a custom field. |
|
Invoice Date |
Invoice date |
|
|
Due Date |
Due date |
|
|
Notes |
Message on invoice/Message on statement |
|
|
Tax Item |
Sales Tax |
Where automatic sales tax calculation is disabled. |
|
Total Price |
Total |
|
|
Grand Total |
Balance due |
|
|
Address Line 1 |
Billing Address |
|
|
Address Line 2 |
|
|
|
City |
||
|
State |
|
|
|
Country |
||
|
Post Code |
|
|
|
Email Address (Billing Address Info) |
Customer email |
The first email address in BMS invoice |
Invoice Item
QuickBooks entity: Invoice Item
| BMS Field | QuickBooks Field | Notes |
|---|---|---|
| BMS Field | QuickBooks Field | Notes |
|
Item Name |
Product/Service |
|
|
Description |
Description |
|
|
Quantity |
QTY |
|
|
Unit Price |
Rate |
|
|
Total Price |
Amount |
|
|
Taxable |
Taxable (Yes/No) |
In non-US companies: the product/service tax will be the same as the invoice tax item. |
Payment
QuickBooks entity: Payment
| BMS Field | QuickBooks Field |
|---|---|
|
Account |
Customer |
|
Payment Date |
Payment Date |
|
Reference # |
Reference no |
|
Payment type |
Payment method |
|
Memo |
Memo |
|
Invoice Number |
Description |
|
Amount |
Amount Received |
Vendor Bill
QuickBooks entity: Expense
| BMS Field | QuickBooks Field |
|---|---|
|
Vendor |
Vendor |
|
Create On |
Bill Date |
|
Due Date |
Due Date |
|
Reference # |
Bill no. |
|
Amount |
Balance Due |
|
Memo |
Memo |


