Charge Type
Introduction
Path: Admin > Finance > Charge Type
A charge type is a financial charge that is included in the purchase order during procurement. The Charge Type page maintains a list of standard charge types. Once you add a charge type with this page, it will appear under Inventory > Procurement > Purchase Order > Purchase Order Charges tab > Add > Charge dropdown. You will see existing charge types in the Charge Type page. This page is also called Charge Type listing page.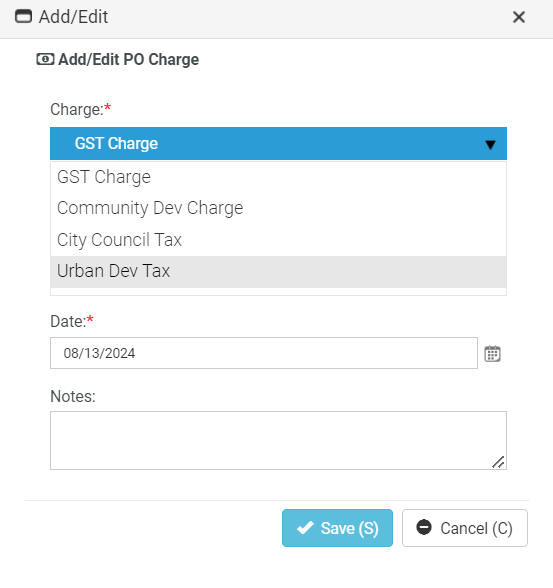

Searching for a charge type
You can search for a charge type using one or more of the following search criteria:
-
Name
-
Description
-
Navigate to Admin > Finance > Charge Type. The Charge Type page opens.
-
Name: Enter the name of the charge that you wish to search for.
-
Description: Enter a word or a few words of the description of the charge that you wish to search for
-
Click Search. The search results will be displayed. To clear the search results, click Clear Search.

Creating a charge type
-
Navigate to Admin > Finance > Charge Type. The Charge Type page opens.
-
Click New. The New Charge Type page opens.
-
Name: Enter an appropriate name for the charge type.
-
Description: Enter a brief description.
-
Status: By default, the Active status is selected. If you want the charge type to be currently inactive, select Inactive.
-
Income Account: Select the appropriate income account from the dropdown.
-
Expense Account: Select the appropriate expense account from the dropdown.
-
Taxable: By default, the Not Taxable is selected. If you want the charge type to be currently taxable, select Taxable
-
Click Save. If you want to add another charge type right after this, click Save and Add New. If you want to cancel everything that you have entered and/or selected, click Cancel. Clicking Cancel will take you to the Charge Type listing page.

Editing a charge type
-
Navigate to Admin > Finance > Charge Type. The Charge Type page opens.
-
Click the charge type that you want to edit. The Charge Type page opens in edit mode.
-
Make changes wherever you want.
-
Click Save. If you want to add another charge type right after this, click Save and Add New. If you want to cancel everything that you have entered and/or selected, click Cancel. Clicking Cancel will take you to the Charge Type listing page.
Deleting a charge type
-
Navigate to Admin > Finance > Charge Type. The Charge Type page opens.
-
Click the charge type that you want to delete. The Charge Type page opens in edit mode.
-
Click Delete on the top. BMS asks for confirmation.
-
Click Yes. The charge type is deleted.
Saving a customized view
The grid that you see beyond the search area shows the default view; however, you can customize a view and save it. You can then click the saved view and the grid will show the customized view with selected columns.
-
Navigate to Admin > Finance > Charge Type. The Charge Type page opens.
-
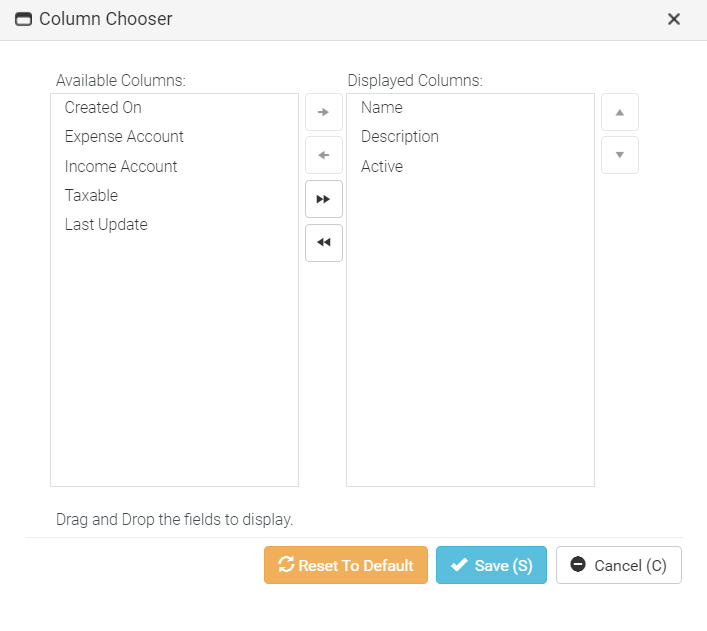
Click the Column Chooser (open book) icon which is next to the settings icon. The Column Chooser window opens.
-
Select as many columns from the left and click the right arrow or just slide them to the right.
-
Click Save. The additional columns will now appear in the grid.
-
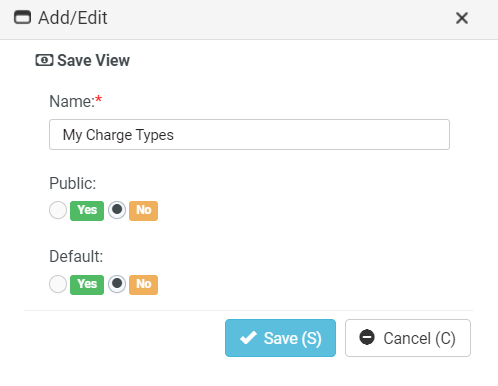
Click the sprocket (settings) icon and then click Save As.
-
Enter a name for your customized view.
-
Public: Click Yes or No according to your choice. If you select Yes, the view will be made public. If you select No, the view will be made private.
-
Default: Click Yes or No according to your choice. If you select Yes, the view will be made the default view. If you select No, the view will not be made the default view.
-
Click Save. You will now see that the name of the view has been added to the Views dropdown.
Sharing a custom view
You can share your custom view with others. Once you create a custom view, other options will appear as dropdown in the settings icon.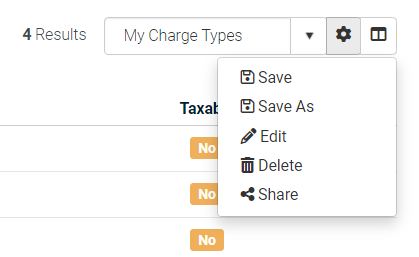
-
Navigate to Admin > Finance > Charge Type. The Charge Type page opens.
-
Select the view from the view dropdown.
-
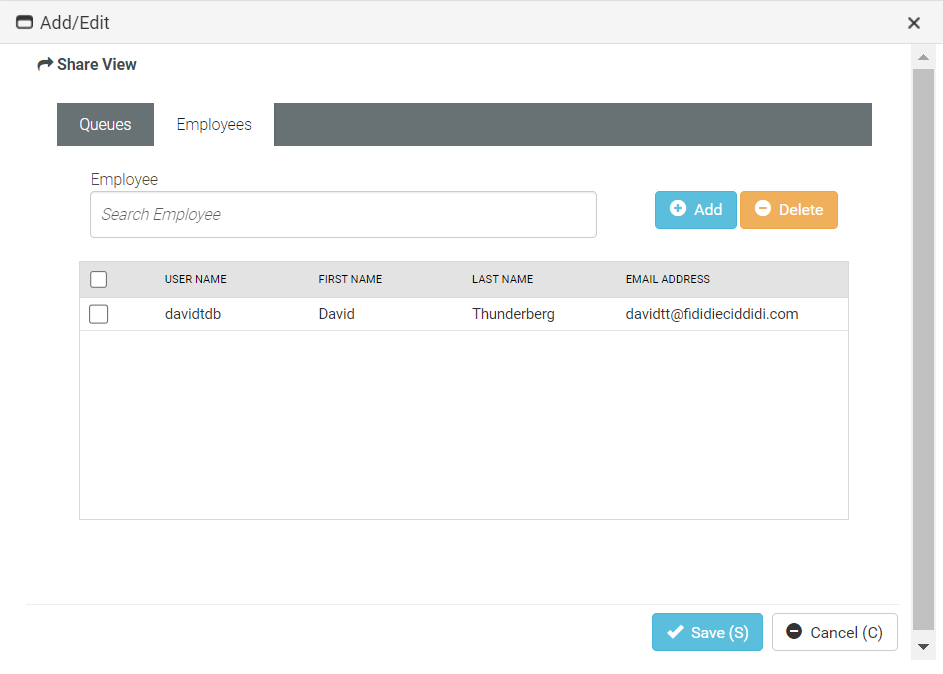
Click Share. The Share View window opens. You will see two tabs - Queues and Employees. The Queues tab is open by default. You can use one of the tabs or both the tabs.
-
Queue: Select a queue from the dropdown and click Add. The queue is added to the list below.
-
Click to select the relevant checkboxes.
-
Click Save.
-
If you wish to share the view with certain employees, go to the Employee tab.
-
Employee: Enter the first few letters of the employee. The employee name appears.
-
Click Add. The employee name is added to the list below.
-
Click to select the relevant checkboxes.
-
Click Save. The customized view is shared with the selected employee. If you want to cancel everything that you have entered and/or selected so far, click Cancel. Clicking Cancel will take you to the Charge Type listing page.
Exporting the grid
You can export the grid as an Excel file. The grid might contain several pages in some cases depending on the number of charge types that you have created. You can export the current page or all the pages together as an Excel file.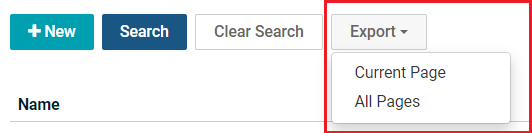
-
Navigate to Admin > Finance > Charge Type. The Charge Type page opens.
-
Click Export > Current Page or All Pages.
-
In the Save As window, enter an appropriate file name.
-
Click Save.


