Email Templates
Introduction
Path: Admin > Business Process > Email Templates
The email templates are templates that can be used in emails to customer's clients. The templates are simple and easy to create, and they can cater to various scenarios. Email templates are used mainly in workflows (Admin > Business Process > Workflows > individual workflow > Notifications tab [under second section from top] > Notification Template section > Email Template field). They are also used in Client Portal and during resetting of user password.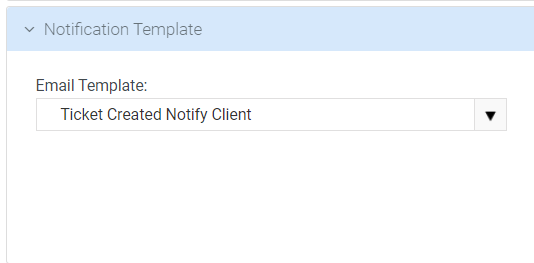
Searching for an email template
You can search for an email template by using one or more of the following search criteria.
-
Name
-
Module
- Name: Enter the name of the email template that you wish to search for.
- Module: Select the appropriate module from the dropdown.
- Click Search. The search results will be displayed. To clear the search results, click Clear Search.

Creating an email template
- Go to Admin > Business Process > Email Templates.
- Click New.
- In the Email Template Info section, do the following:
- Email Template Name: Enter a name for the email template.
- Description: Enter a brief description for the email template.
- Module: Select the appropriate module from the dropdown for which the email template is meant. Most of the email templates are used in workflows; however, some specific templates can be used for Client Portal or during resetting of a user password. For these two scenarios, select New Client Portal User or Reset User Password respectively from the Module dropdown.
- Status: Select either Active or Inactive. By default, Active is selected.
- In the Email Template Details, do the following:
- Email Display Name: Enter the sender's name.
- From: Enter the sender's email ID. By default, you will see notifications@vorex.com.
- CC: Enter mail IDs of persons to whom you want to send a CC.
- BCC: Enter mail IDs of persons to whom you want to send a BCC.
- Subject: Enter a subject for the email template.
- Content: You can create a standardized text here with the help of fields selected from the right. Select appropriate fields from the right as you frame sentences. Whenever you select a field (for example, Ticket Number), the field will be enclosed within percentage signs. The fields are variables where you can write custom text. Take a look at the example below. The Details text box has three views - Design, HTML and Preview. By default, when you open the page, you will see the Design view. You can explore HTML and Preview views as well.
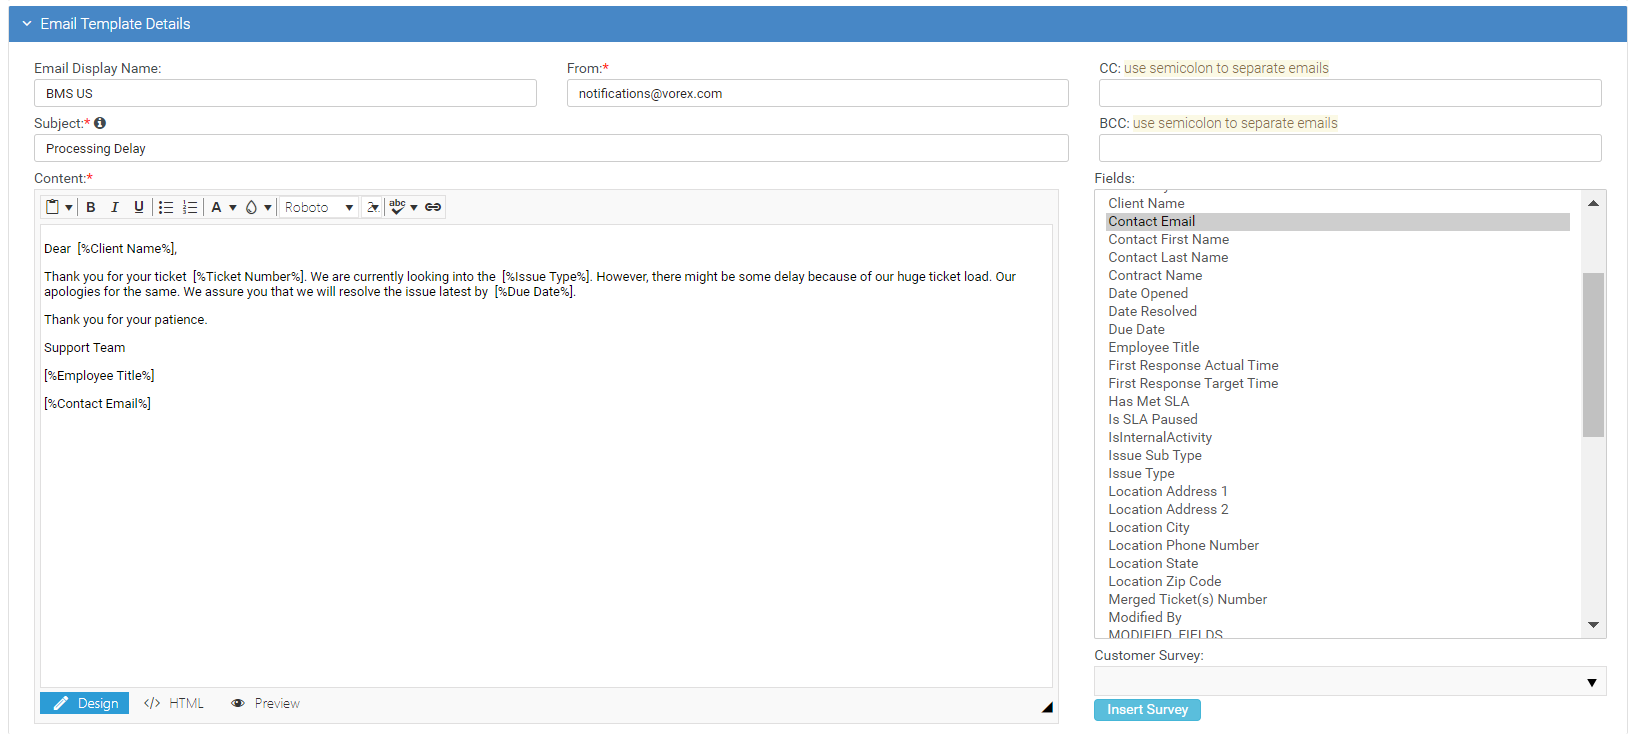
- When using the [%TicketNumber%] field anywhere in the email template, you will need to add hashtags on either end of the field as shown here - #[%TicketNumber%]#.
- If you wish to have threaded messages sent out to your customers showing the full history of the ticket, you should change [%ActivityDetails%] to [%AllActivityDetails%].
- Customer Survey: You can attach a survey if you want by using this field. Select a survey from the dropdown and click Insert Survey.
- Click Save. You will find the saved email template in the grid in the Email Templates page. Once you click Save, you will find that the Delete and Refresh buttons are active. At this stage, you can refresh the page using the Refresh button or delete the template using the Delete button.
Editing an email template
- Go to Admin > Business Process > Email Templates. The Email Templates page opens.
- In the grid, click the template that you want to edit. The template opens.
- Make changes to the relevant fields according to your choice. Some fields may be non-editable.
- Click Save.
Creating a custom view
The grid that you see beyond the search area shows the default view; however, you can customize a view and save it. You can then click the saved view and the grid will show the customized view with selected columns.
- Click the Column Chooser (open book) icon which is next to the settings icon.
- Select as many columns from the left and click the right arrow or just slide them to the right.

- Click Save. The additional columns will now appear in the grid.
- Click the settings icon and then click Save As. Enter a name for your custom view.
- Public: Click Yes or No according to your choice. If you select Yes, the view will be made public.
- Default: Click Yes or No according to your choice. If you select Yes, the view will be made the default view.
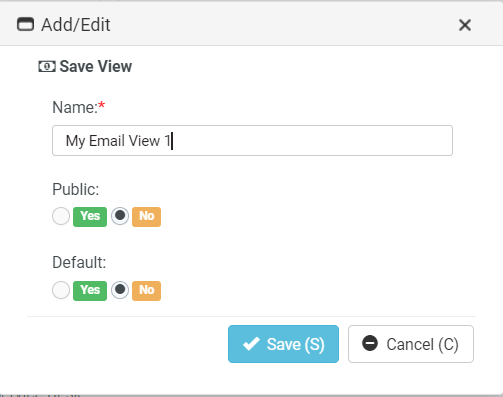
- Click Save. You will now see that the name of the view has been added to the Views dropdown.
Sharing a custom view
You can share your custom view with others. Once you create a custom view, other options will appear as dropdown in the settings icon.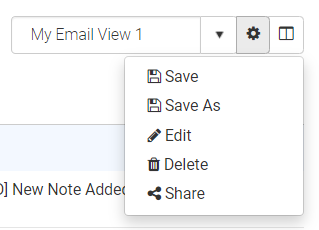
- Select the view from the view dropdown.
- Click Share. The Share View window opens. You will see two tabs - Queues and Employees. The Queues tab is open by default. You can use one of the tabs or both the tabs.
- Queue: Select a queue from the dropdown and click Add. The queue is added to the list below.
- Click to select the relevant checkboxes.
- Click Save.
- If you wish to share the view with certain employees, go to the Employee tab.
- Employee: Enter the first few letters of the employee. The employee name appears.
- Click Add. The employee name is added to the list below.
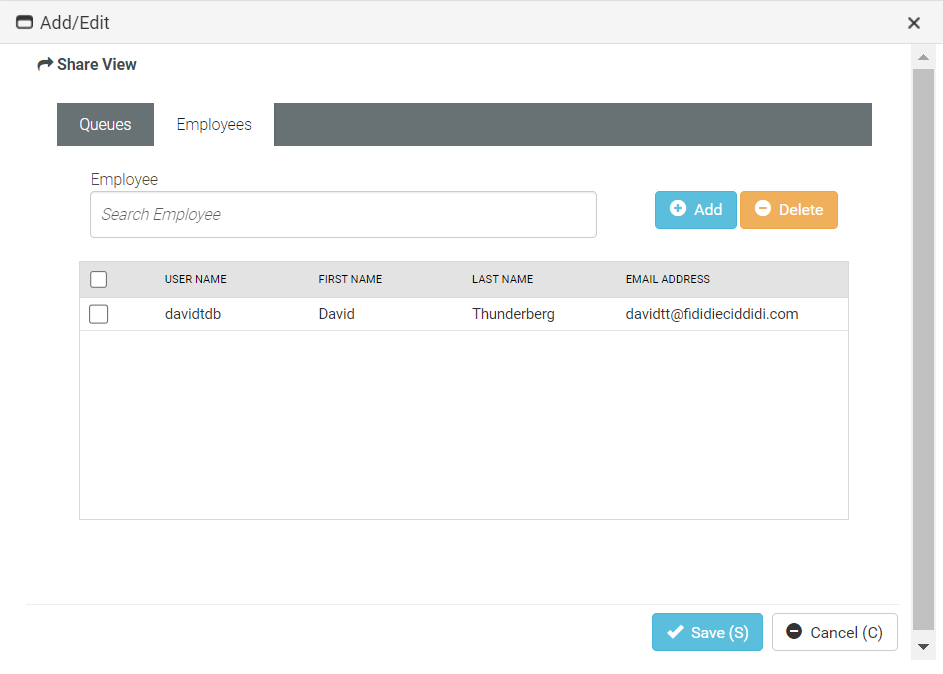
- Click to select the relevant checkboxes.
- Click Save.
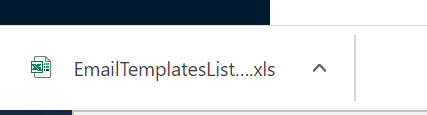
Exporting the grid
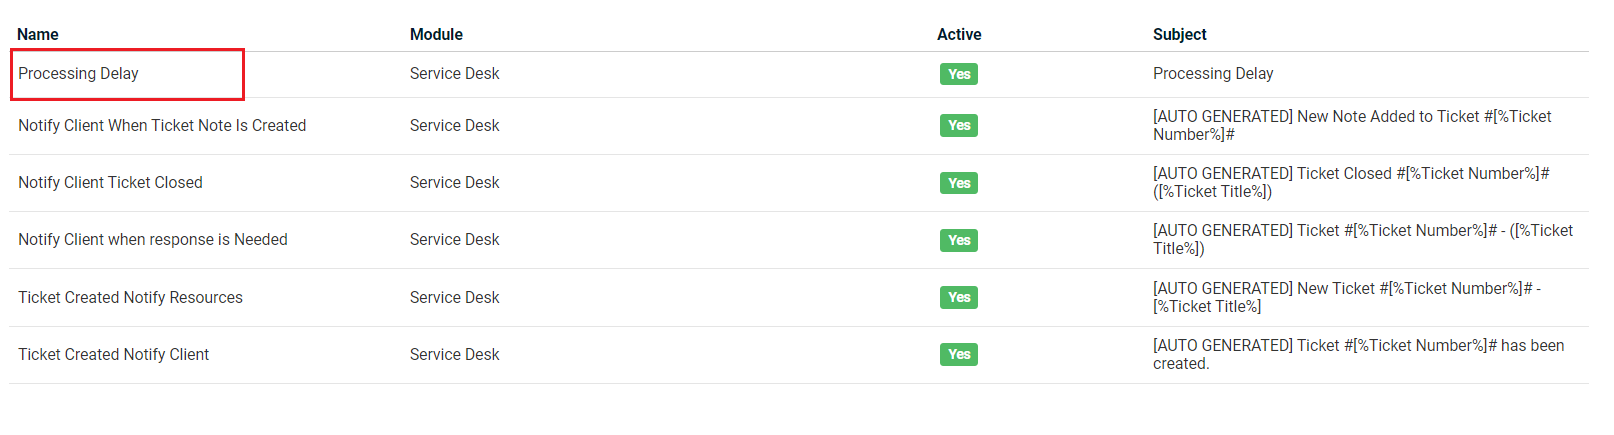
You can export the grid that you see in the Email Templates page. The grid shows the different email templates that you have created. (You can see an image of the grid towards the end under the section Creating an Email Template above.)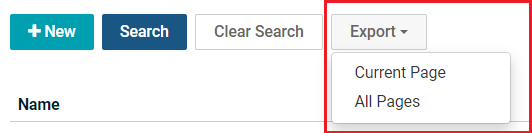
- Click the Export button which you will find near the Search buttons.
- Click Current Page or All Pages depending on your choice. You will see a downloaded Excel file at the bottom left corner of your browser. This file contains columnized data from the grid.