SLA
NAVIGATION Admin > Service Desk > SLA
The SLA page provides a comprehensive list of service level agreements. An SLA (service level agreement) is a formal contract between a service provider and a customer that outlines the expected level of service. It typically specifies response times, escalation procedures, and, in some cases, resolution times for incidents. These agreements define, in measurable terms, how your organization addresses client needs and service requests.
SLAs play a crucial role in setting clear expectations for service delivery. Without them, customers may assume that services will always be available and delivered at 100% capacity. By formalizing these expectations, SLAs help prevent misunderstandings and ensure accountability. Additionally, SLAs can be tailored to individual clients based on the terms of your contractual agreement with them.
The SLAs created using the SLA page appear in the SLA drop-down menu on the Contract > New > <Any type> page. The SLA drop-down menu appears for all types of new contracts.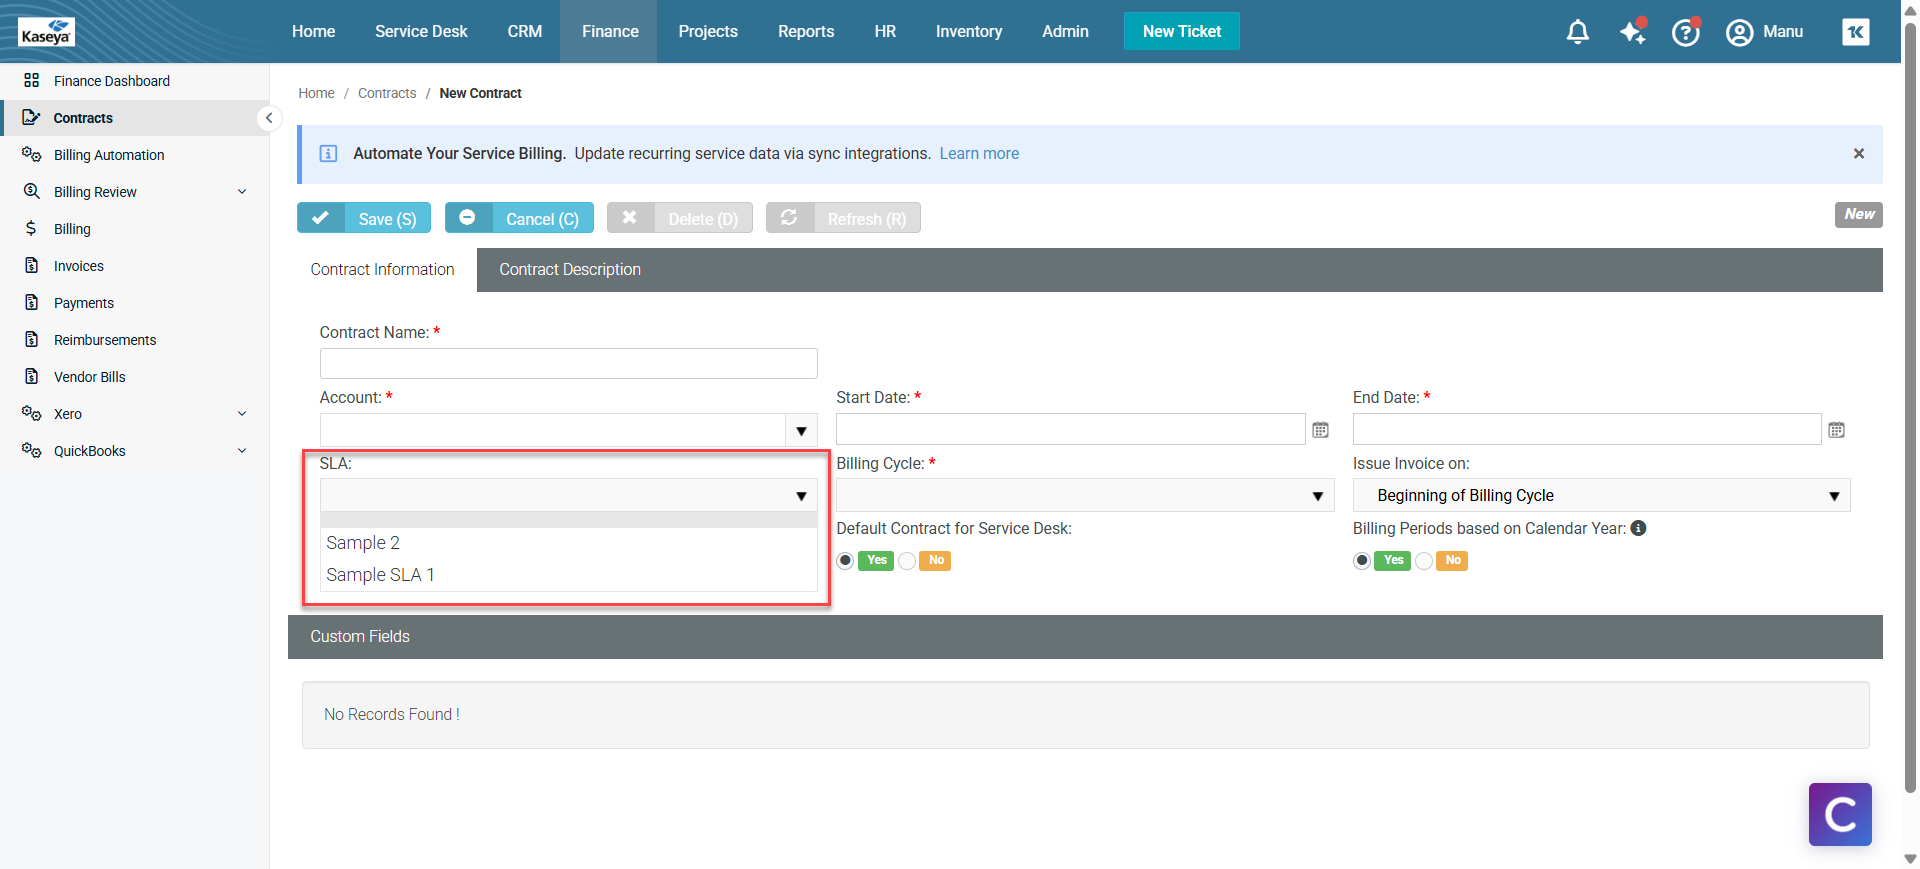
Tickets
-
A default SLA is set for all tickets using the Admin > My Company > Company Settings > Service Desk tab.
-
Email parsers calculate the SLA Time to Resolution when a new ticket is added.
-
The SLA Time to Resolution is paused whenever a ticket is in the waiting for customer status.
-
For tickets assigned an SLA, when editing a ticket, you will see a link next to an SLA Status field in the Ticket View tab. Click this link to see the estimated and actual times specified for resolving the ticket by the SLA.
Workflows
Workflows contain several SLA options that affect how tickets are processed.
Triggers
-
SLA First Response Due In: Specifies when a SLA first response is due and sends an alert, in hours or minutes.
-
SLA Resolution Due In: Specifies when a SLA resolution is due and sends an alert, in hours or minutes.
-
SLA Resolution Overdue By: Specifies when a SLA resolution is past due and sends an alert, in hours or minutes.
Conditions
-
SLA: A ticket may or may not be assigned to one or more selected SLAs.
Update
-
SLA: Assigns a ticket to a specified SLA.
Contracts
Contracts can also be assigned to SLAs. A contract associated with an SLA overrides the default SLA when the ticket is linked to the contract.
Creating an SLA
-
Click New to open the New Service Level Agreement page.
-
Name: Enter a name for the SLA.
-
Description: Enter a brief description.
-
Business Hours Of: Select the appropriate office from the drop-down menu.
-
Click Save.
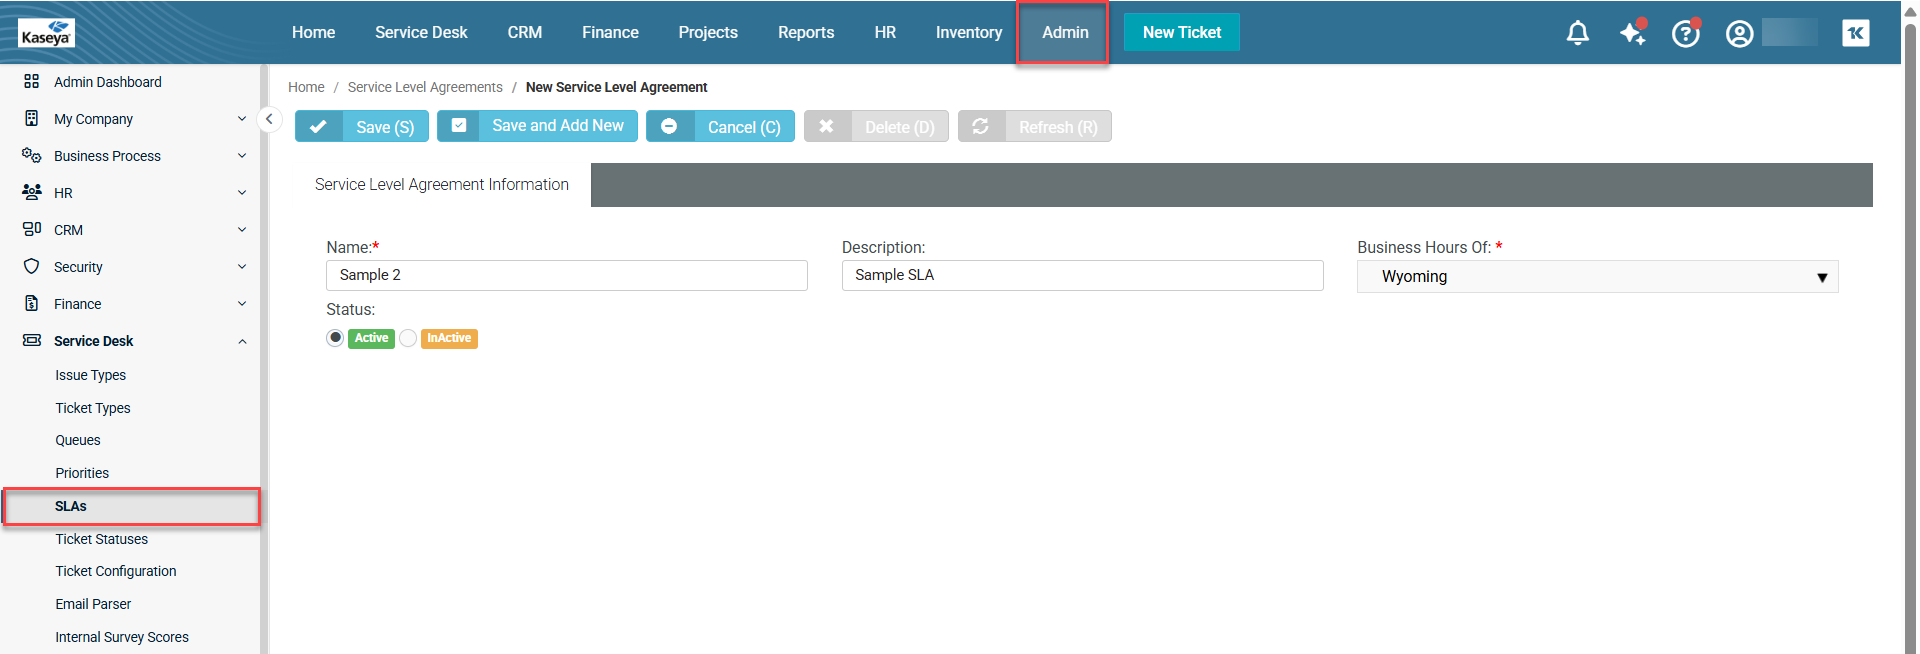
You'll also see a new tab, SLA Objectives, that opens at the bottom of the page.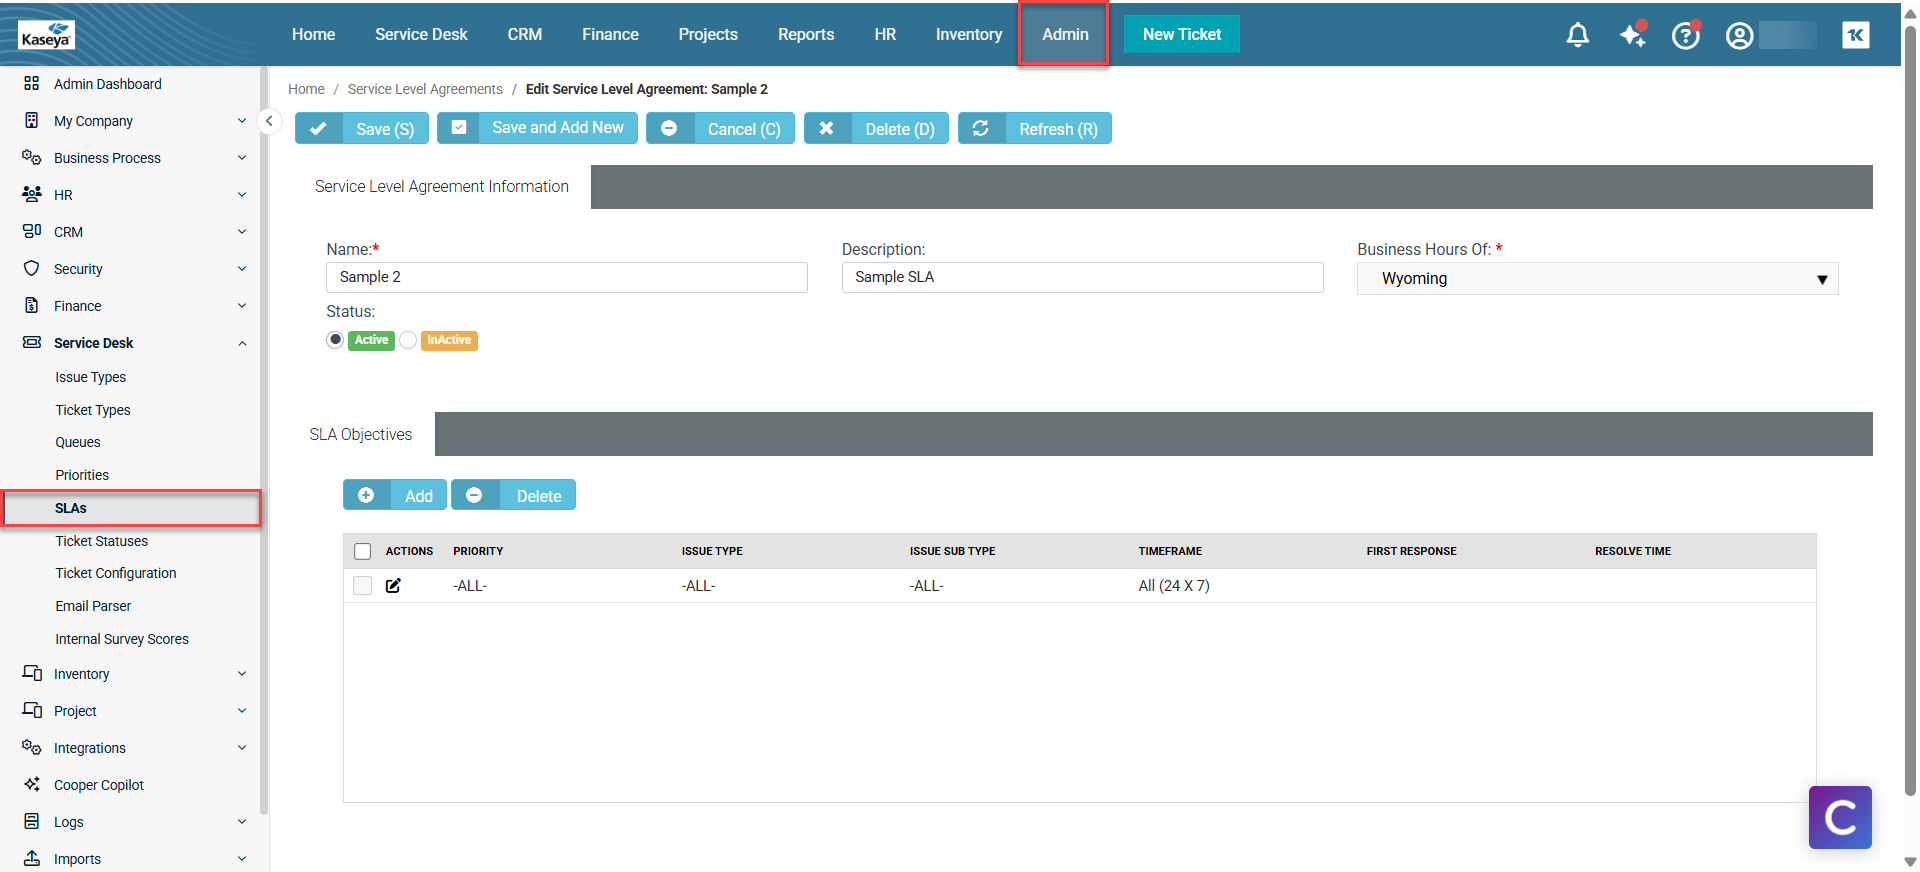
The SLA Objectives tab displays the objectives of the particular SLA. By default, an automatic entry is displayed when the tab opens. The entry displays Priority as All, Issue Type as All, Issue Sub Type as All, and Timeframe as All (24 x 7). You can edit this entry according to your requirements. Additionally, you can add more entries as more objectives. To edit the default entry, complete the following steps: -
Click the
 icon to open the entry in edit mode.
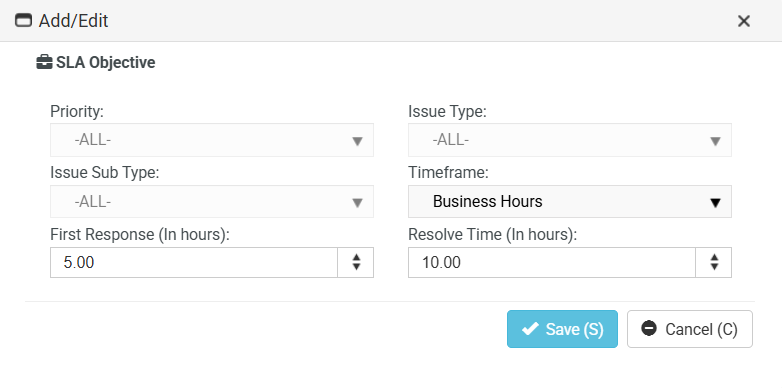
NOTE You can edit only the Timeframe, First Response (in hours), and Resolve Time (in hours) fields.
-
Timeframe: Select the appropriate timeframe from the drop-down menu.
-
All: Using all 24 hours, seven days a week.
-
Business Hours: Using the business hours defined for this location. For example, a location defines business hours as 8:00 AM to 5:00 PM, Monday through Friday. You have a four-hour SLA for an incident and the ticket comes in at 3:00 PM on Monday. Based on these hours of operation, you have until 10:00 AM on Tuesday to respond.
-
Extended: Using business hours and the hours beyond the normal end of the same workday for this location, excluding weekends and holidays. For example, a location defines business hours as 8:00 AM to 5:00 PM, Monday through Friday. You have an eight-hour SLA for an incident and the ticket comes in at 3:00 PM on Monday. Based on these hours of operation, you have until 11:00 PM of the same day, Monday, to respond.
-
-
Click Save. The entry is saved with the changes.

-
Click Save in the upper-left corner of the page to save the entire SLA details. If you want to add another SLA right after this, click Save and Add New. If you want to cancel everything that you have entered and/or selected so far, click Cancel. Clicking Cancel will take you to the SLA listing page.
Editing an SLA
-
Click the SLA that you want to edit to open the SLA page in edit mode.
-
Make changes as required.
-
Click Save. If you want to add another SLA right after this, click Save and Add New. If you want to cancel everything that you have entered and/or selected so far, click Cancel. Clicking Cancel will take you to the SLA listing page.
Deleting an SLA
-
Click the SLA that you want to delete to open the SLA page in edit mode.
-
Click Delete at the top of the page. BMS asks for confirmation.
-
Click Yes to delete the SLA.
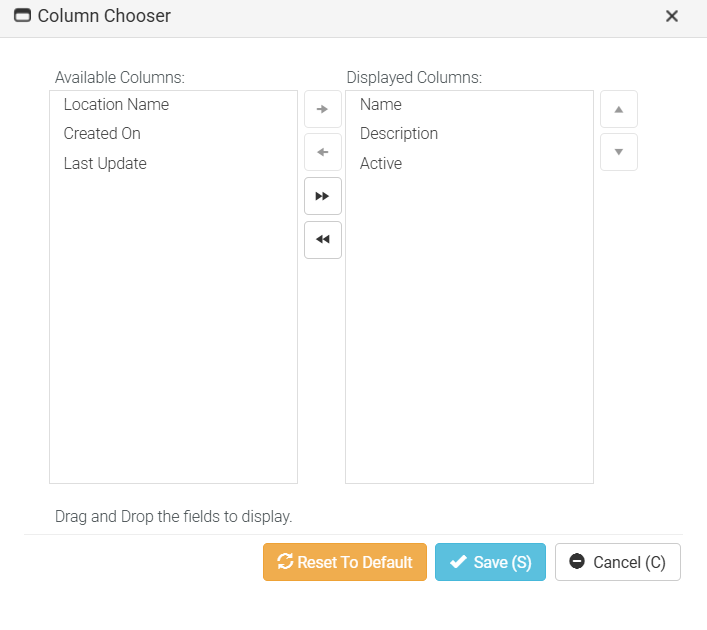
Saving a customized view
The table that you see beyond the search area shows the default view; however, you can customize a view and save it. You can then click the saved view, and the table will show the customized view with selected columns.
-
Click the Column Chooser icon, which is next to the settings icon. The Column Chooser window opens.
-
Select as many columns from the left and click the right arrow or simply slide them to the right.
-
Click Save. The additional columns will now appear in the table.
-
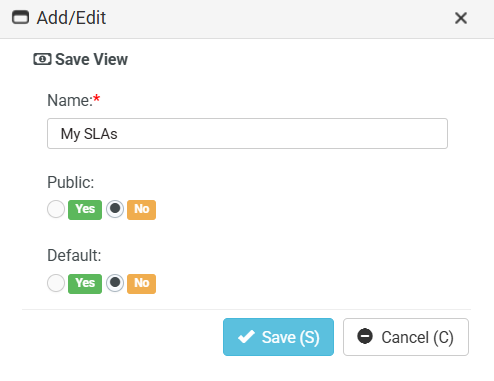
Click the settings icon and then click Save As.
-
Enter a name for your customized view.
-
Public: Click Yes or No according to your choice. If you select Yes, the view will be made public. If you select No, the view will be made private.
-
Default: Click Yes or No according to your choice. If you select Yes, the view will be made the default view. If you select No, the view will not be made the default view.
-
Click Save. You will now see that the name of the view has been added to the Views drop-down menu.
Sharing a customized view
You can share your custom view with others. Once you create a custom view, other options will appear as a drop-down menu in the settings icon.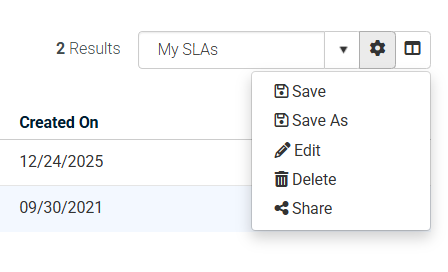
-
Select the view from the view drop-down menu.
-
Click Share to open the Share View window. You will see two tabs: Queues and Employees. The Queues tab is open by default. You can use one of the tabs or both the tabs.
-
Queue: Select a queue from the drop-down menu and click Add. The queue is added to the list below.
-
Select the relevant checkboxes.
-
Click Save.
-
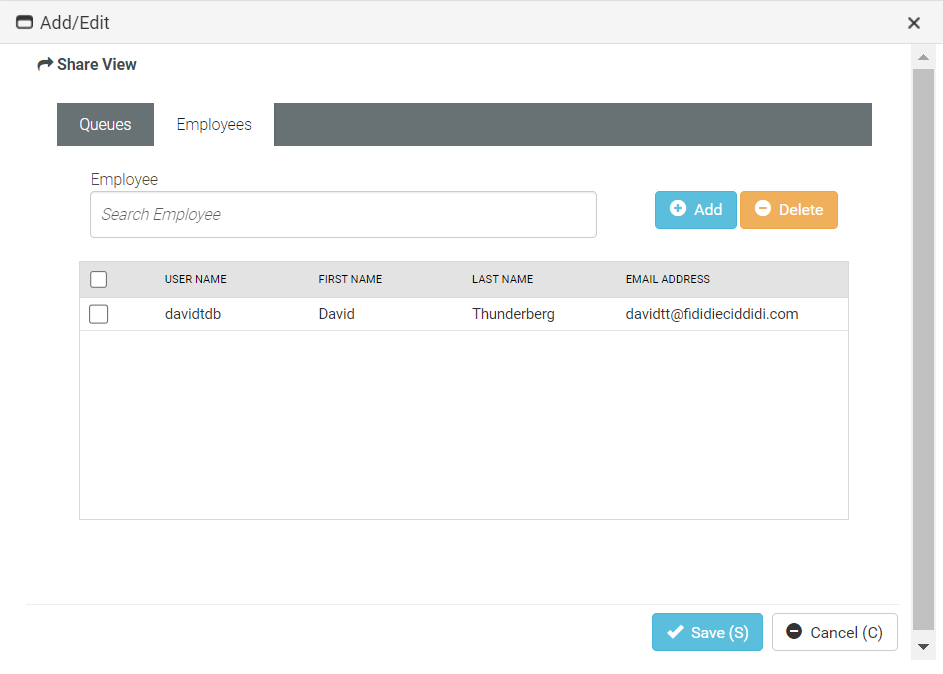
If you wish to share the view with certain employees, go to the Employee tab.
-
Employee: Enter the first few letters of the employee. The employee name appears.
-
Click Add. The employee name is added to the list below.
-
Select the relevant checkboxes.
-
Click Save. The customized view is shared with the selected employee. If you want to cancel everything that you have entered and/or selected so far, click Cancel. Clicking Cancel will take you to the SLA listing page.
Exporting the table
You can export the table as an Excel file. The table might contain several pages in some cases depending on the number of SLAs that you have created. You can export the current page or all the pages together as an Excel file.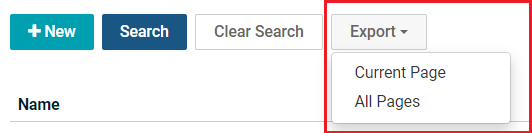
-
Click Export > Current Page or All Pages.
-
In the Save As window, enter an appropriate file name.
-
Click Save. You will see the downloaded Excel file in the default download location on your device. This file contains tabular data from the table.


