Setting up custom SMTP with Office 365 as outbound email in BMS
Introduction
The following process outlines how to set up a custom SMTP connection with Office 365 as outbound email in BMS.
Steps
-
Go to Admin > My Company > Outbound Email. The Outbound Email page opens.
-
Business Email: Enter the business email ID that sends the outbound email. This should be in the format name@domain.com.
-
Business Email Display Name: Enter the business name that should be accompanying the business email ID. This is the display name that appears in the inbox.
-
Use Custom SMTP Settings: By default, this is set to No. This means that BMS is using Kaseya's email server to send emails. Set this to Yes. You should now enter your outgoing mail server address, username, and password.
-
Outgoing Mail Server (SMTP): (This field becomes active only when you select Yes in the above option.) In this case, enter smtp.office365.com. We are just using Office 365 as an example. You should obtain your outgoing mail server address from your mail provider if your mail server is not hosted by Office 365.
-
Username: Enter the username for the mail server.
-
Password: Enter the password for the mail server.
-
Server Port Number: By default, this is set to 587.
-
Encryption Type: By default, this is selected as SSL.
-
Email Logs Retention (10-30 Days): This is the number of days up to which the email logs will be retained. Enter a number between 10 and 30 depending on your requirement. You will be able to see these logs under Admin > Logs > Outbound Email.
-
Enable OAuth 2.0 Authentication: By default, this is selected as No. If you select Yes, two more fields - Application ID and Directory ID - will appear. This is applicable only for custom SMTP connections with Office 365 as outgoing mail server.
-
Application ID: Enter this information from your email parser.
-
Directory ID: Enter this information from your email parser.
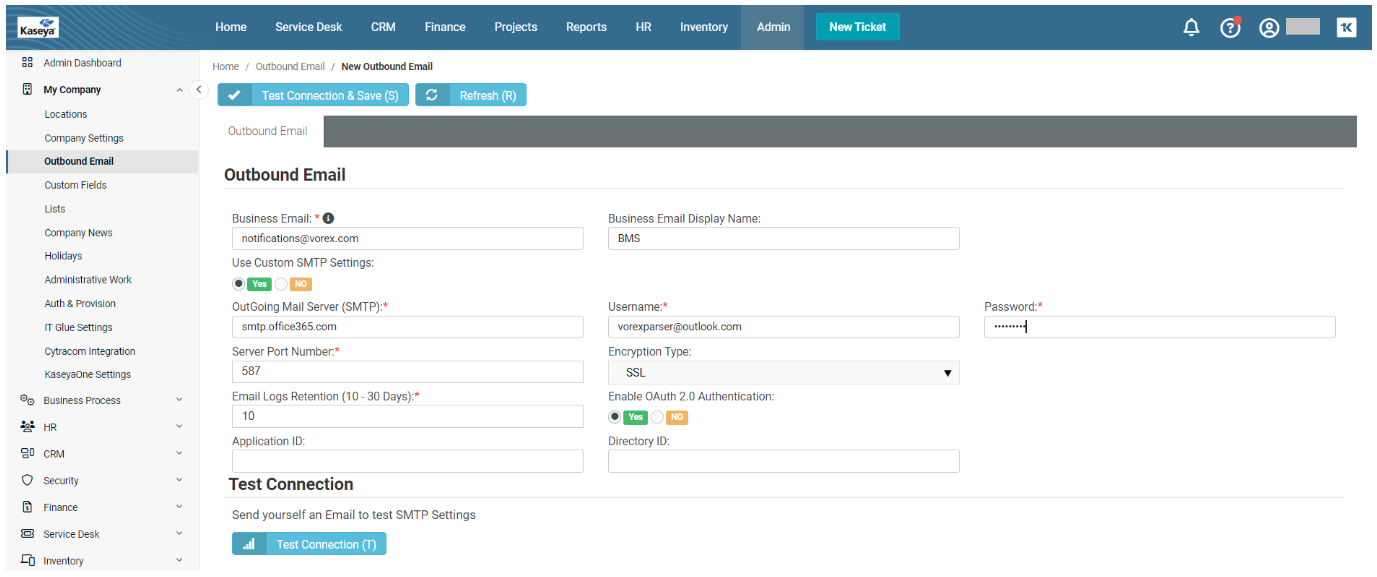
Once the above settings are in place, you can click Test Connection & Save. If the settings are correct, you will see a success message on the top of the page.


