Calendar sync
Introduction
This topic explains the calendar sync feature on the Home page. This feature enables a PSA user to automatically and securely bi-directionally sync their My Calendar items with a linked calendar on Office 365, Exchange, Outlook.com, Google, or iCloud. Calendar items added to My Calendar will be added to the linked calendar, and items added to the user’s linked calendar will be added to My Calendar. The Calendar Sync uses the Cronofy Calendar API.
The document explains how to set up an integration to your online linked email calendar. This covers the following topics related to Calendar Sync:
Calendar sync creation
- Log in to your tenant.
- Navigate to Home > My Calendar.
- Click Calendar Sync on the top right of the page. You will be directed to the Calendar Sync page.

- To create an integration, click Click to Connect. You will be directed to the Cronofy portal.
- Select the calendar service you wish to connect to. There are five types you can choose from
- iCloud
- Office 365
- Exchange (on-premise)
- Outlook.com
- Once you select a type, you will be directed to enter your email credentials and verify it. You will need to allow Cronofy to access your selected email account and perform the sync later.

Calendar sync options
In the Calendar Sync settings wizard, you will have options to choose sync settings.
- Linked calendar Tab
- The dropdown will retrieve all the available calendars from your email. Select the calendar that you wish to send/receive items from.
- Next, select the event types you wish to sync (Create, Update, Delete). For example, if you check “Create” and leave “Update” and “Delete” unchecked, only created events are synced to My Calendar from the linked calendar.
- Your Calendar Tab
- In this tab, you are specifying the calendar items that you wish to send to your linked calendar. These calendar items are Appointments, CRM Activities, Service Calls, Tasks, and To-dos. Once an item is checked, the item activities will be reflected in your linked character.
- For instance, assume Service Call is checked. If the user adds a service call to a ticket and assigns the service call resources to the linked email user, the service call will be created as an appointment on the linked calendar. Furthermore, updating or deleting this item will be reflected in the linked calendar.
- Sync Options: By default, the two-way sync options are disabled.
- Retrieve linked calendar items: At some point, a user might want to retrieve specific events within a specific date range from the linked calendar and have them available on My calendar as well. For that, the Retrieve linked Calendar items radio button should be enabled. By doing so, the Get Past Items and Get Future Items dropdowns will be enabled, and the user can select the date range.
- Send my calendar Items: Likewise, My Calendar items can be synced to the linked calendar by enabling the Send my Calendar Items radio button.
- Confirmation:
- The final tab contains a confirmation summary of the fields and options selected in the previous tabs. Once Finish is clicked, at the bottom right, the options are saved and the sync runs in case one of the sync options is enabled.
- You will be directed to the Calendar Sync listing page. You can view the newly created integration.
With the newly created integration, the below overview options will be available.
- Active: The user can activate/deactivate the integration according to the user's choice. If deactivated, real-time sync from/or to PSA will not function. Also, manual sync from the settings will not start.
- Settings: Settings is the integration edit page. The user can perform any changes to the options or perform a sync.
- Delete: This will delete the integration permanently, and therefore no more real-time sync will happen.
- Logs: All syncing actions performed manually from/to PSA will be listed in the logs.
- Last Sync Date: This date is updated in case any item is synced to PSA or to the linked calendar.
- Status: This field is related to the connection status between Cronofy and PSA. If connected, the sync process occurs normally.
NOTE If the status is Not Connected, verify that Cronofy has the permission to connect to your PSA.
Calendar sync events (two way)
Creating an appointment
- Make sure you have an active integration with the Appointments event checked.
- Navigate to Home > My Calendar.
- Select a specific day.
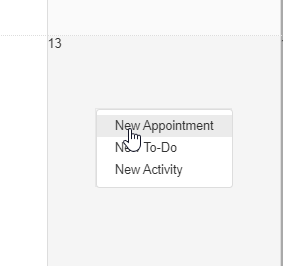
- Right-click and add an appointment with a specific subject, date, time, and description. Add an appointment
- Sign in to your linked email and check the appointment was added.
- Navigate to your integration setting and make sure Create is checked from the Linked Calendar. Add another appointment to your linked calendar.
- Navigate to My Calendar to see the appointment added in the linked calendar.


Enabling the calendar sync with Exchange-hosted servers
In order for the calendar sync to work with hosted exchange servers, the exchange server administrator must enable the Exchange Web Services (EWS). This can be done to all users or specific users. For more information on how to do this, you can follow the Microsoft documentation mentioned below:


