BMS-ConnectBooster integration
BMS
PERMISSIONS Administrator or <Custom Role>
ConnectBooster
NAVIGATION Integrations > Kaseya BMS
PERMISSIONS Master Admin > Settings > Integrations
Overview
Simplify your billing process with this direct payment and accounting integration. By automating the entire collections process, ConnectBooster automatically collects payments based on present rules and contracts in BMS.
ConnectBooster pulls BMS data to help you leverage Autopay and supercharge your billing automation. This integration allows you to leverage a single platform to seamlessly bill, collect, and reconcile invoicing.
Kaseya 365This integration is included as part of a Kaseya 365 Ops subscription and will be configured for you in a session with an implementation consultant from Kaseya. Refer to Getting started with Kaseya 365 Ops. |
How to...
You have the option to set up a custom role in BMS with minimum security permissions that you can use specifically for managing this integration with ConnectBooster. Complete the following steps in BMS to do so:
- Navigate to Admin > Security > Roles > New.
- Enter a name for the role and, optionally, a description indicating that this role is used for the integration with ConnectBooster.
- Select the Internal role type.

- Click Save.
- In the Permissions tab that populates, configure the following permissions:
- Home: Allow View All
- ServiceDesk: Allow View All, Allow Modify All
- CRM: Allow View All
- Finance: Allow View All, Allow Modify All
- Projects: Allow View All
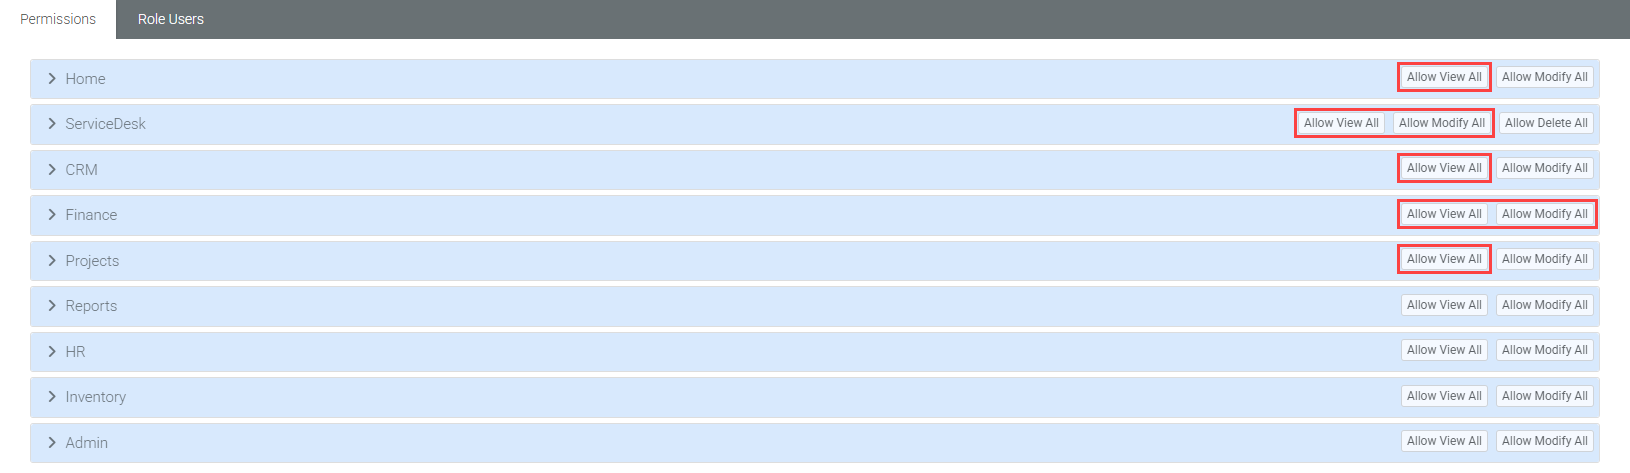
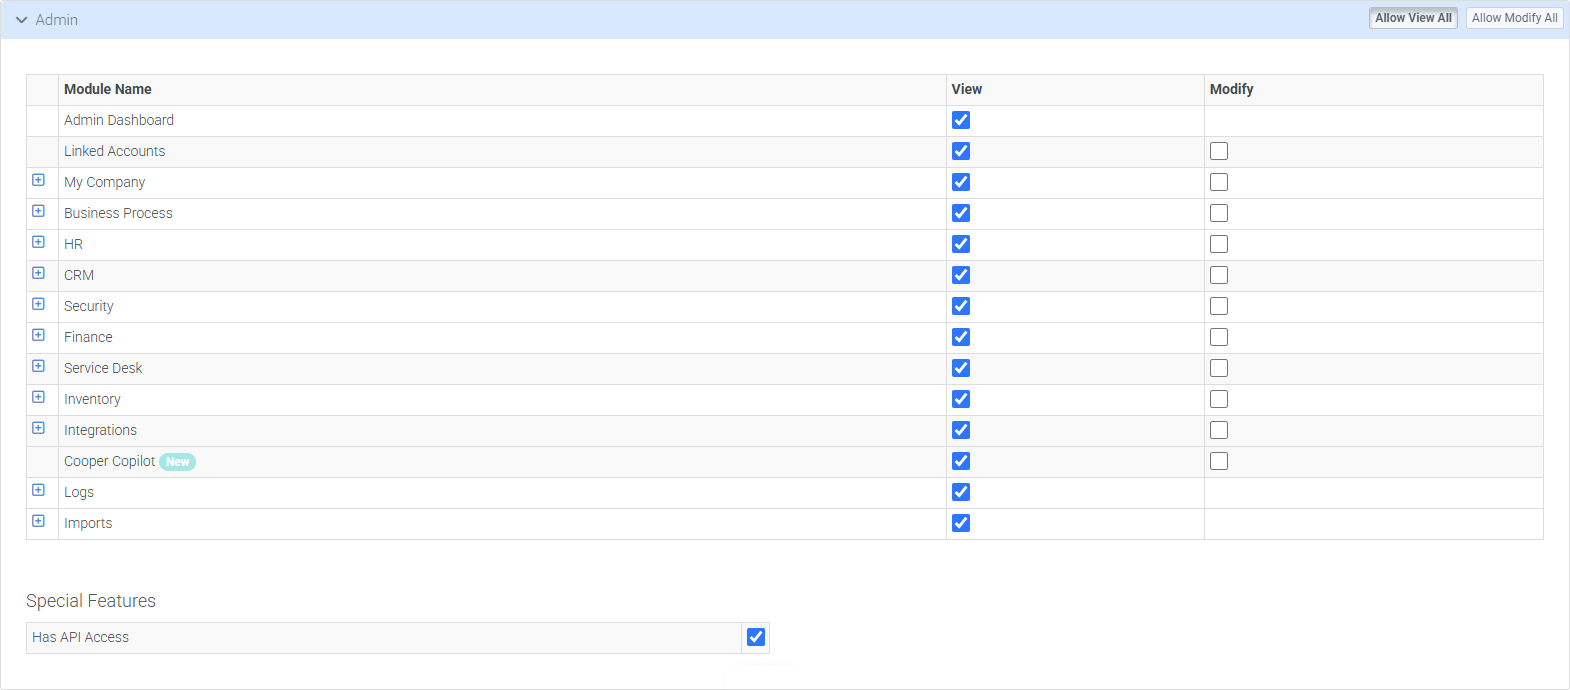
- In the Admin section, click Allow View All and select the Has API Access check box.
- Click Save to create the new security role to be used for the integration with ConnectBooster.
NOTE The user type API Employee described in Create a dedicated API user in BMS (recommended) cannot have its security role type set to External.
BMS allows you to create API-only access user types for the purpose of OAuth integrations with other applications. A BMS user with the Administrator or Project Manager security role can complete the following steps to create credentials for an API user in BMS, which will not have access to the BMS user interface. The API user credentials configured in the following steps will be used for connecting this integration:
- From the top navigation menu, click Admin.
- From the left navigation menu, navigate to HR > Employees.
- Click New.
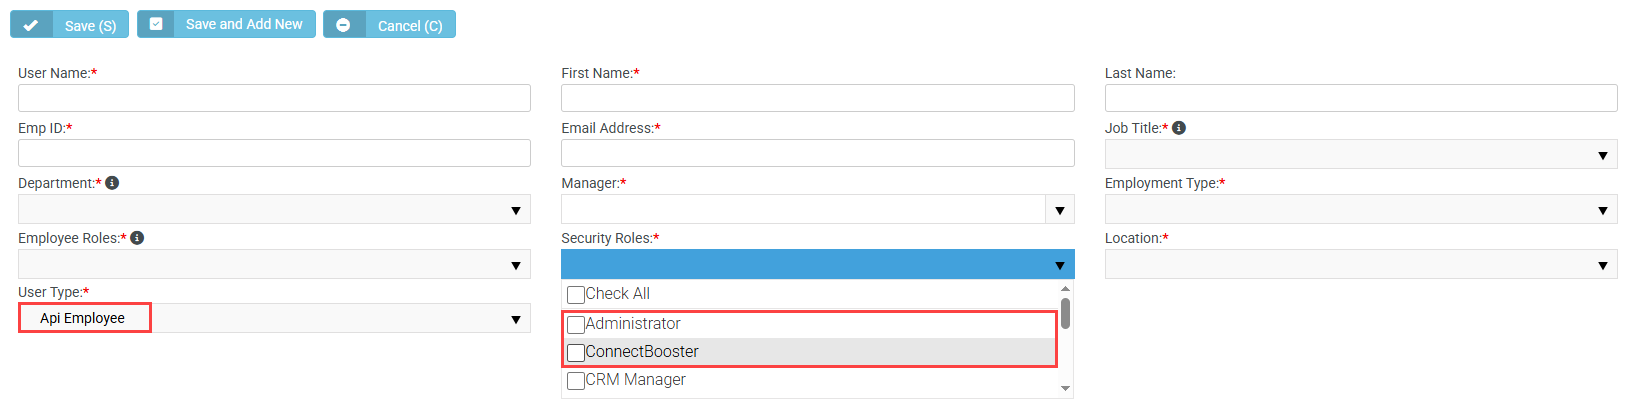
- Fill in the required fields, and from the User Type drop-down menu, select API Employee.
- From the Security Roles drop-down menu, select either Administrator or the custom role you set up in Create a dedicated security role in BMS (optional).
- Click Save to create the new user and receive an email with login credentials.
NOTE Ensure the email address you enter is for an inbox from which you can retrieve the emailed BMS login credentials, as this user type cannot manually set a password.
Learn more about API users in the BMS Help system.
To establish the connection with BMS in ConnectBooster, complete the following steps:
- From the left navigation menu, click Integrations.
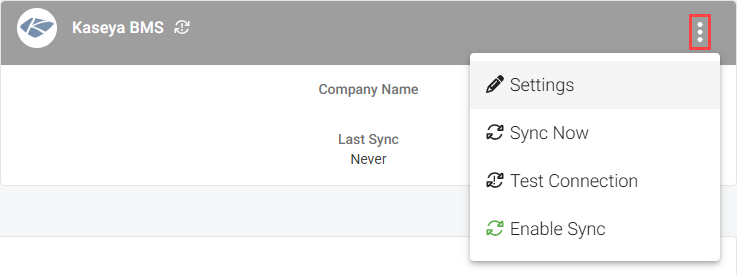
- Click the Kaseya BMS card.
- From the menu in the upper-right corner of the card, select Settings.
- Enter the following credentials:
- Company Name: Enter your BMS company name. Your company name is visible on the My Profile page in BMS.
- Username: Enter the username of the dedicated role created in BMS-ConnectBooster integration or that of another user with admin permissions to manage the integration.
- Password: Enter the user password.
- Server URL: Enter the server URL of your BMS account (for example, bms.kaseya.com).
- Click Save.
- From the menu in the upper-right corner of the card, select Test Connection.
- The initial synchronization between BMS and ConnectBooster will begin within the hour and may require some time to finish, as organizations, contacts, contracts, tickets, and the full invoice history is pulled into ConnectBooster.
To initiate an immediate sync, from the menu in the upper-right corner of the card, select Sync Now.
Subsequent syncs will not take long and will automatically pick up new customers created in BMS.
NOTE If this card is not available, email support@connectbooster.com to request that this integration be added to your portal.
Notifications in ConnectBooster, which are responses to activities triggered in the system or by your clients' initiation, can be sent as email messages to a BMS contact and create service tickets in BMS.
Once ConnectBooster is integrated with BMS, ConnectBooster will automatically pull the default email address for notifications from the billing contact configured in BMS.
NOTE If a billing contact is not configured in BMS, ConnectBooster will default to your integrated accounting package to pull contact information.
Additionally, all notification types will be automatically configured to create a corresponding service ticket in BMS once a notification is triggered in ConnectBooster. You can clear any Service Ticket check boxes from any notification types to stop automatic ticket creation.
In the Service Ticket Configuration section, select the BMS destination, priority level, and issue type to apply to the automatically created tickets.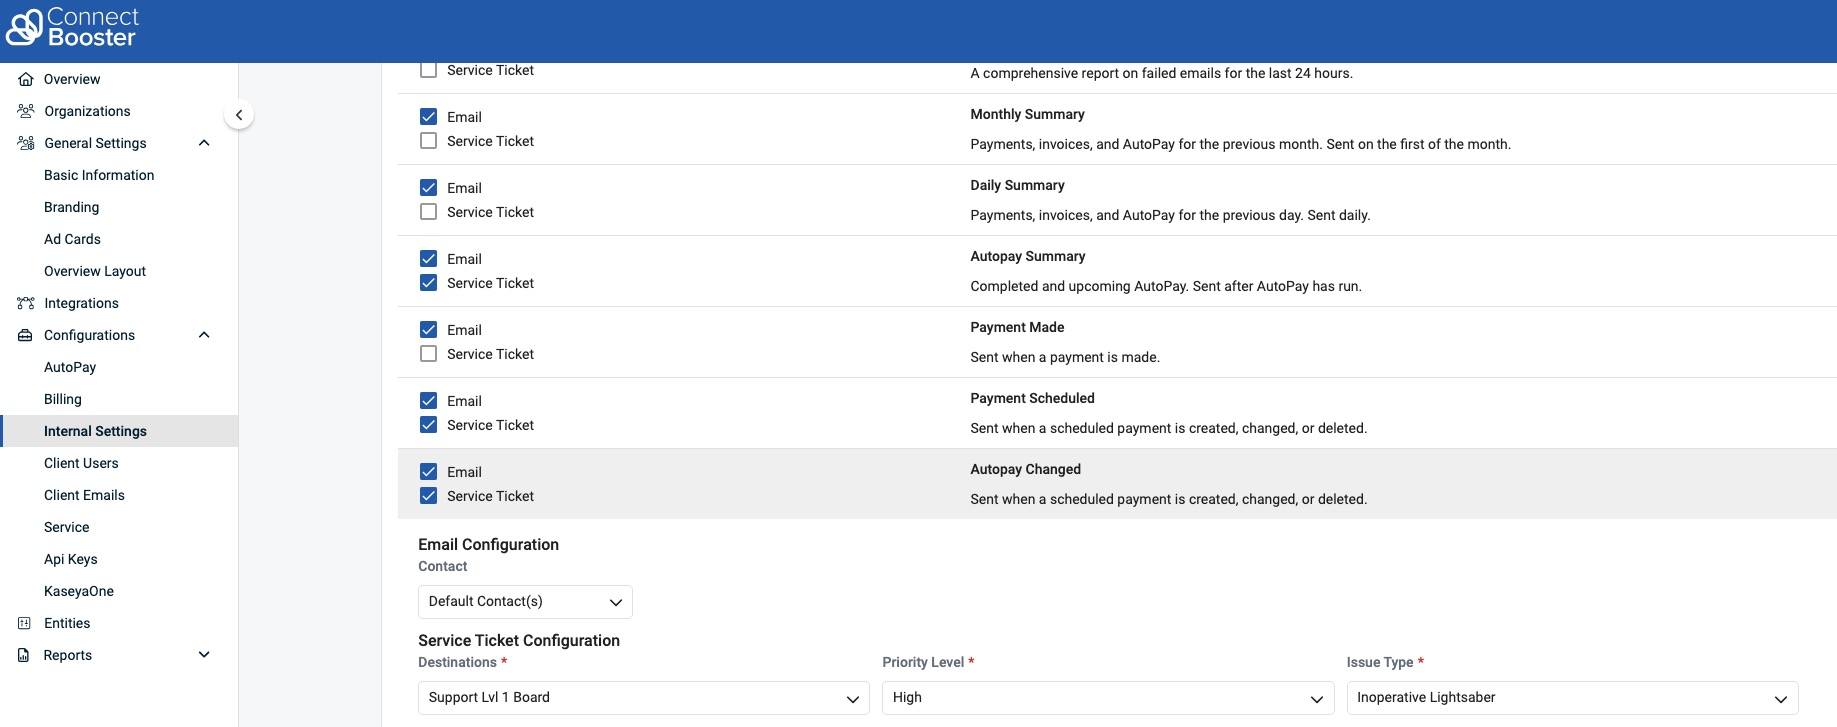
In the ConnectBooster Help system, learn about default contacts and internal notifications.
- In ConnectBooster, navigate to Configurations > Billing > Invoice Image Data.
- Select the check box for the BMS integration.
- Drag the BMS line item to the top of the list to ensure that when you or a client attempts to view an invoice on the portal, ConnectBooster will first attempt to display the BMS version of the invoice.

- Click Save.
In the ConnectBooster Help system, learn more about invoice image data and the related functions that impact your portal behavior.
To disable the integration, complete the following steps in ConnectBooster:
- From the left navigation menu, click Integrations.
- Click the Kaseya BMS card.
- Click Delete.
- In the confirmation dialog box, click Confirm.


