Billing Review
Introduction
The Billing Review menu enables you to review billing entries and create invoices. You can use the Post button to select certain time entries, expenses or services and post them. You can use Post All button to select all time entries, expenses or services in all pages and post them together at the same time. Invoices can then be generated for these time entries, expenses or services. Invoices can be sent out before or after the customer receives services. Let us review each type of billing entry below.
Billing Entries Pages
- Labor Hours
- Expenses
- Recurring Services
- Fixed Price Milestone
- Retainer Amount
- Retainer Hours
- Charges
Labor Hours
The Labor Hours page lists billing entries for labor hours entered on tickets and tasks. Review one or more entries, make adjustments if necessary, then post them. Posting moves billing entries to Bill. For a billing entry to display on this page:
- Hours must be reported in a ticket or task. The ticket or task may be optionally linked to a time and materials contract. The contract must be active.
- The billing entry must match search filter parameters.
- Zero value hours can be posted or ignored using the Admin > Company Settings > Invoice > Post Zero Entries option.
Reviewing Labor Hour Billing Entries
- Select the Finance > Billing Review > Labor Hours page.
- You can change the search filter settings. You can search by Ticket. Filter by ticket number is available on labor hours, expenses, and charges. You can sort by Date. Sort labor hours based on Date. This is the log date of the time entry in a ticket. The default date range is from today's date to three months into the future. This can be customized using the Admin > Company Settings > Invoice tab > Billing End Date setting.
- Click Search. A list of entries displays in the Results tab.
- Review the ticket or task for a billing entry by clicking the link in the Ticket/Project column.
- Review the contract for a billing entry by clicking the link in the Contract column.
- Adjusting billing entries.
- Check one or more rows you want to post.
- Click Post to post checked entries. Click Post All to post all entries in all pages.
Expenses
Finance > Billing Review > Expenses
The Expenses page lists billing entries for expenses entered on tickets and tasks. Review one or more entries, make adjustments if necessary, then post them. Posting moves billing entries to Bill. For a billing entry to display on this page:
- An expense must be added to a ticket or task or expense report.
- The billing entry must match search filter parameters.
Reviewing Expenses
- Select the Finance > Billing Review > Expenses page.
- Set your Filters
- Click Search. A list of entries displays in the Results tab.
- You can review the ticket or task for a billing entry by clicking the link in the Ticket/Project column.
- You can review the contract for a billing entry by clicking the link in the Contract column.
- You can adjust billing entries.
- Check any row you want to post.
- Click Post to post checked entries. Click Post All to post all entries in all pages.
Recurring Services
Finance > Billing Review > Recurring Services
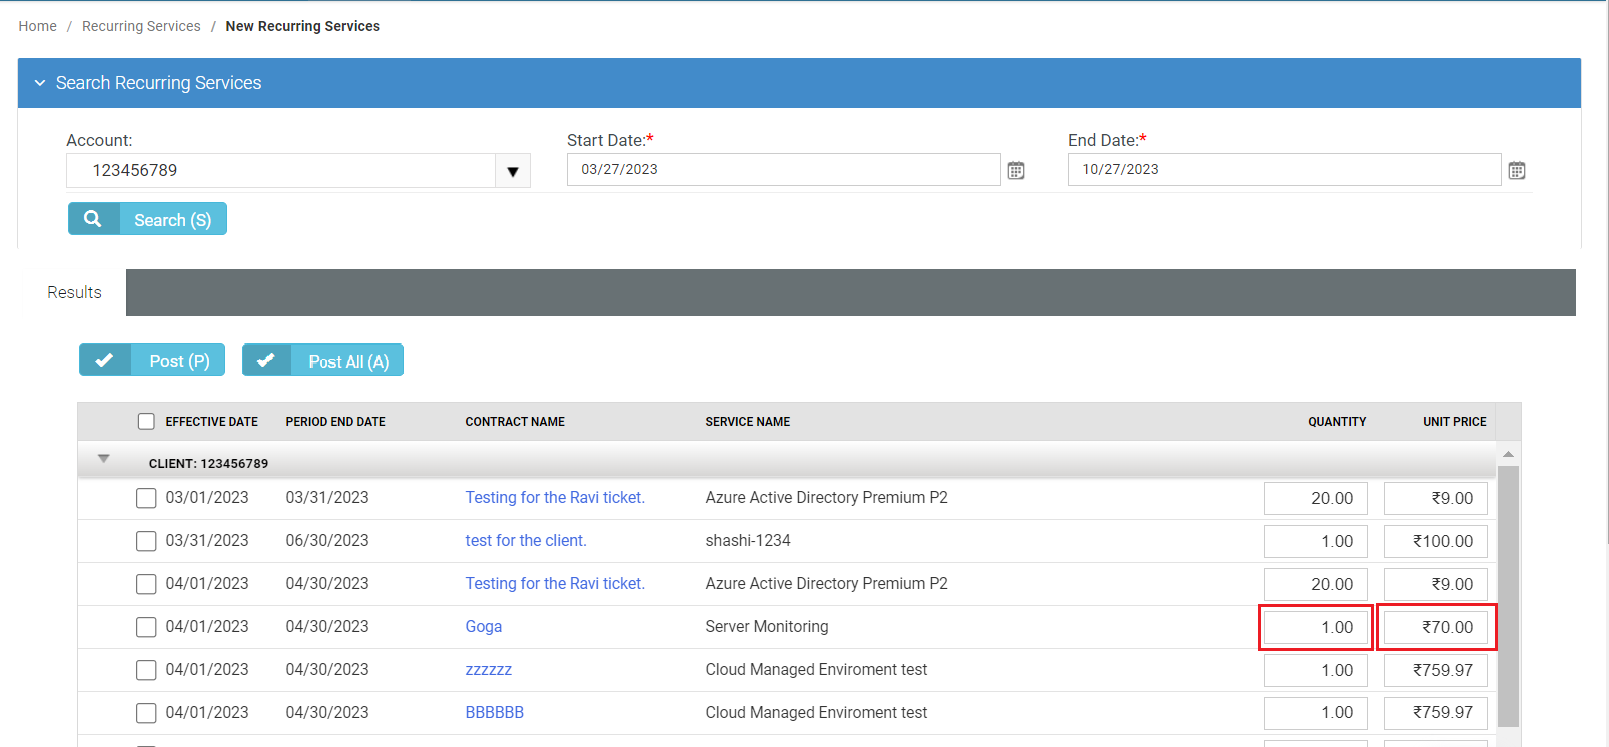
The Recurring Services page lists billing entries for recurring services. For a billing entry to display on this page:
- A recurring service must be added to a recurring services contract.
- The contract must be active.
- The billing entry must match search filter parameters.
- Billing is by contract billing period. Once a recurring services contract is active, any of the time periods can be billed at any time. Review one or more entries, make adjustments if necessary, then post them. Posting moves billing entries to Bill.
- Billing entries are not generated for hours reported on tickets and tasks linked to a recurring service contract. To prevent generating billing lines for labor hours independently of a contract, set the Default Contract option to Yes for that contract. When a new ticket or task is created, the default contract is linked to the ticket or task automatically.
- Zero-value hours can be posted or ignored using the Admin > Company Settings > Invoice > Post Zero Entries option.
Reviewing Recurring Services
- Select the Finance > Billing Review > Recurring Services page.
- Set your Filters.
- Click Search. A list of entries displays in the Results tab.
- Optionally adjust billing entries.
- Quantity
- Unit Price
-
Check any row you want to post.
-
Click Post to post checked entries. Click Post All to post all entries in all pages.
Fixed Price Milestone
Finance > Billing Review > Fixed Price Milestones
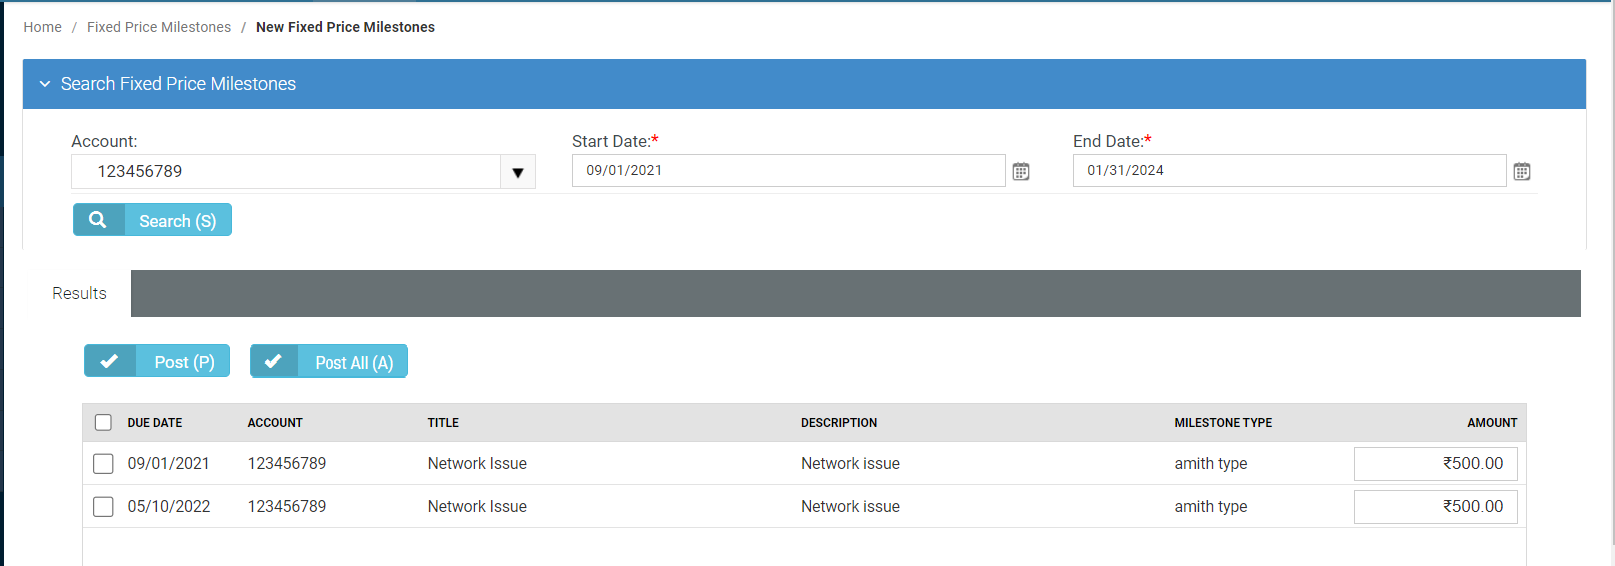
The Fixed Price Milestone page lists billing entries for fixed price milestones. Milestones are created using fixed-price contracts. Review one or more entries, make adjustments if necessary, then post them. Posting moves billing entries to Bill. For a billing entry to display on this page:
- A fixed-priced milestone must be added to a fixed-priced contract.
- The contract must be active.
- The billing entry must match search filter parameters.
A fixed-priced contract is typically linked to a project. Once a fixed price contract is active, you can bill any of its fixed-price milestones at any time.
Reviewing Fixed Price Milestones
- Select the Finance > Billing Review > Fixed Priced Milestones page.
- Set your filters.
- Click Search. A list of entries displays in the Results tab.
- You can adjust billing entries.
- Check any row you want to post.
- Click Post to post checked entries. Click Post All to post all entries in all pages.
Retainer Amount
Finance > Billing Review > Retainer Amount
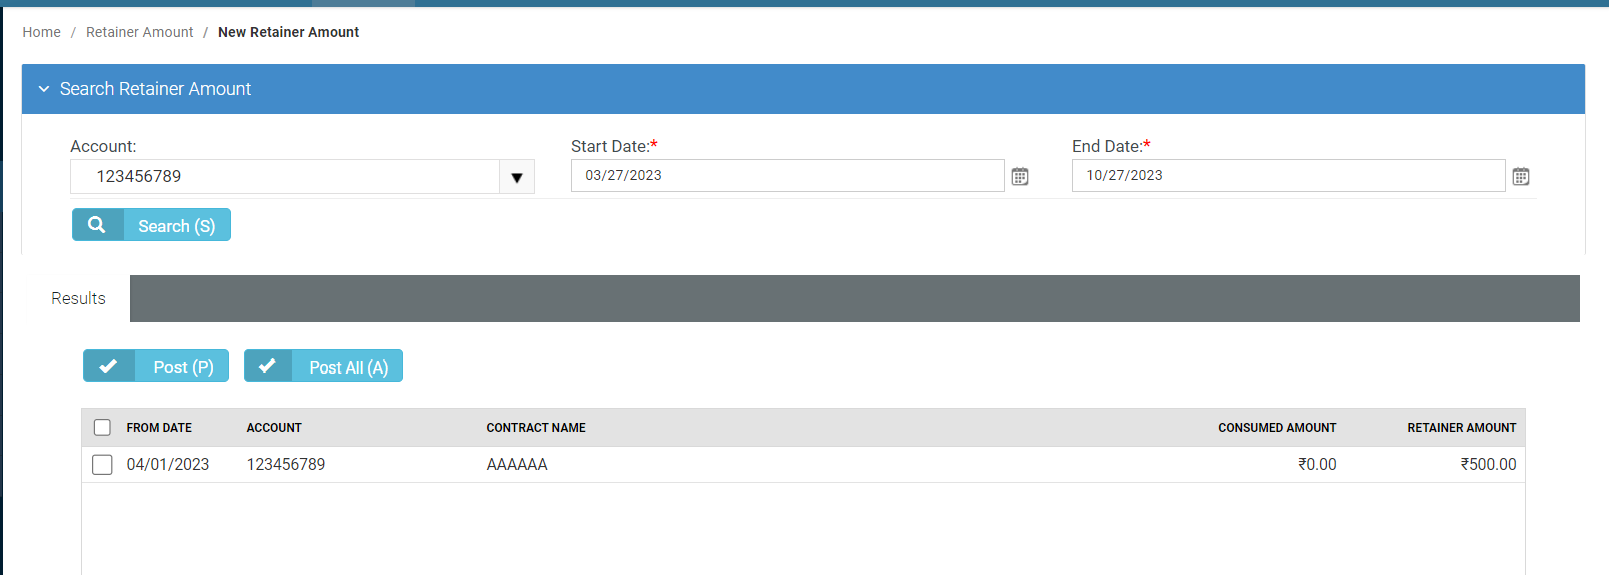
The Retainer Amount page lists billing entries for retainer by amount contracts. Review one or more entries, make adjustments if necessary, then post them. Posting moves billing entries to Bill. For a billing entry to display on this page:
- A retainer by amount contract must be active.
- The billing entry must match search filter parameters.
Once a retainer by amount contract is active, the total price of the contract can be billed at any time.
Reviewing Retainer Amount
- Select the Finance > Billing Review > Retainer Amount page.
- Set your Filters
- Click Search. A list of entries displays in the Results tab.
-
Check any row you want to post.
-
Click Post to post checked entries. Click Post All to post all entries in all pages.
Retainer Hours
Finance > Billing Review > Retainer Hours
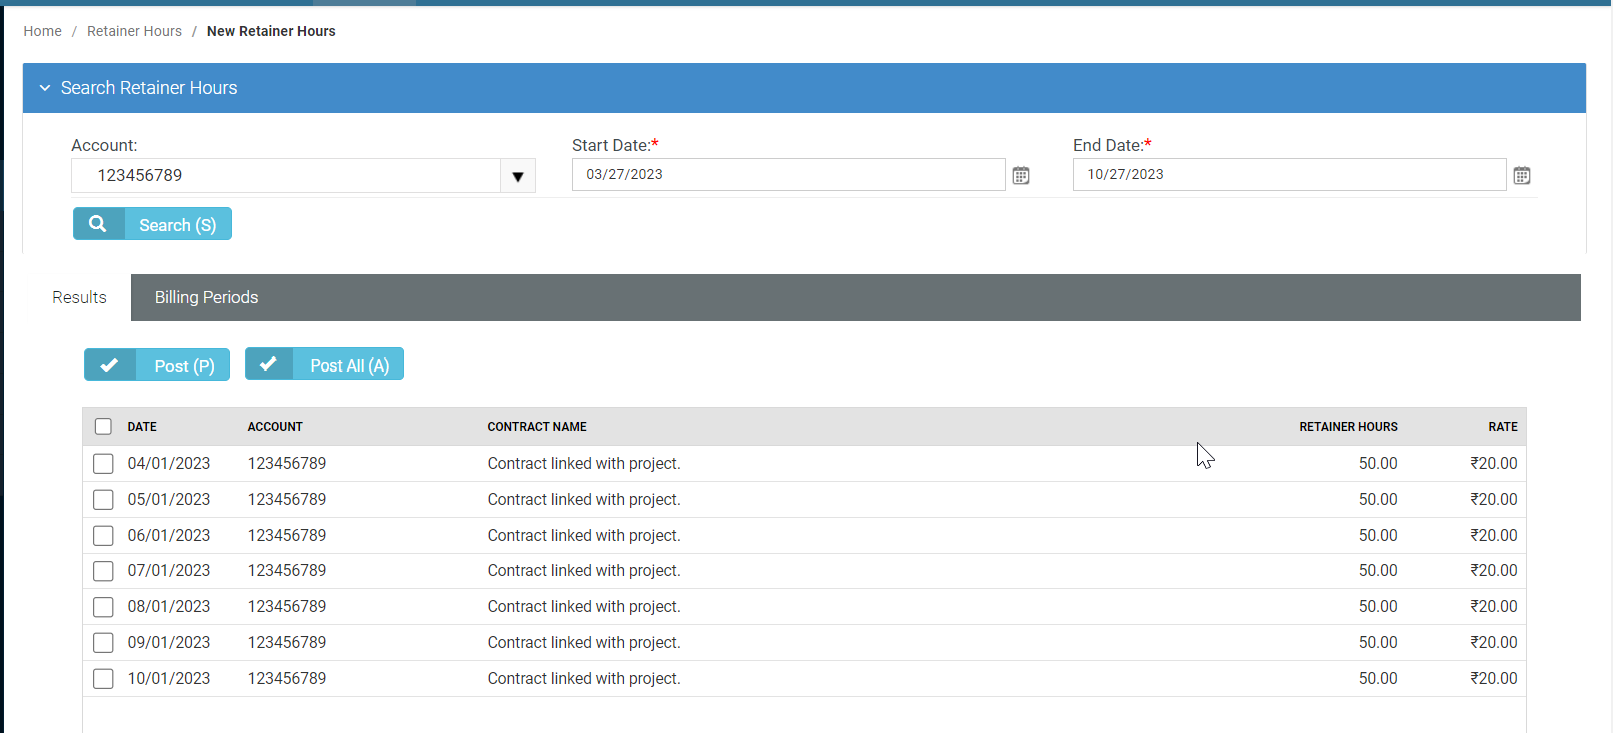
The Retainer Hours page lists billing entries for retainer hours. Retainer hours are consumed when hours are reported on tickets or tasks linked to a retainer by hours contract. Billing is by contract billing period. Review one or more entries, make adjustments if necessary, then post them. Posting moves billing entries to Bill. For a billing entry to display on this page:
- Hours must be reported in a ticket or task.
- The ticket or task must be linked to a retainer by hours contract.
- The contract must be active.
- The billing entry must match search filter parameters.
Once a retainer hours contract is active, any of the time periods can be billed at any time unless the billing period has been closed.
NOTE To prevent generating billing lines for labor hours independently of a contract, set the Default Contract option to Yes for that contract. When a new ticket or task is created, the default contract is linked to the ticket or task automatically.
Reviewing Retainer Hours
- Select the Finance > Billing Review > Retainer Hours page.
- Set your Filters.
- Click Search. A list of entries displays in the Results tab.
-
Check any row you want to post.
-
Click Post to post checked entries. Click Post All to post all entries in all pages.
-
You can close billing periods using the Billing Periods tab.
- Close Billing Periods - If checked, clicking this button closes checked billing periods. If the Carry Over Extra Hours to the Next Billing Cycle option is set to Yes in the retainer by hours contract, unconsumed retainer hours are carried forward to the next billing period when a billing period is closed.
Charges
Finance > Billing Review > Charges
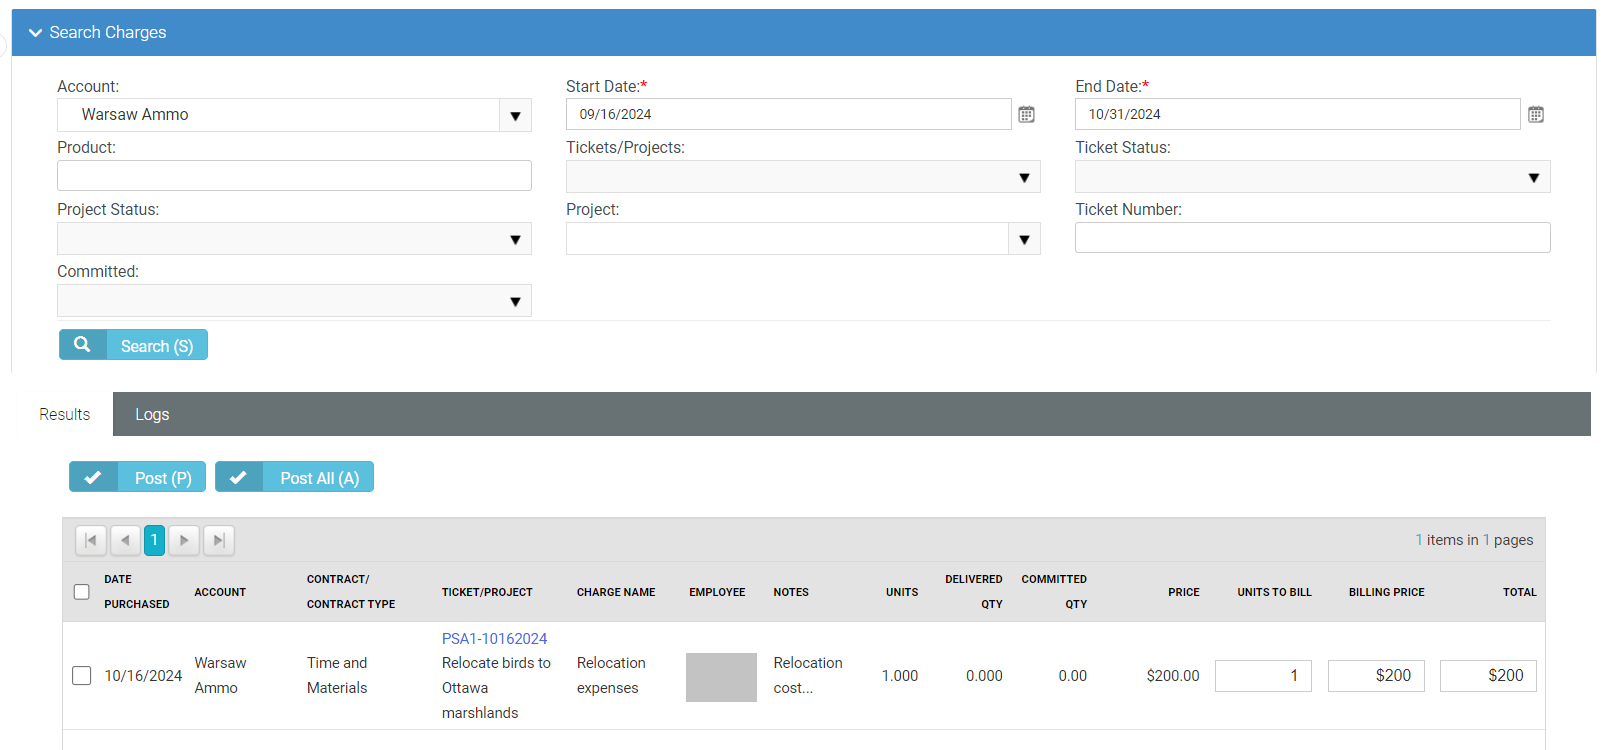
- The Charges page lists billing entries for charges added on a ticket/project.
- Choose your filters to get a list of charges that can be billed.
- Select the billable items and post them to be billed. Click Post to post checked entries. Click Post All to post all entries in all pages.
- The Committed status is available as a default column in the Charges page.
