Kaseya 365 Ops: Getting started with BMS/Vorex
PERMISSIONS Master role in KaseyaOne
PERMISSIONS User accounts with the highest permission level (Master, Superuser, Administrator, or Global Administrator) for each module in the Kaseya 365 subscription. If you need an account with a higher permission level, contact your module's administrator.
Introduction
This article describes how to access your BMS/Vorex instance for the first time and get started setting up your account. You will want to fully set up BMS/Vorex before introducing it to the rest of your company.
Prerequisite
You should have any of the standard authenticator apps like Microsoft Authenticator or Google Authenticator either on your phone or as a browser extension to activate mandatory 2FA.
If you have just purchased Kaseya 365 Ops and you are the administrator setting up the system, you will be accessing BMS/Vorex for the first time from the Kaseya 365 Setup Guide page after you click Activate for BMS/Vorex:
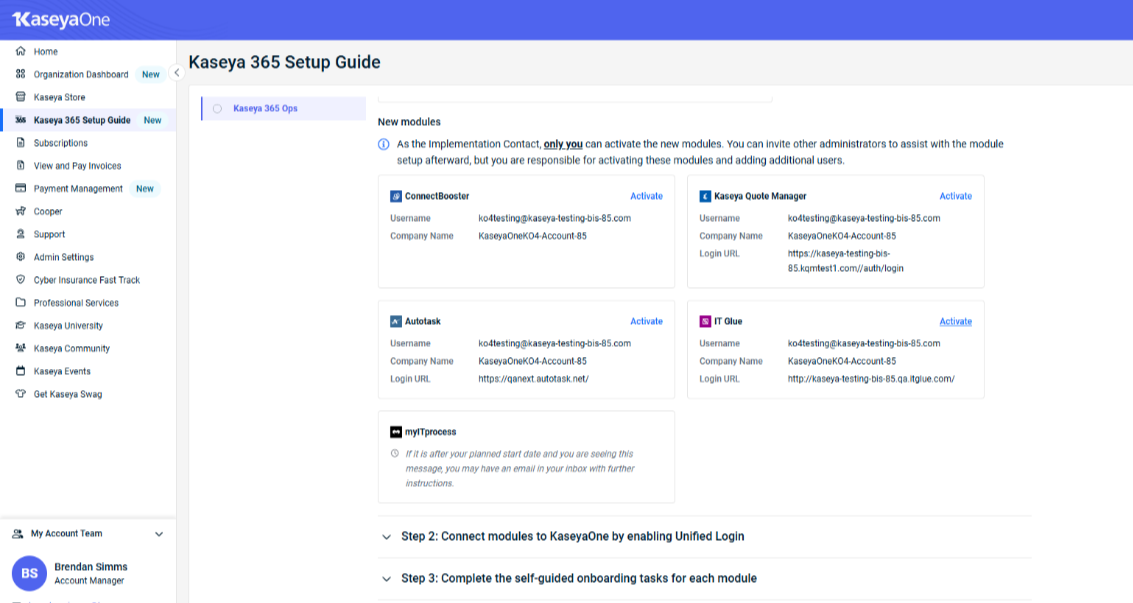
IMPORTANT Before you click Activate, make note of your login details. The login details are available in the Kaseya 365 Ops Setup Guide page.
Follow the steps below to activate your BMS/Vorex module for Kaseya 365 Ops:
-
On the Kaseya 365 Ops Setup Guide tab, find BMS/Vorex under New Modules.
-
Click Activate. The BMS/Vorex Reset Password page opens. Enter a strong password and re-enter the same password in the Confirm Password field. Click Reset.
As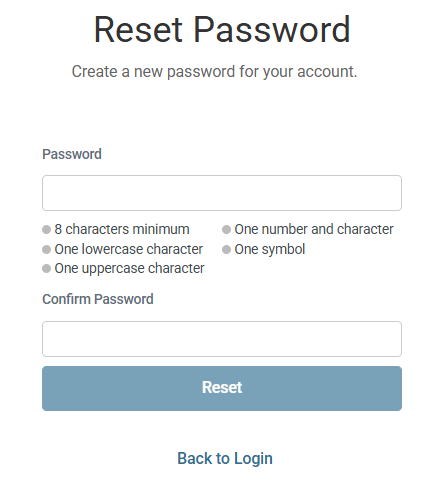
-
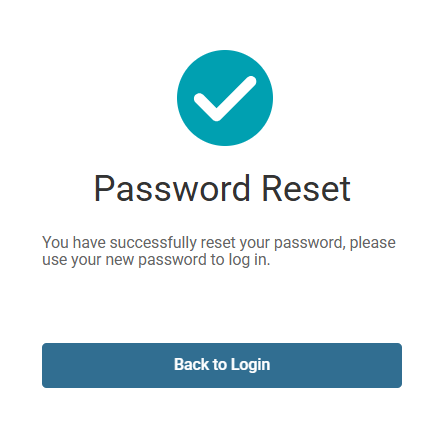
The Password Reset screen appears. Click Back to Login.
-
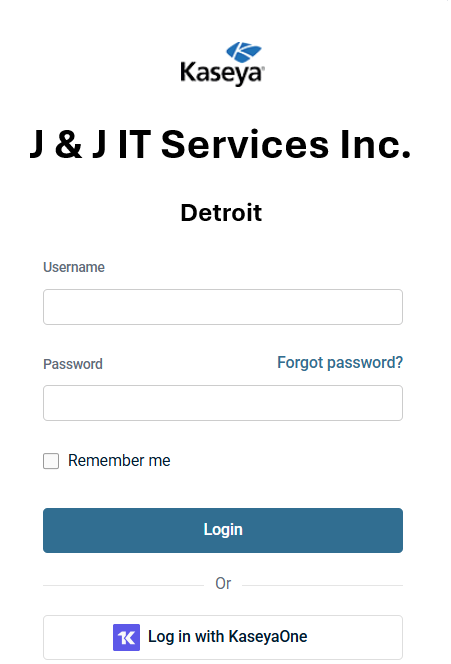
The login screen appears. Enter the username and password, and then click Log In.
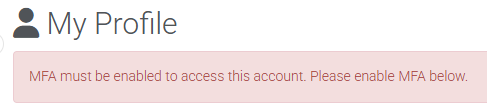
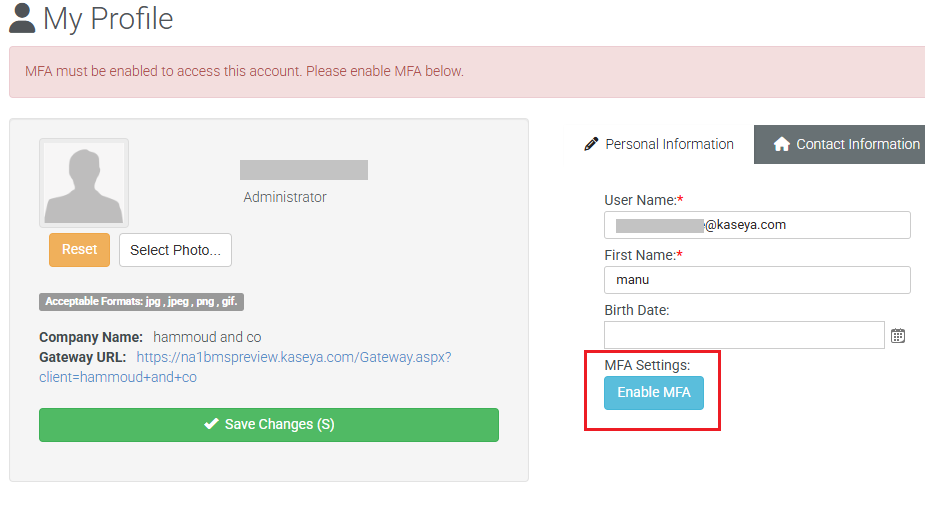
BMS/Vorex will log you into the application and take you to the My Profile section. You will see a message on the top in red which says, "MFA must be enabled to access this account. Please enable MFA below."
NOTE MFA is required to access other parts of the application.
-
Under Personal Information tab, click Enable MFA.
-
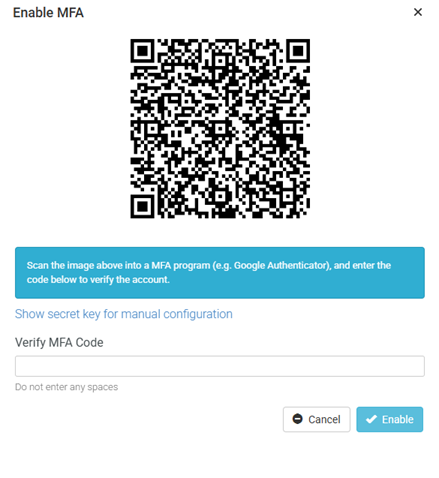
Scan the bar code with an authenticator application on your phone. Enter the six-digit code that appears in your authenticator application. Click Enable.
-
Your MFA is enabled now, and you will now have access to the rest of the application. You will also see a link to generate a one-time MFA recovery token. This is useful in case you do not have access to an authenticator. You can see this link at the bottom of the Personal Information tab.

Next steps: Configuring KaseyaOne Unified Login
KaseyaOne Unified Login connects your Kaseya modules with KaseyaOne so that you can log in once - to KaseyaOne - and access all your Kaseya modules.
NOTE The first task in your self-paced onboarding is setting up Unified Login. Follow the steps in the myITprocess walk-through to quickly configure this setting. You can also follow the steps outlined below.
Enabling KaseyaOne Unified Login
-
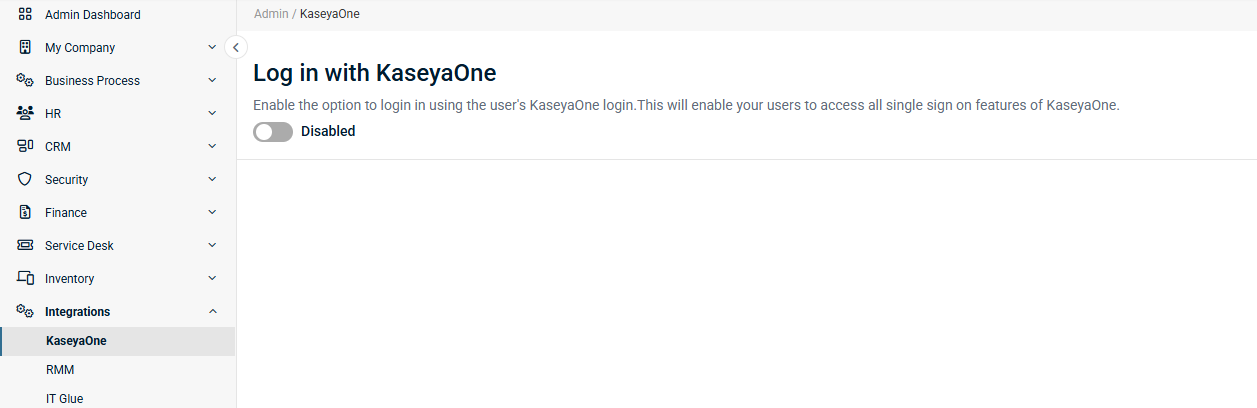
Navigate to Admin > Integrations > KaseyaOne.
-
Move the toggle to the right. This will make it Enabled.
-
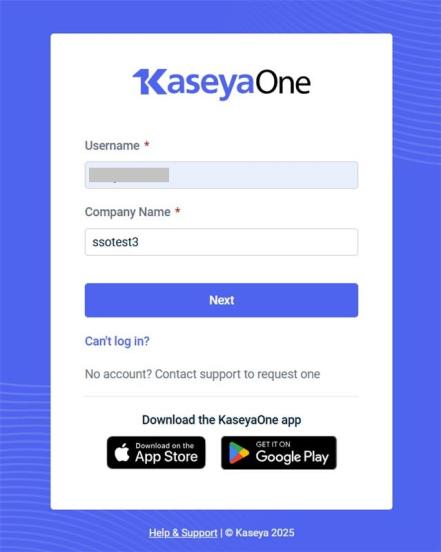
You will be redirected to KaseyaOne login screen. Enter your username and company name. Click Next.
-
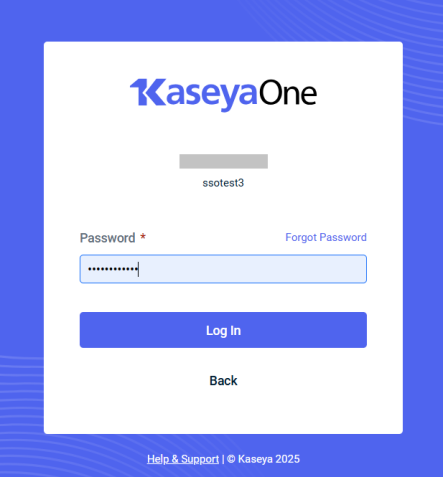
It takes you to the next screen. Enter the password. Click Log In.
-
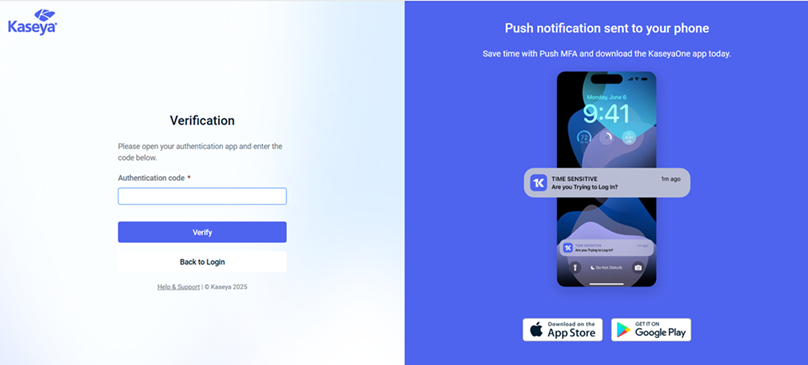
It takes you to the next screen. Enter the authentication code received on your authentication app. Click Verify.
-
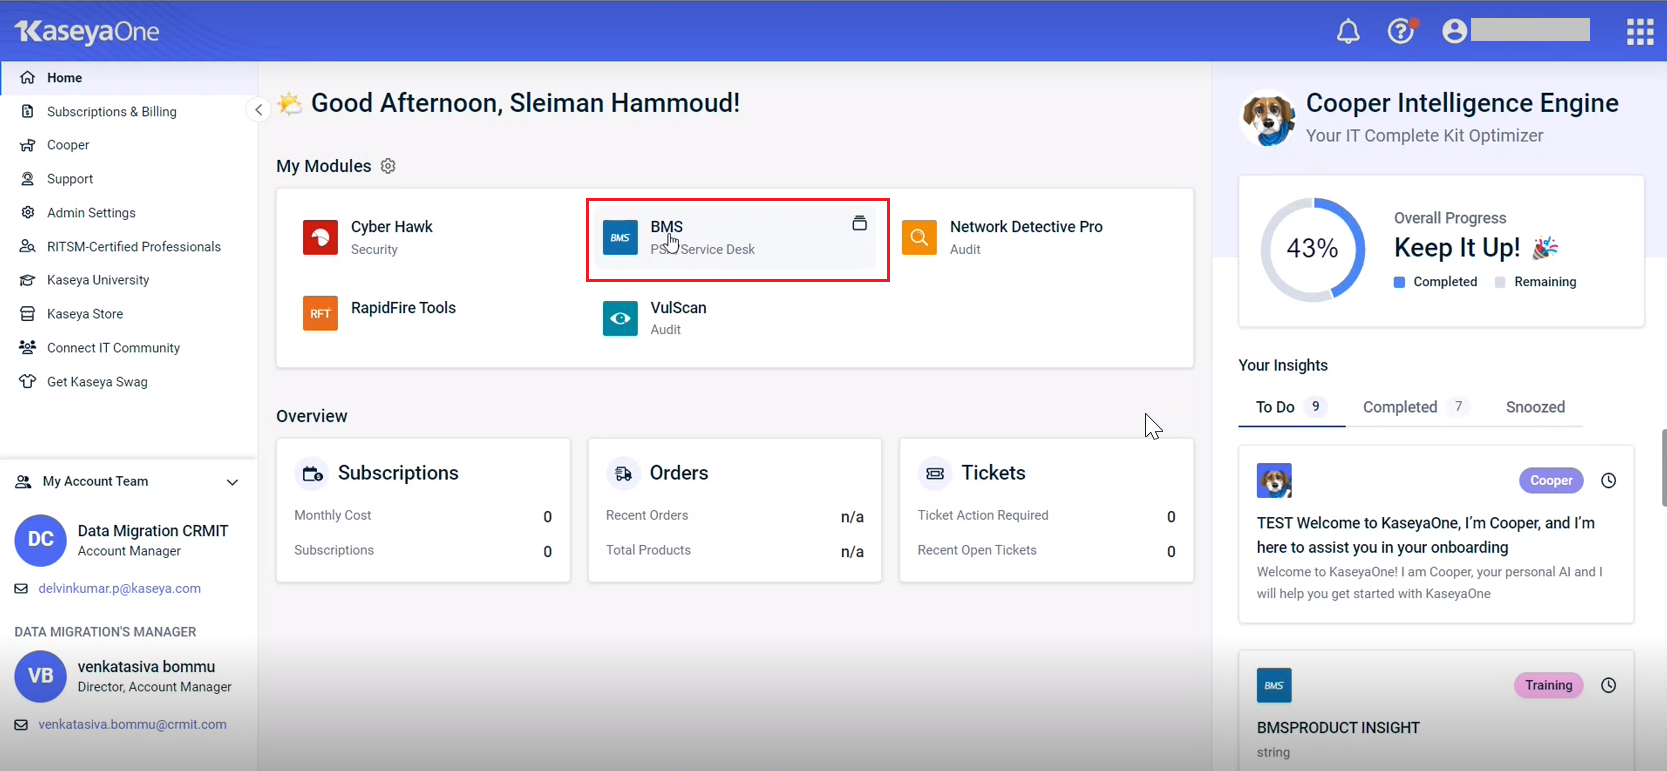
You will be logged into KaseyaOne.
-
After you have successfully logged in to KaseyaOne, you can come back to the KaseyaOne page in BMS and setup additional KaseyaOne functionality for adding users. For more information, see the last section in this page.
Next steps: Completing the self-paced onboarding
Self-paced onboarding launches automatically the first time you log in to your new BMS/Vorex instance as an administrator. You can also access it anytime from the WalkMe menu. Click the graduation cap icon to open the menu:![]()
NOTE There is also a self-paced onboarding that launches for technicians.
Next steps: Required (or recommended) configurations prior to your consulting sessions
The self-paced onboarding walks you through BMS/Vorex and also requires certain configurations that should be made prior to your first consulting session. As supplementary material, the following table lists the required configurations and links to the related knowledge base articles:
| Task | Knowledge Base Article |
|---|---|
| The Foundations | Explore the Invoice tab in addition to General |
| Service Desk | SLA events and how they are tied to the statuses |
| Service Desk | Creating a custom status |
| Service Desk | IMAP settings |
| Service Desk | OAuth 2.0 |
| CRM (Customer Relationship Management) | Create an account and talk about taxes, email domains and net days |
|
Invoice defaults |
|
|
Configure roles |
|
|
Creating an account |
|
|
Set up SLA events |
Next steps: Understanding integrations and automations
Integrations
BMS/Vorex integrates with several other Kaseya modules, including the following Kaseya 365 Ops modules:
NOTE Integrations between BMS/Vorex and your other Kaseya 365 Ops modules will be configured for you in a session with an implementation consultant from Kaseya.
Benefits
These integrations unlock automations that boost efficiency and reduce rework, including
-
the ability to sync data between modules,
-
automatic BMS/Vorex ticket creation,
-
the option to leverage functionality from other modules directly from BMS/Vorex tickets,
-
simplified billing processes, and more.
Automations
-
The Integrated Customer Billing feature allows you to accurately bill your customers using BMS/Vorex for the Kaseya services you provide to them. Eliminate hours of manual reconciliation and optimize your revenue by automatically updating BMS/Vorex contracts with each customer’s usage of other Kaseya modules.
-
The Integrated Service Ticketing feature allows you to triage all alerts by centralizing them within BMS/Vorex tickets. Easily create widgets and dashboards to surface the most pressing alerts and track activity against physical assets with a closed feedback loop on resolved tickets.


